Introduction
Upgrading the MAD Plasma Table to version 2 control hardware is divided into two separate tasks. You may perform either task first, but both tasks must be complete and the GUI software updated before operating the machine. Please read these instructions thoroughly before beginning. When removing or connecting a cable, always pull on the plug housing and never the cable directly. Do not forget, the Version 2 torch interface only supports a 50:1 voltage divider in your plasma unit. Check these settings before operation.
Hazardous Voltage
Disconnect power to the machine before entering the control panel.
Task 1 - Control Panel
In the control panel we must replace both PCB1 (Control Board) and PCB2 (Torch Interface). Estimated time for completion is 15 minutes.
Required Tools
- Medium Phillips Head Screw Driver
- Small Flat Head Screw Driver
Disconnect Existing Cables
- Remove the two gray wire covers by pinching the fingers and rotating the cover.
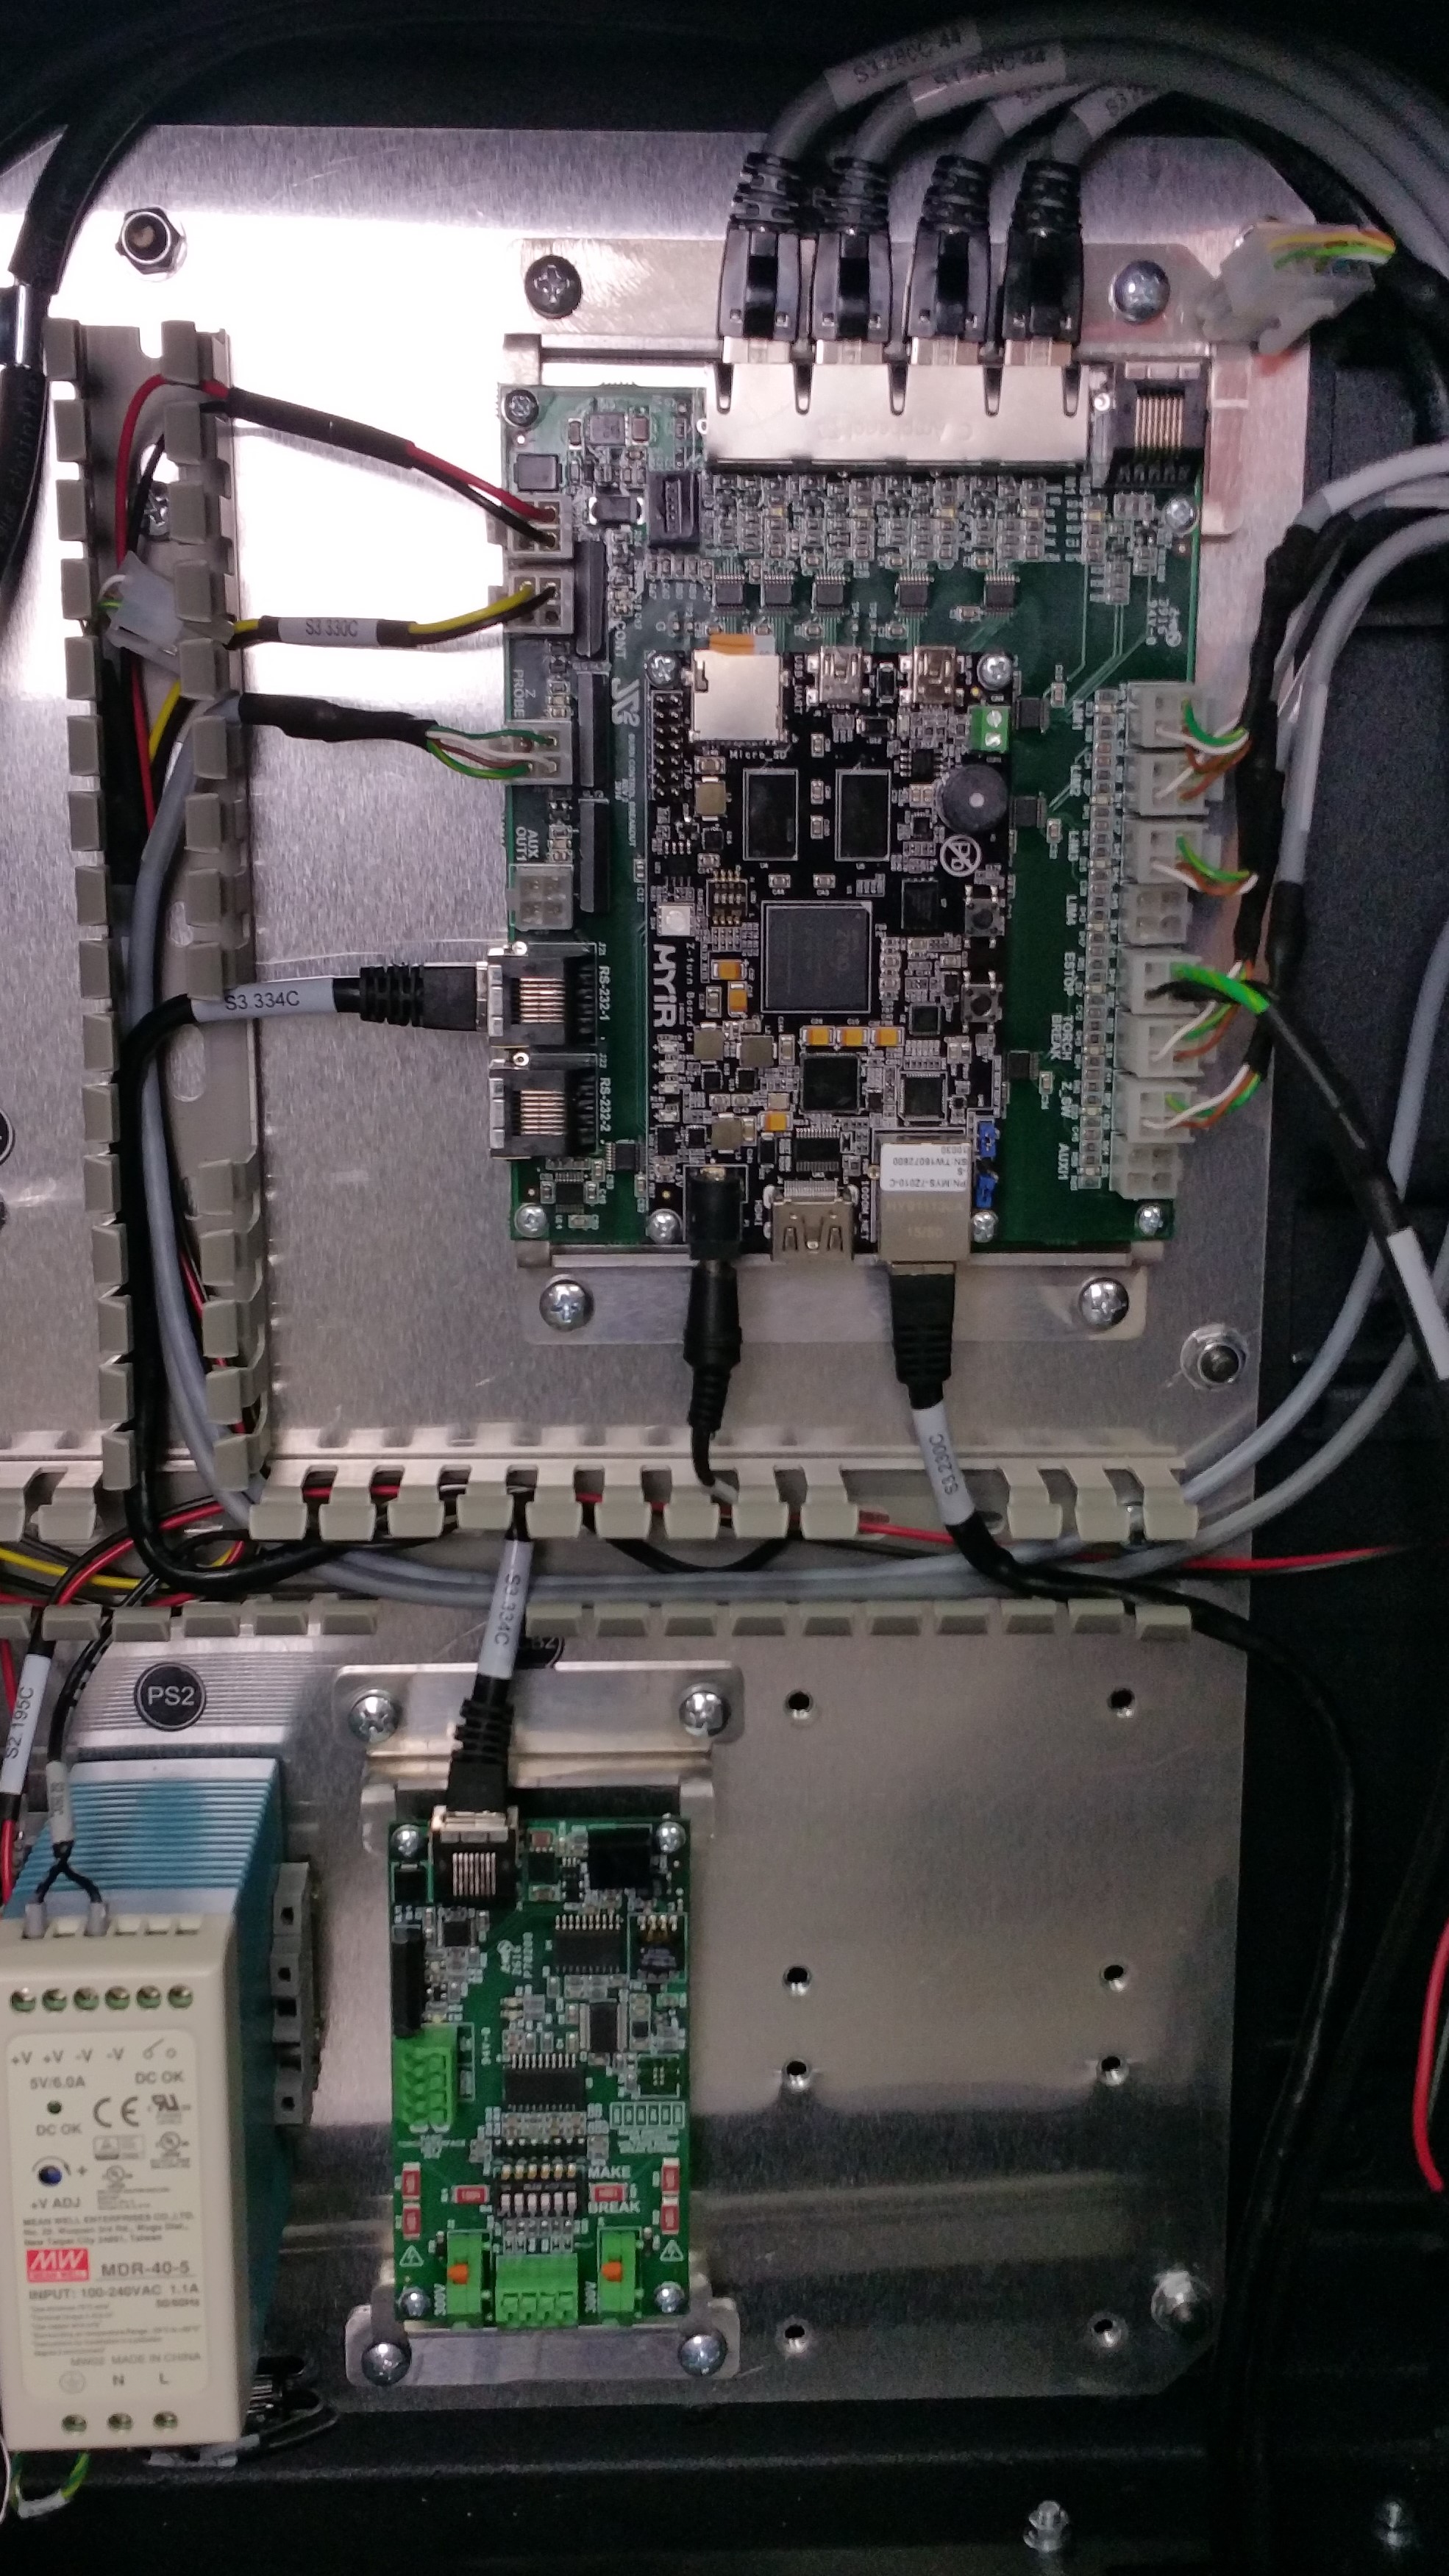
- Remove all wires connected to PCB2 (Torch Interface) by pressing the spring release button with a small screwdriver and gently pulling the wire.
- Remove one end of the S3.334C (Serial Cable) from the top of PCB2, and remove the other end from the left side of PCB1. Set this cable aside for reinstallation.
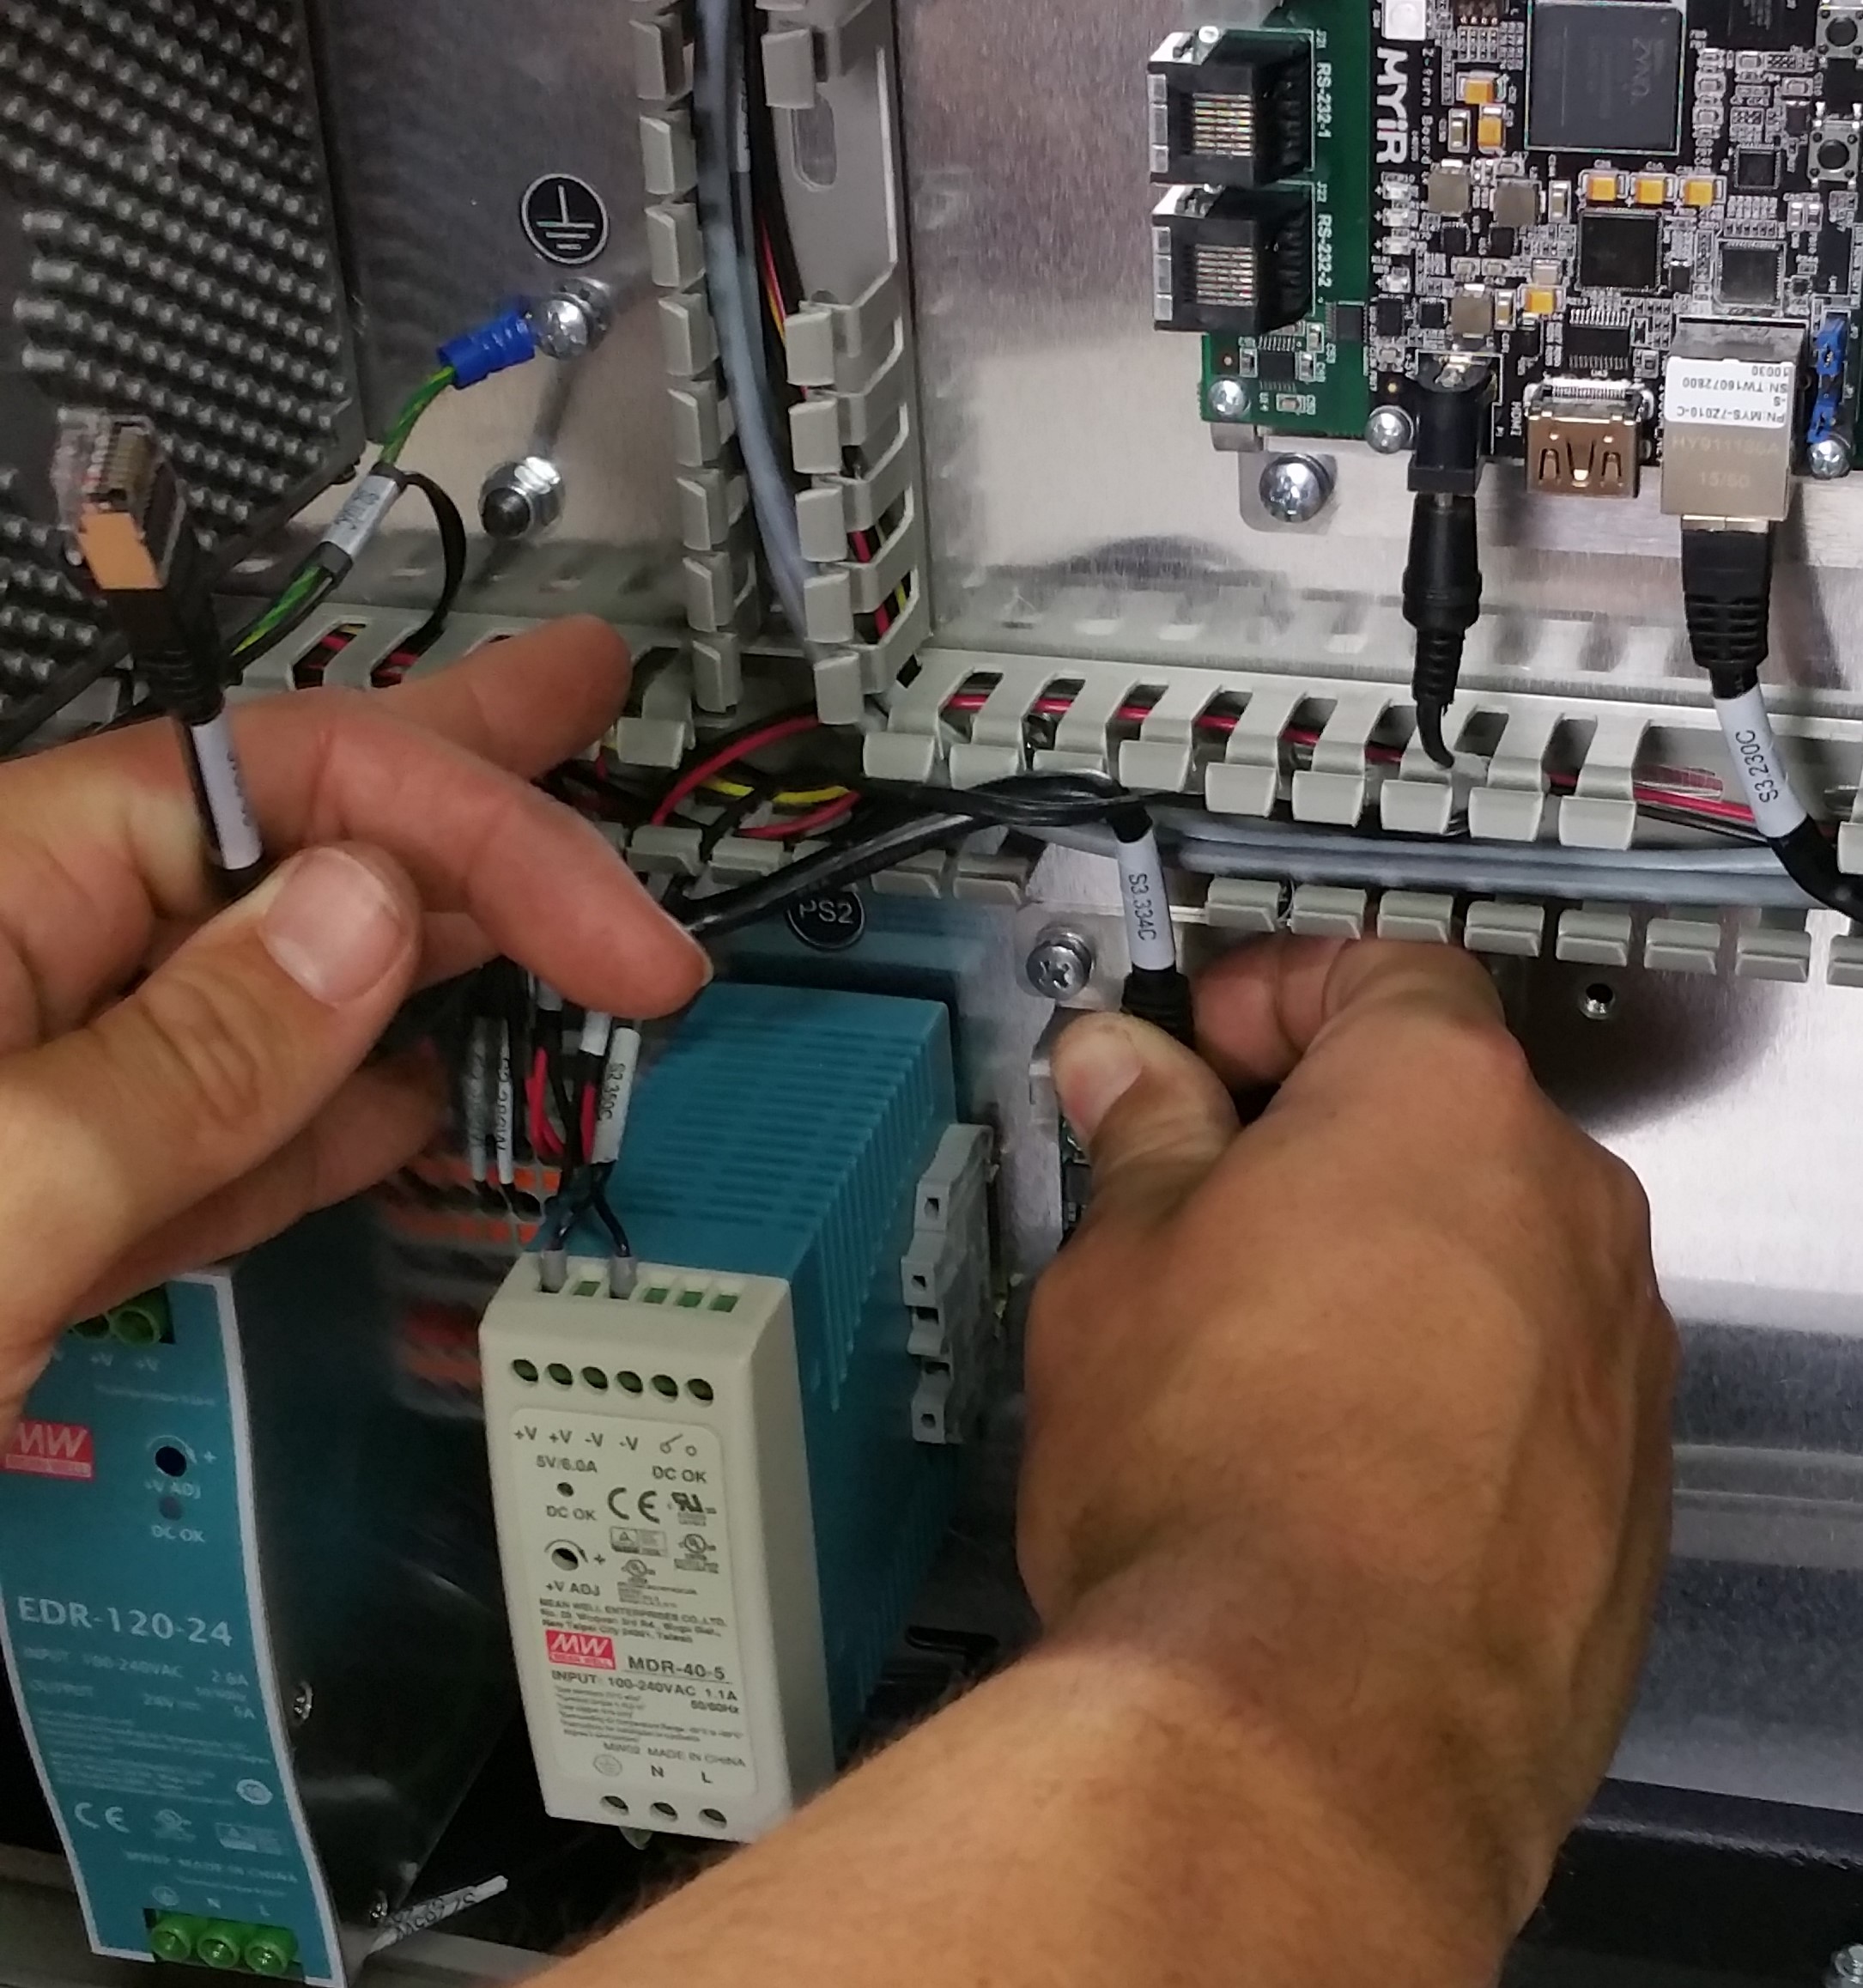
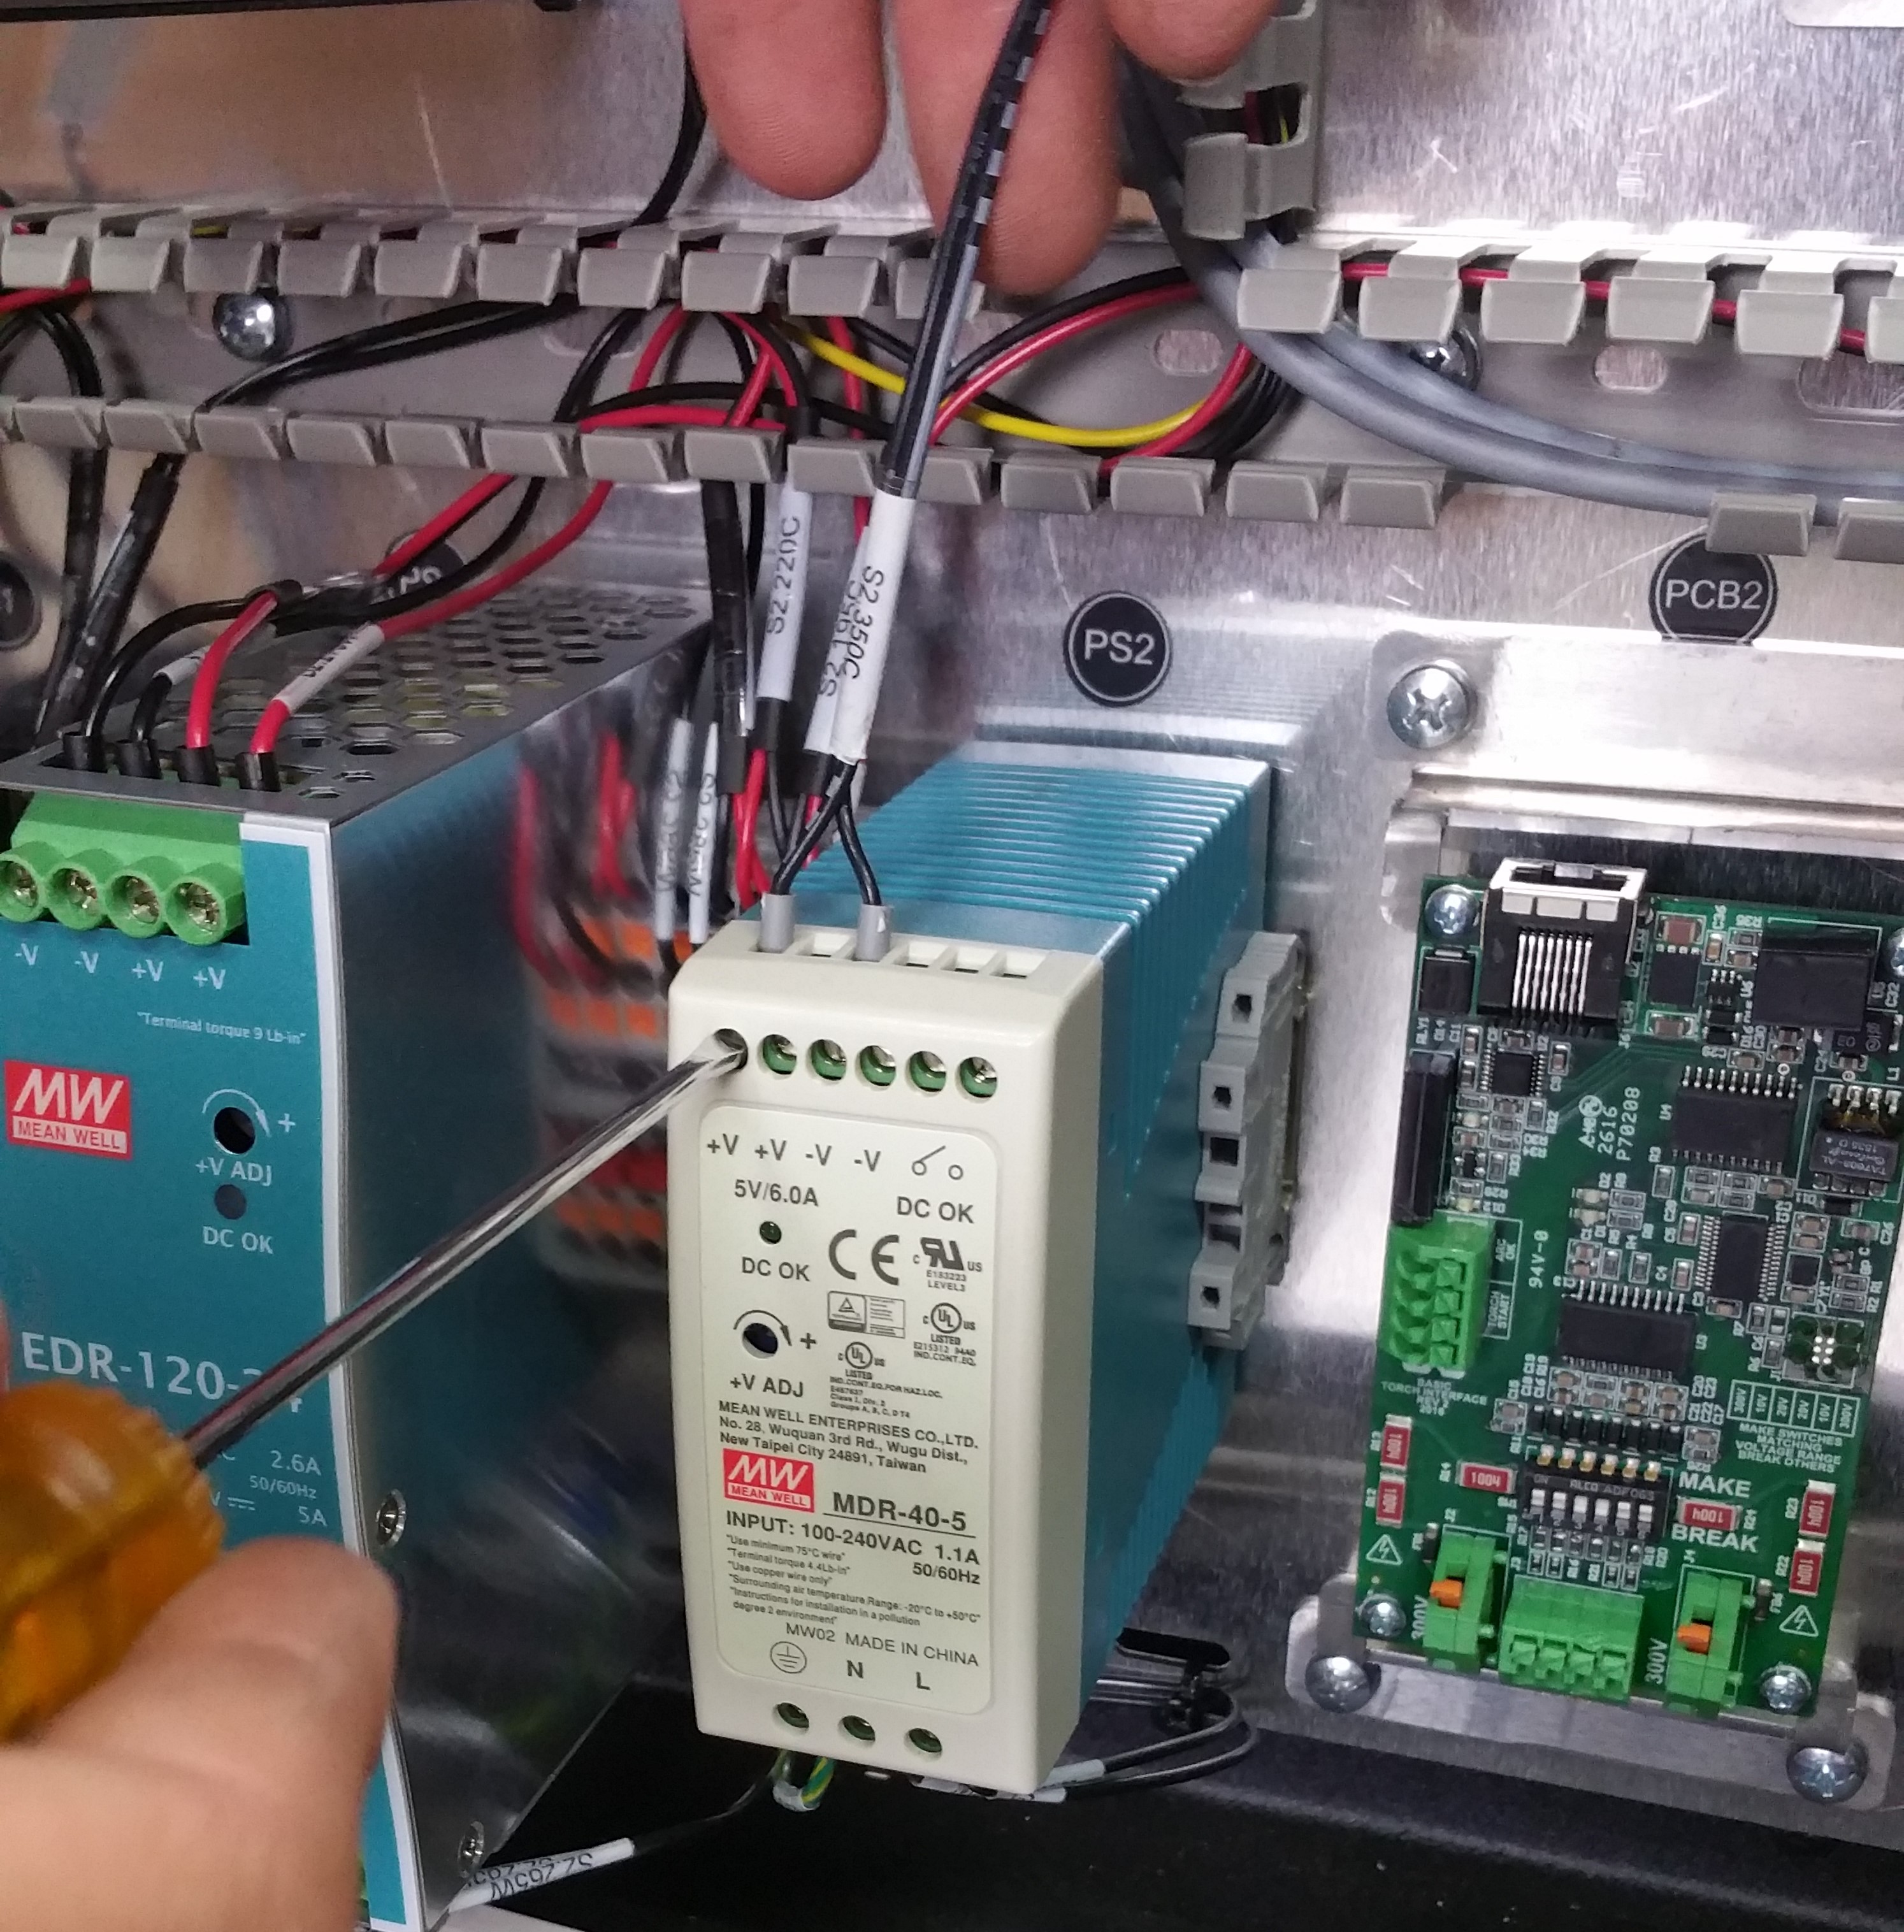
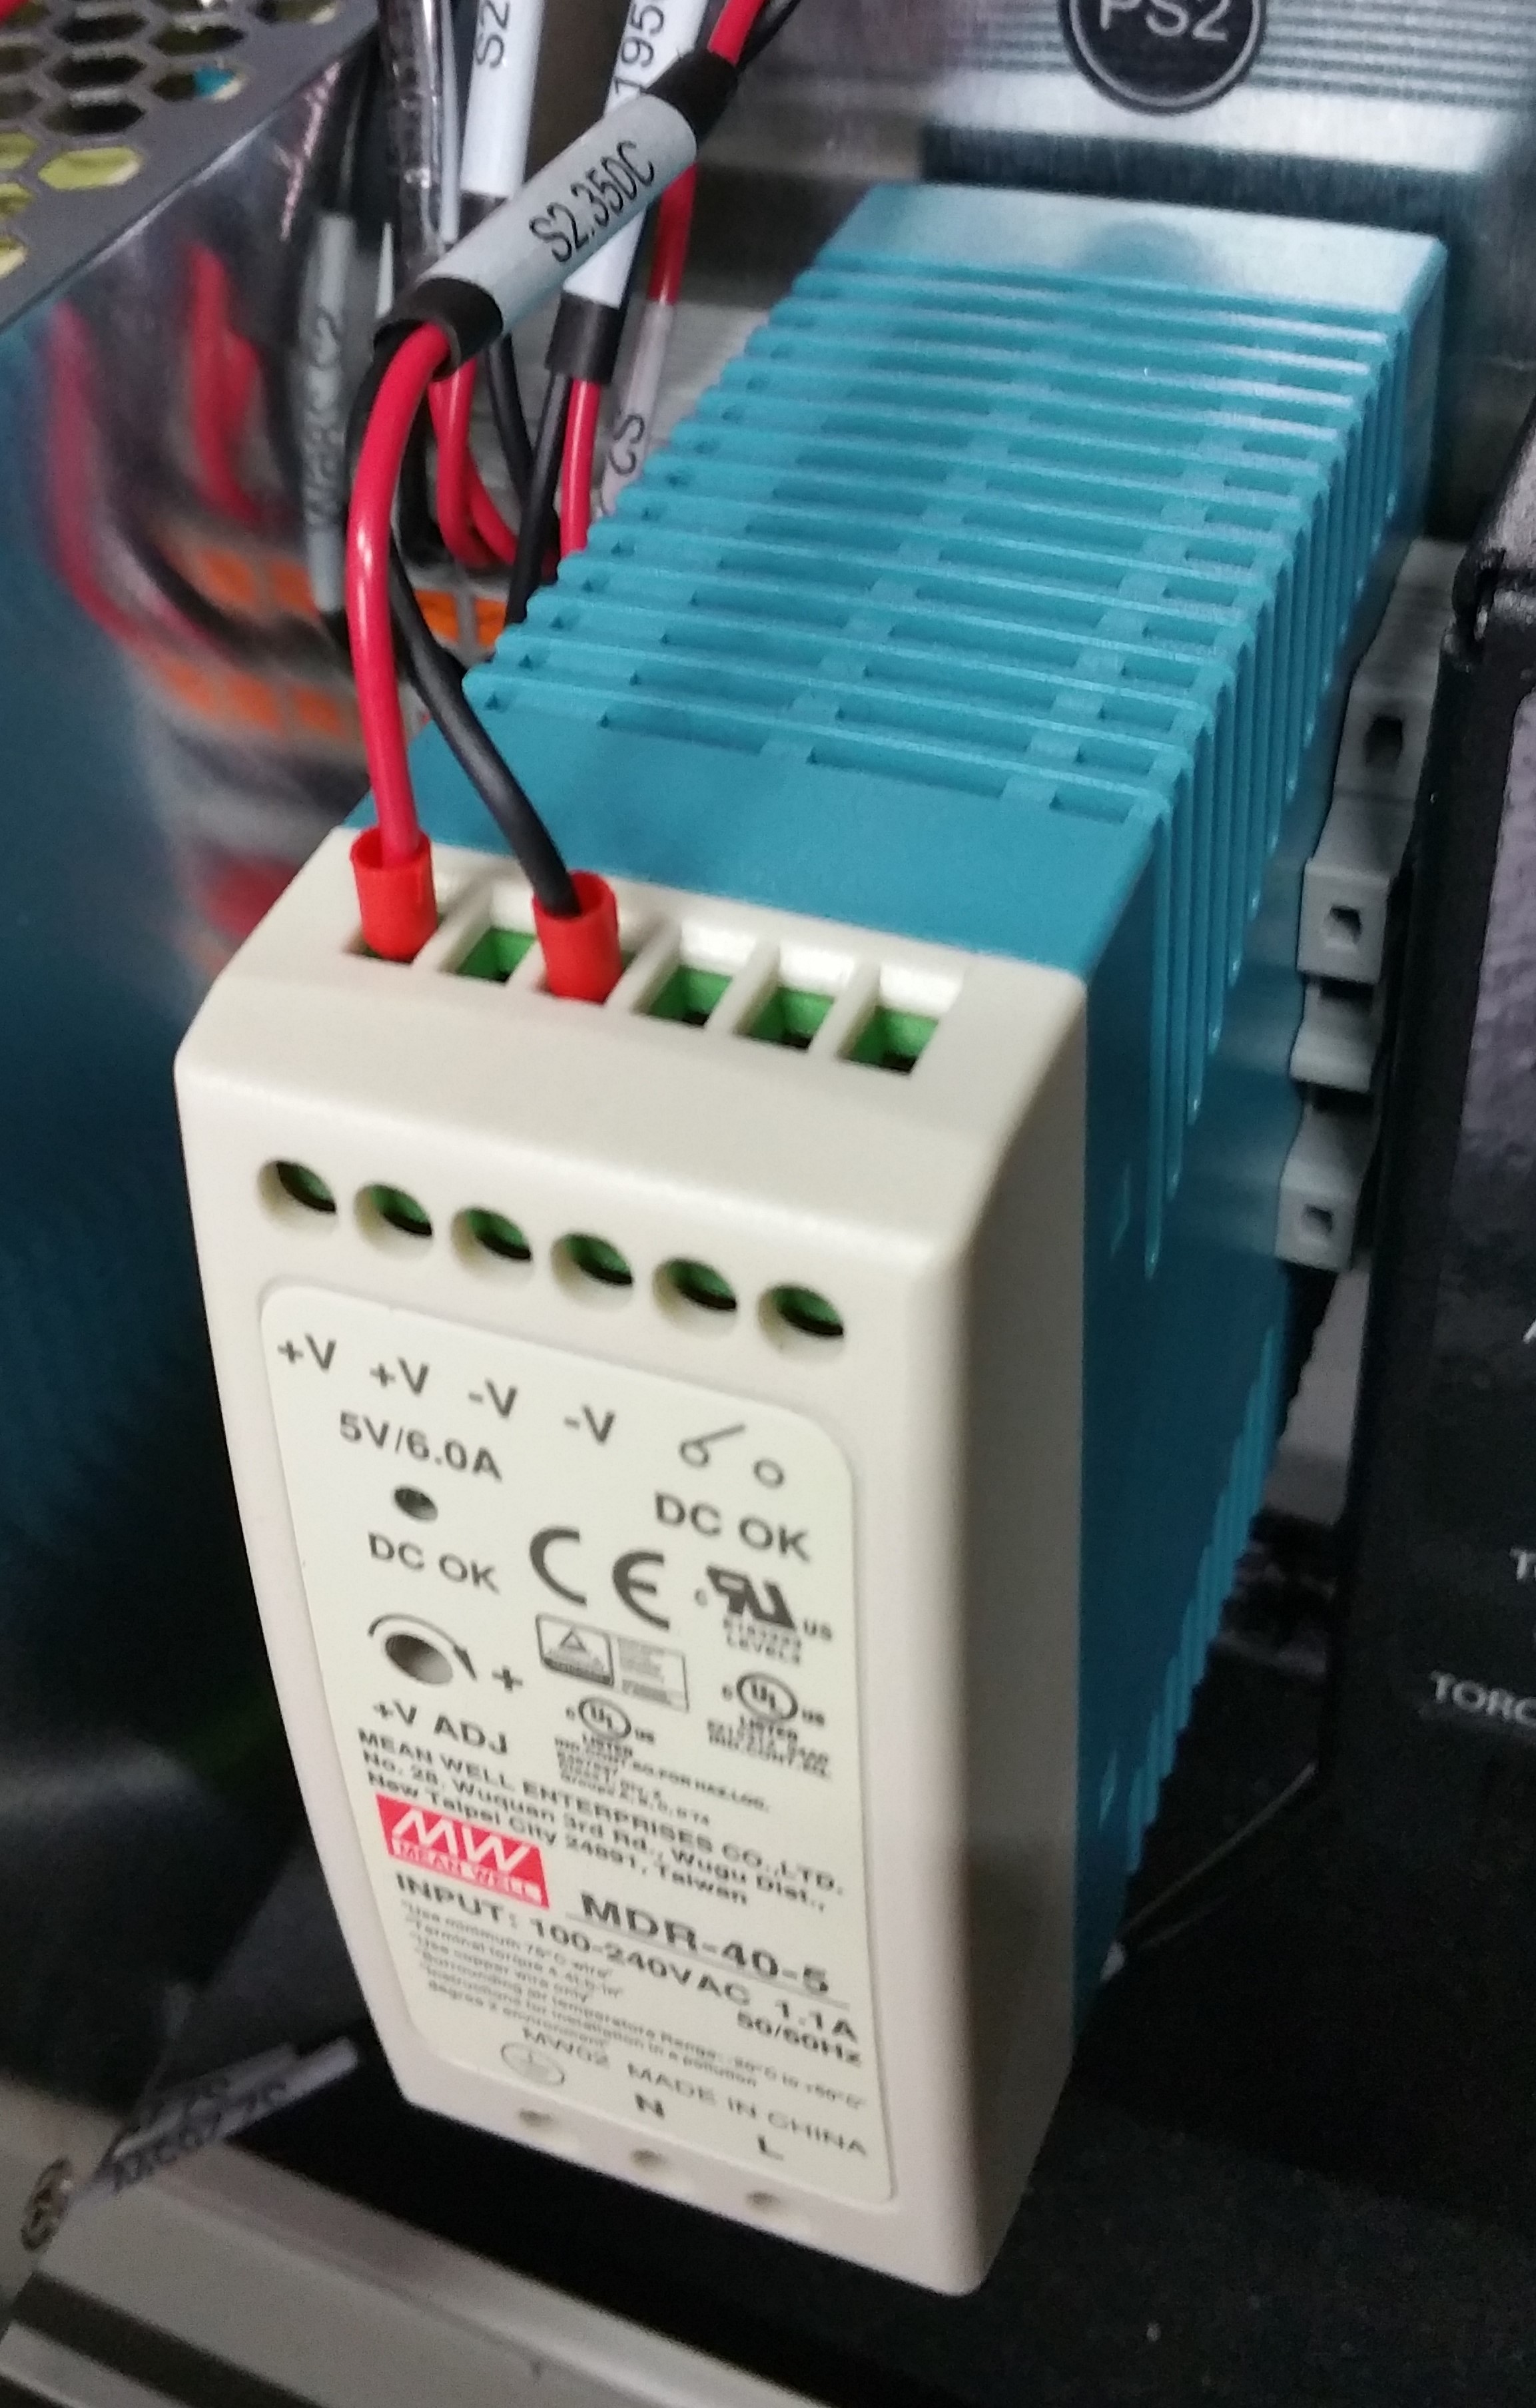
- Remove and discard the old S2.350C cable that has a barrel jack on end by unscrewing the respective terminals in PS2.
- Unplug all remaining cables from PCB1 (Control Board). Do not forget the four motor control cables in the top of the board. You may let S3.194C (E-STOP) and S3.230C (Ethernet) rest in the bottom of the control panel.
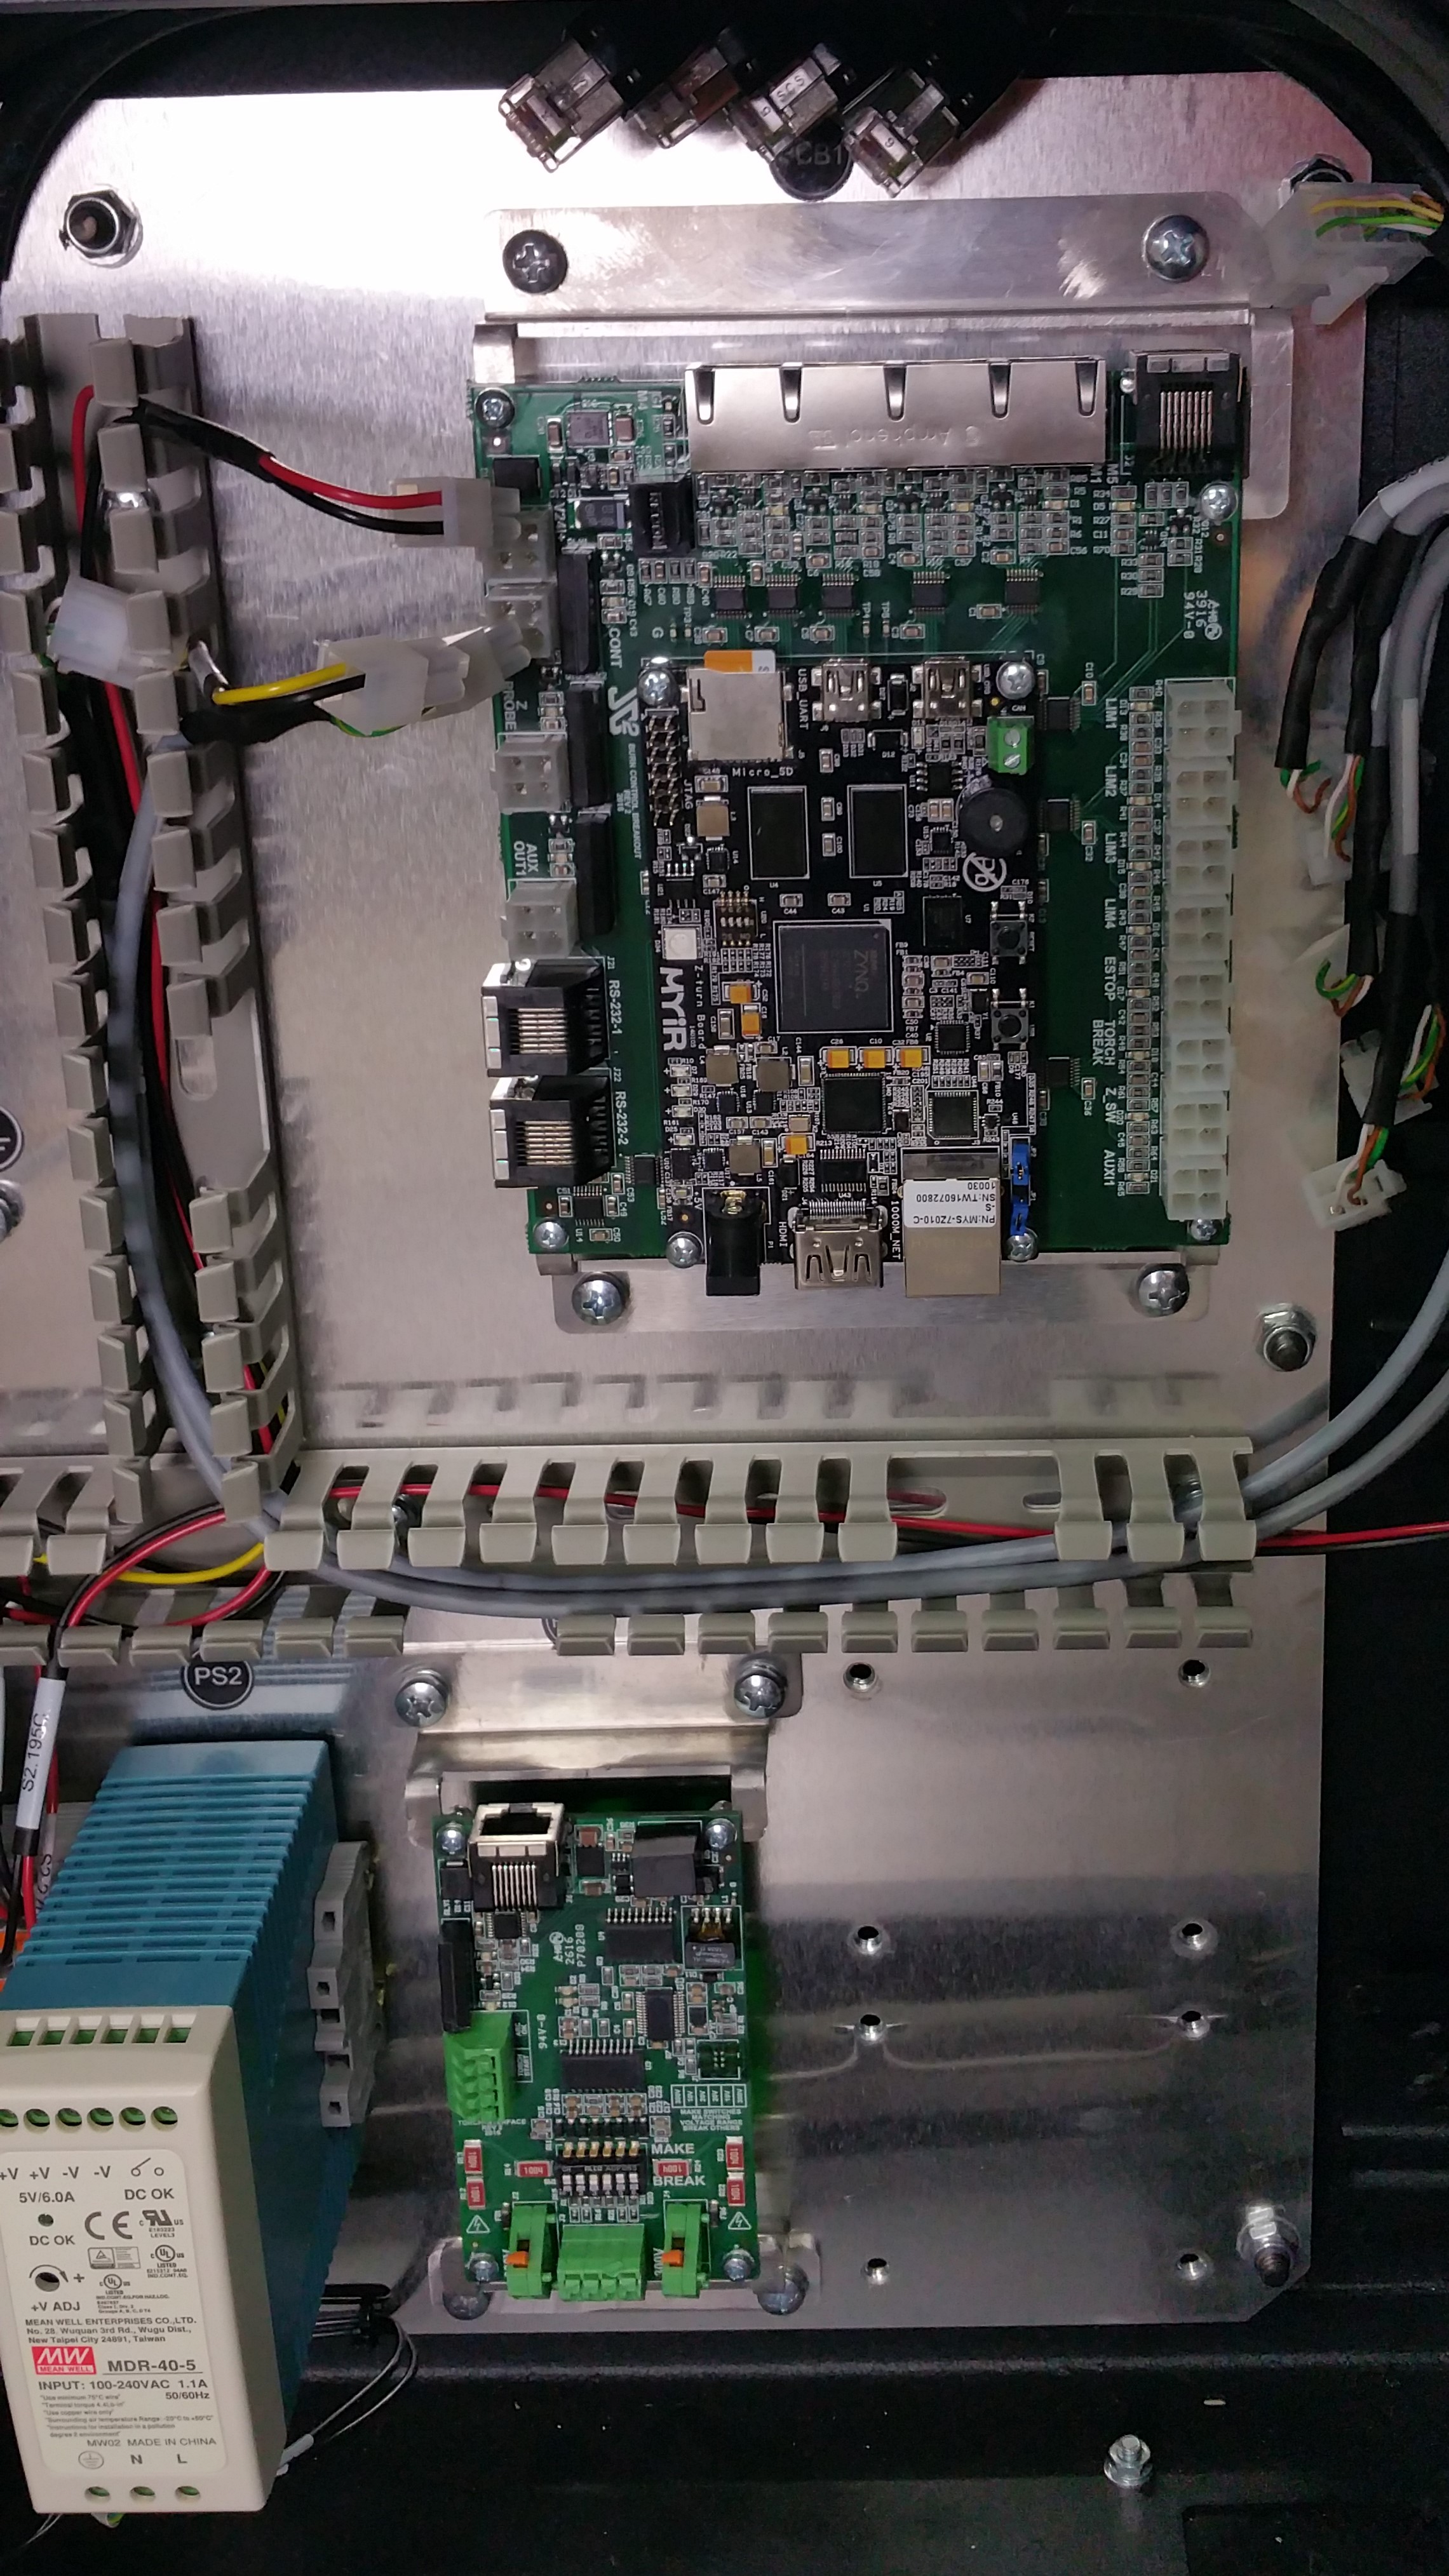
Remove the Version 1 Hardware
- Use a phillips head screw driver to remove the four M5 mounting bolts holding PCB1 to the backplane. Retain the hardware for reinstallation.
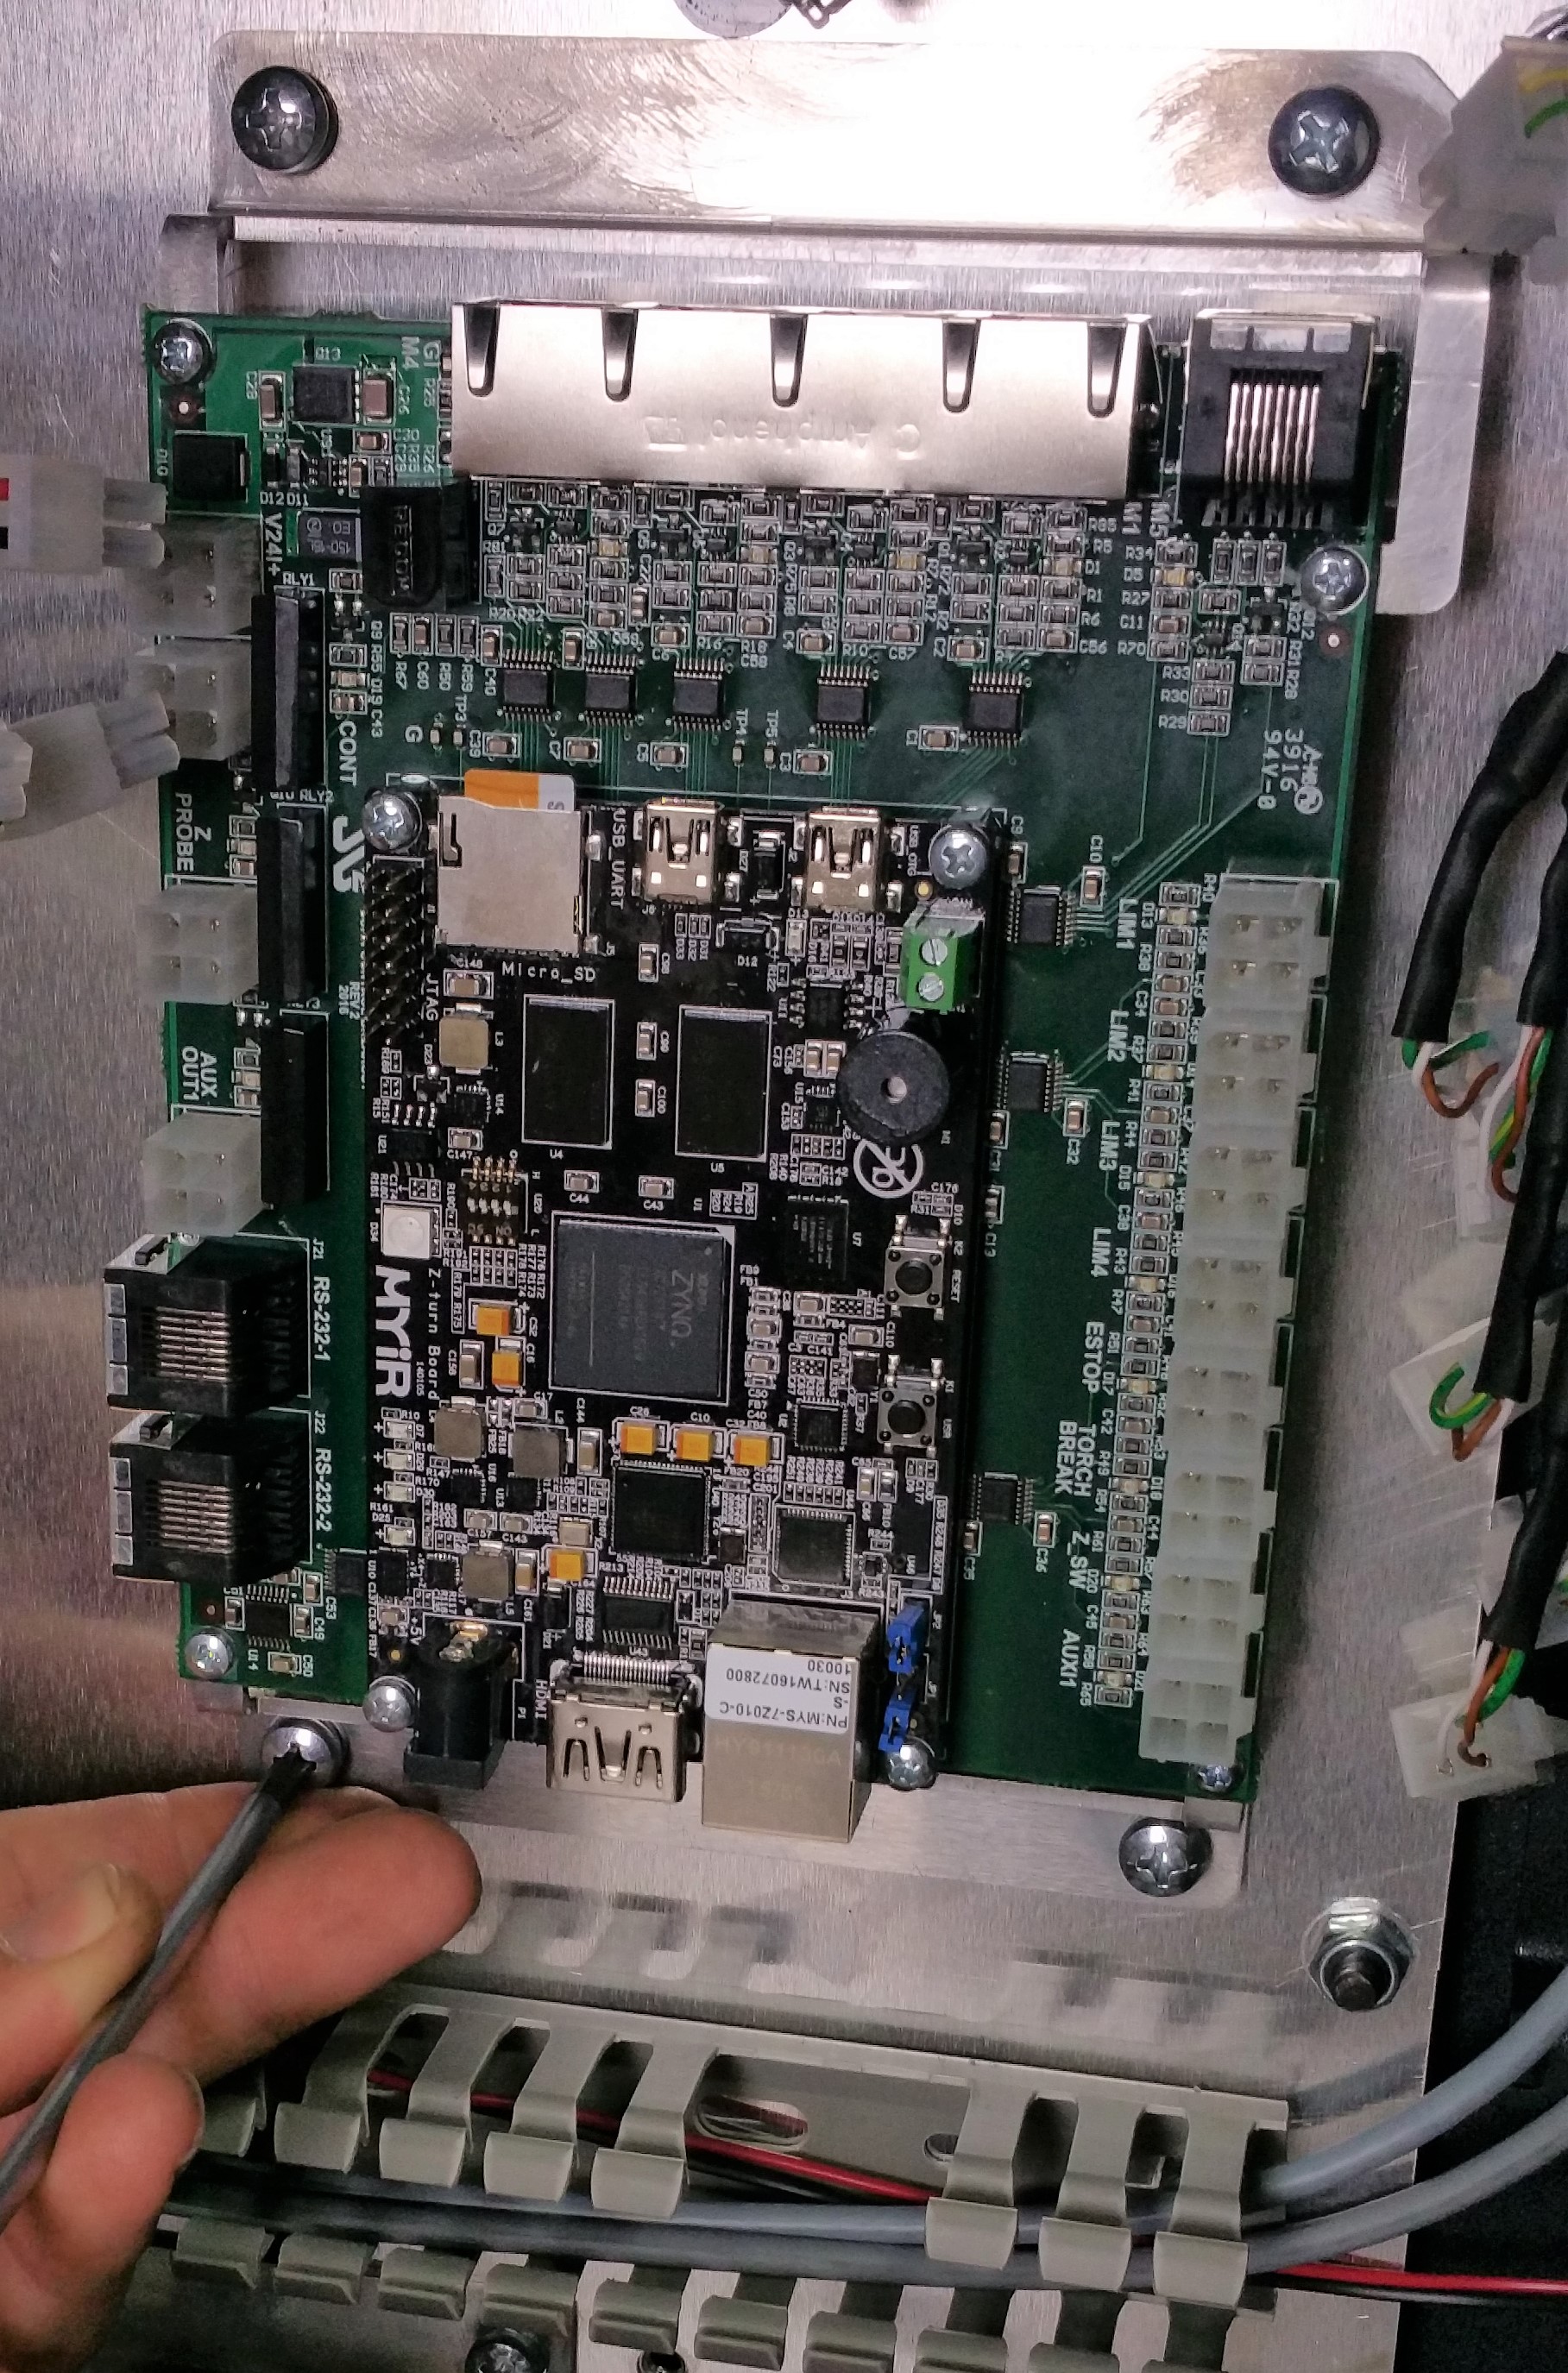
- Use a phillips head screw driver to remove the four M5 mounting bolts holding PCB2 to the backplane. Retain the hardware for reinstallation.
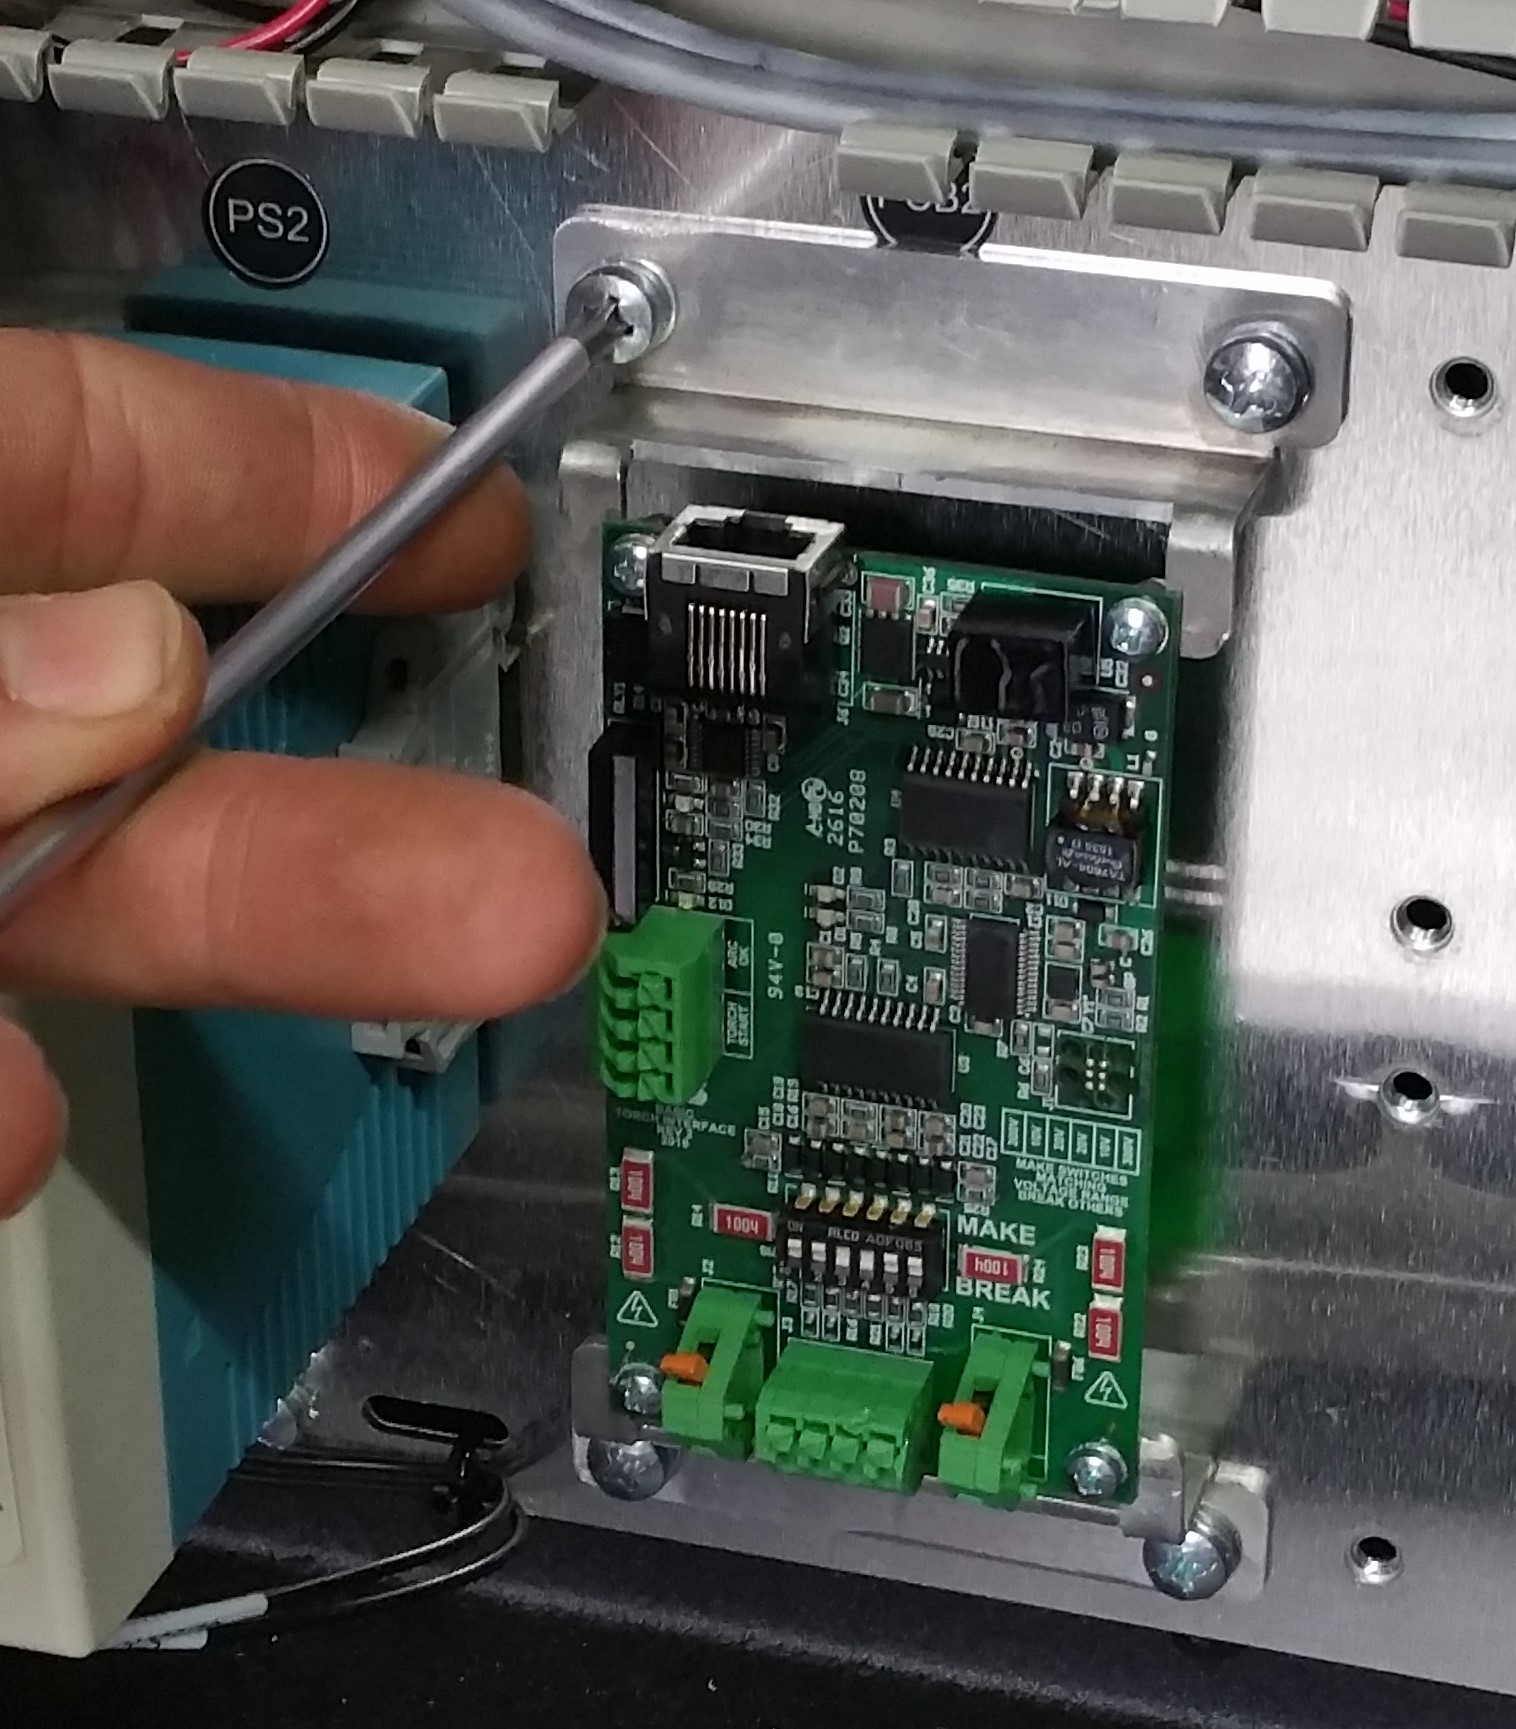
- Please return both boards to the box received for shipping back to JD Squared using the provided call-tag.
Install Version 2 Hardware
- Carefully remove Version 2 PCB1 and PCB2 from their foam packaging.
- Install both PCBs into the backplane using the eight (8) sets of retained hardware (M5 screw, lock washer, flat washer).
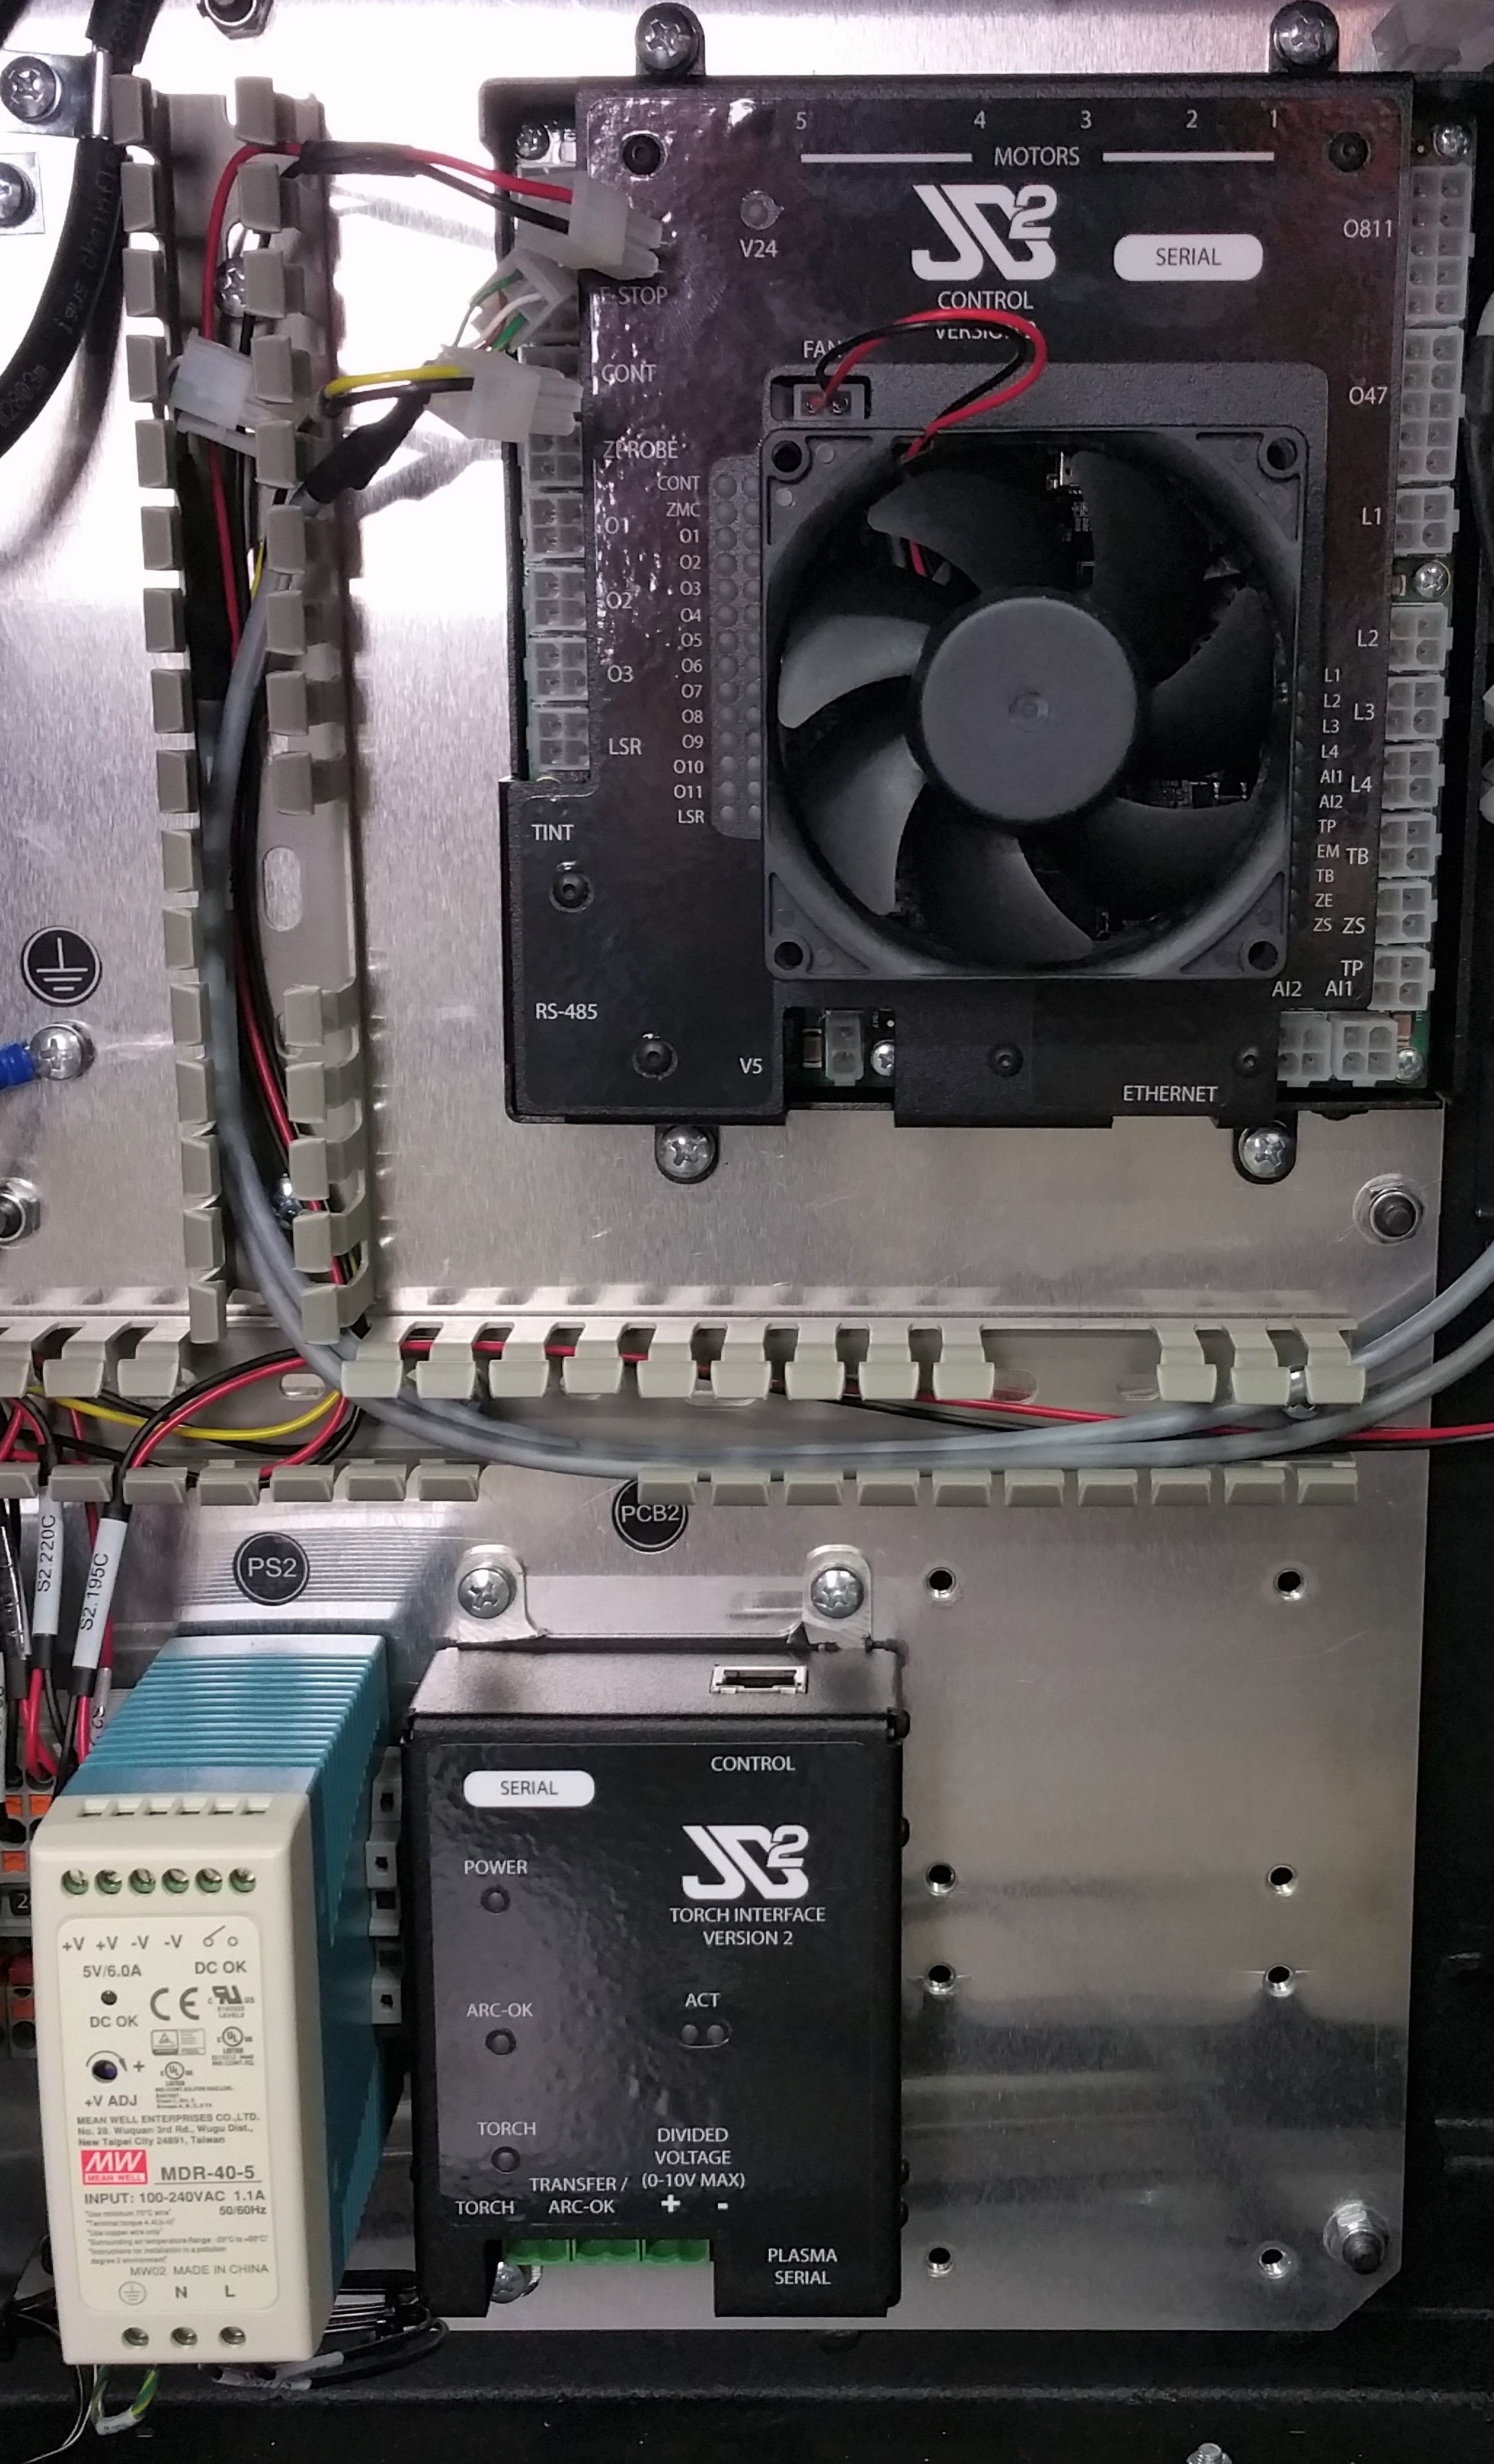
- Break two or three wire channel fingers above the plug labeled Control on PCB2 to allow connection of S3.334C.
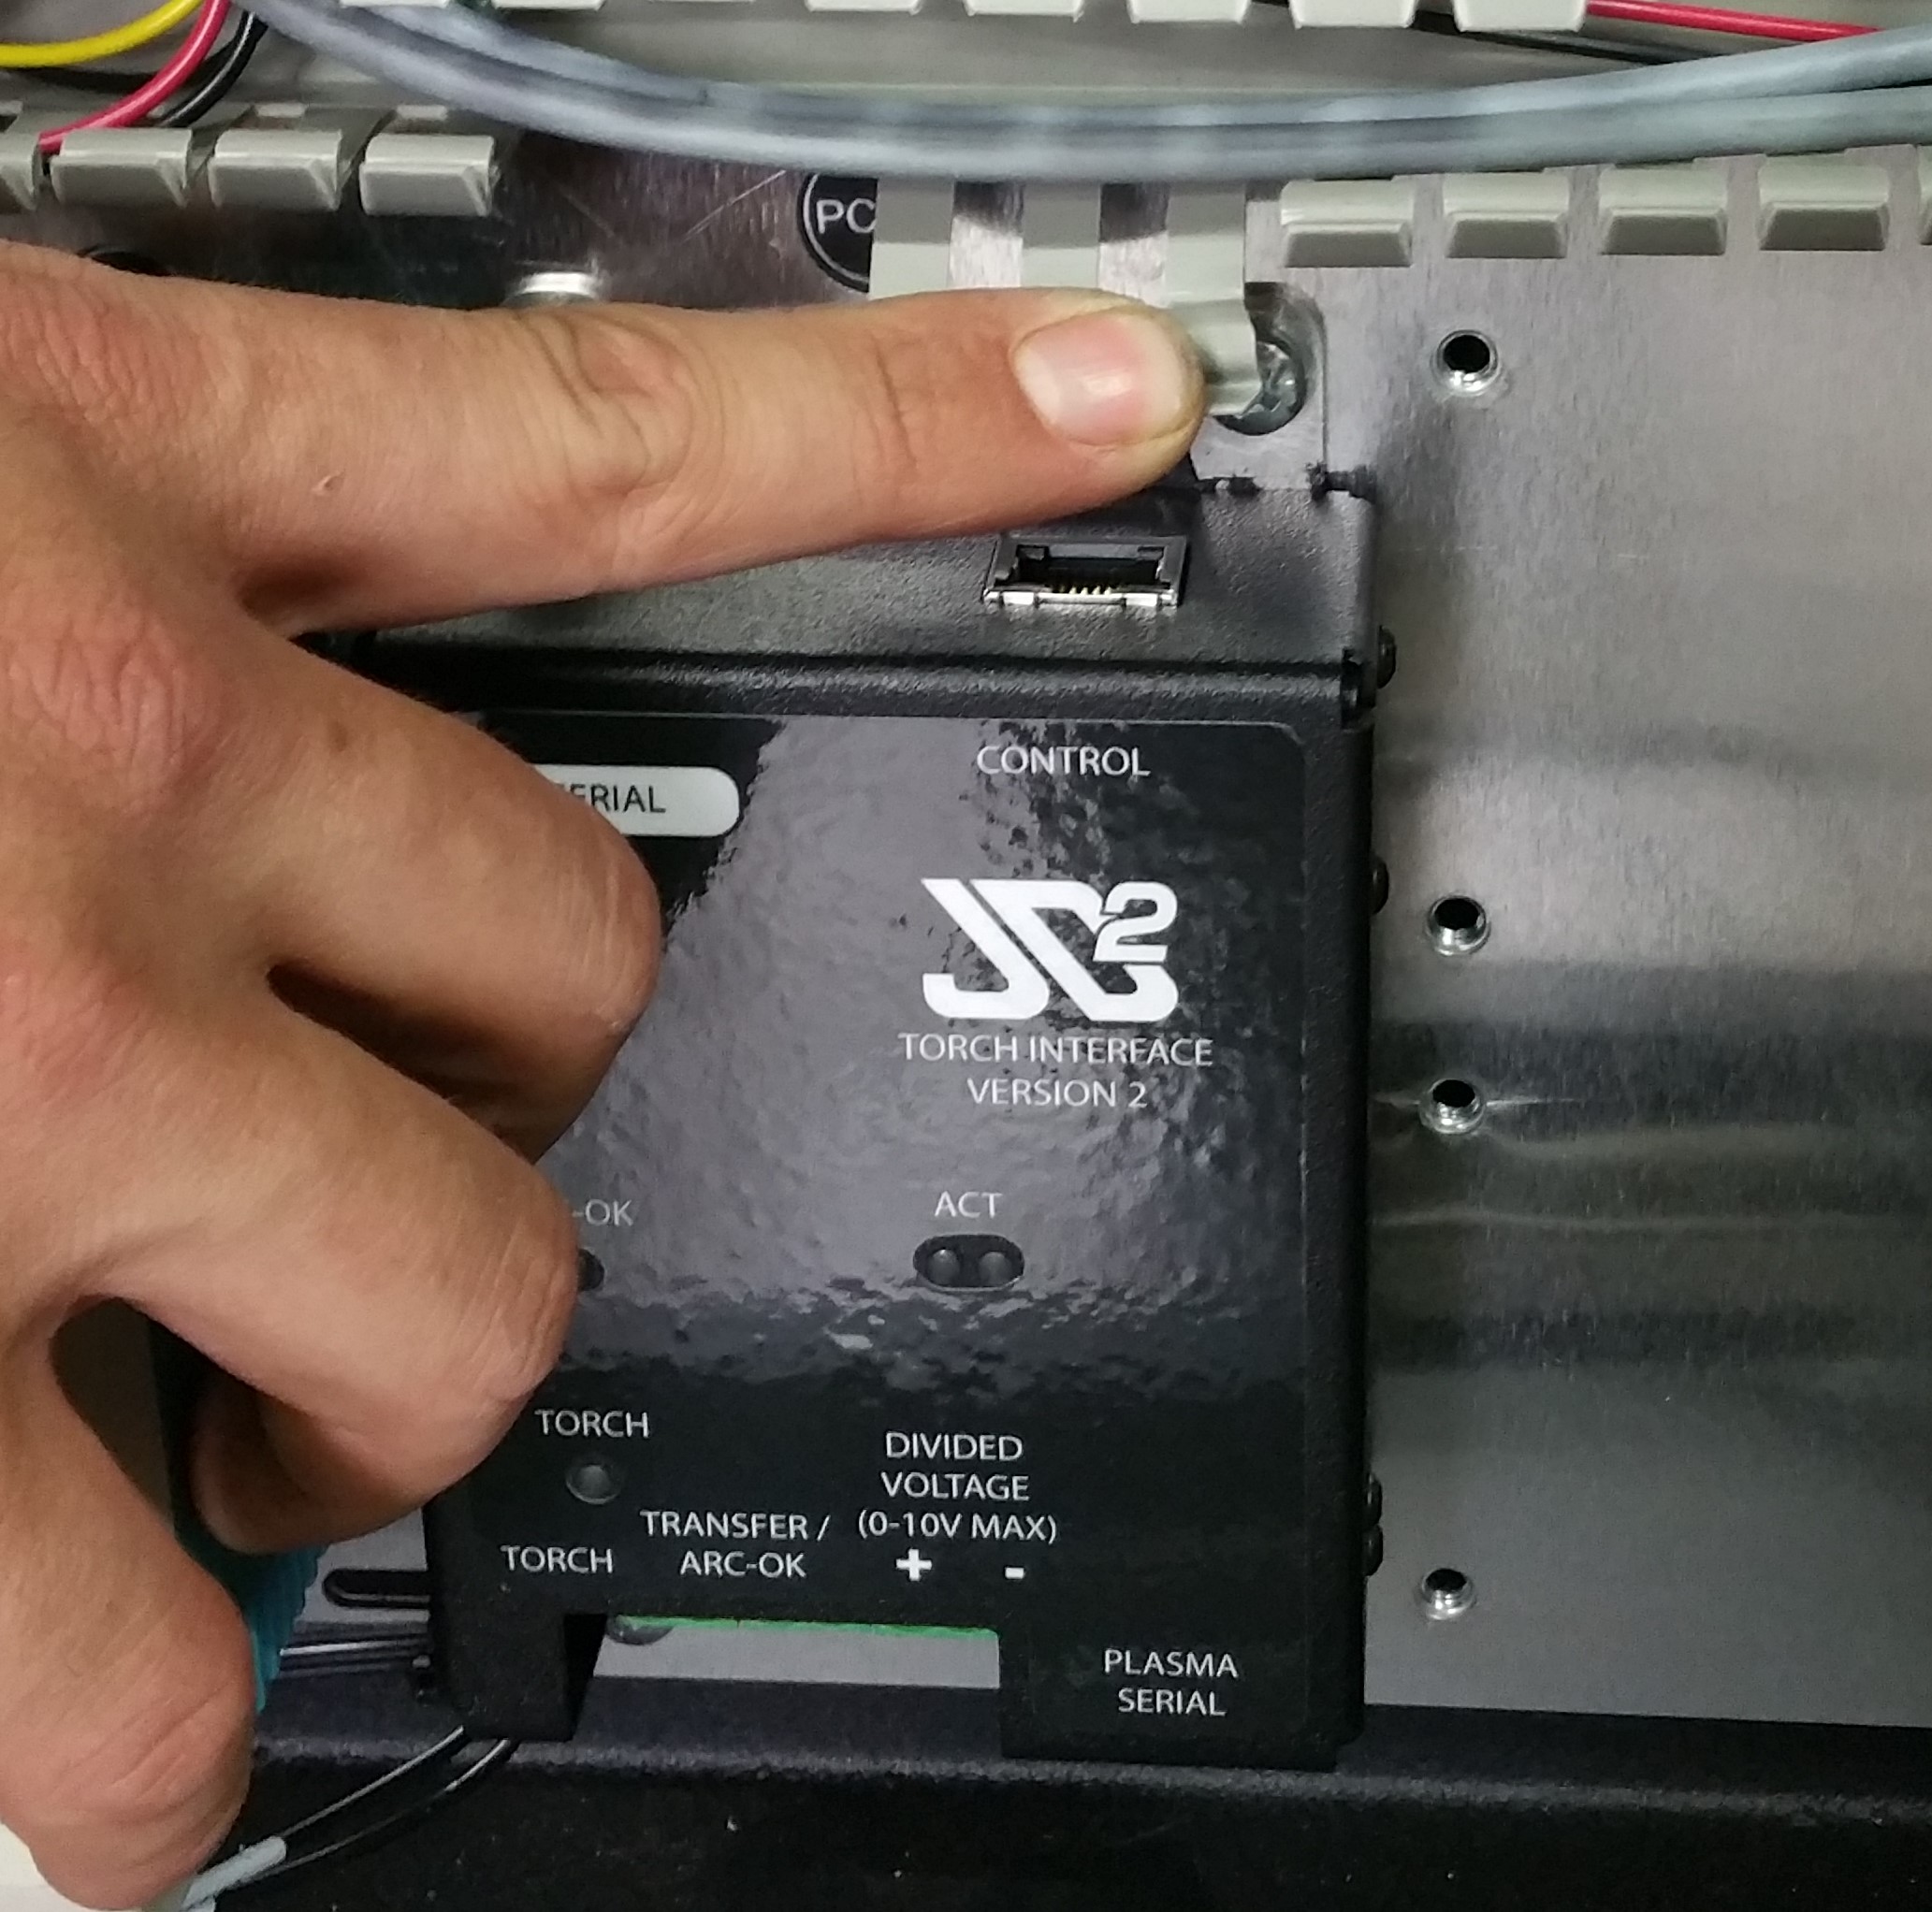
Emergency Stop S3.194C Relocated
Many of the cables will need to simply be plugged in without any adjustment. The Emergency Stop cable is the one major exception.
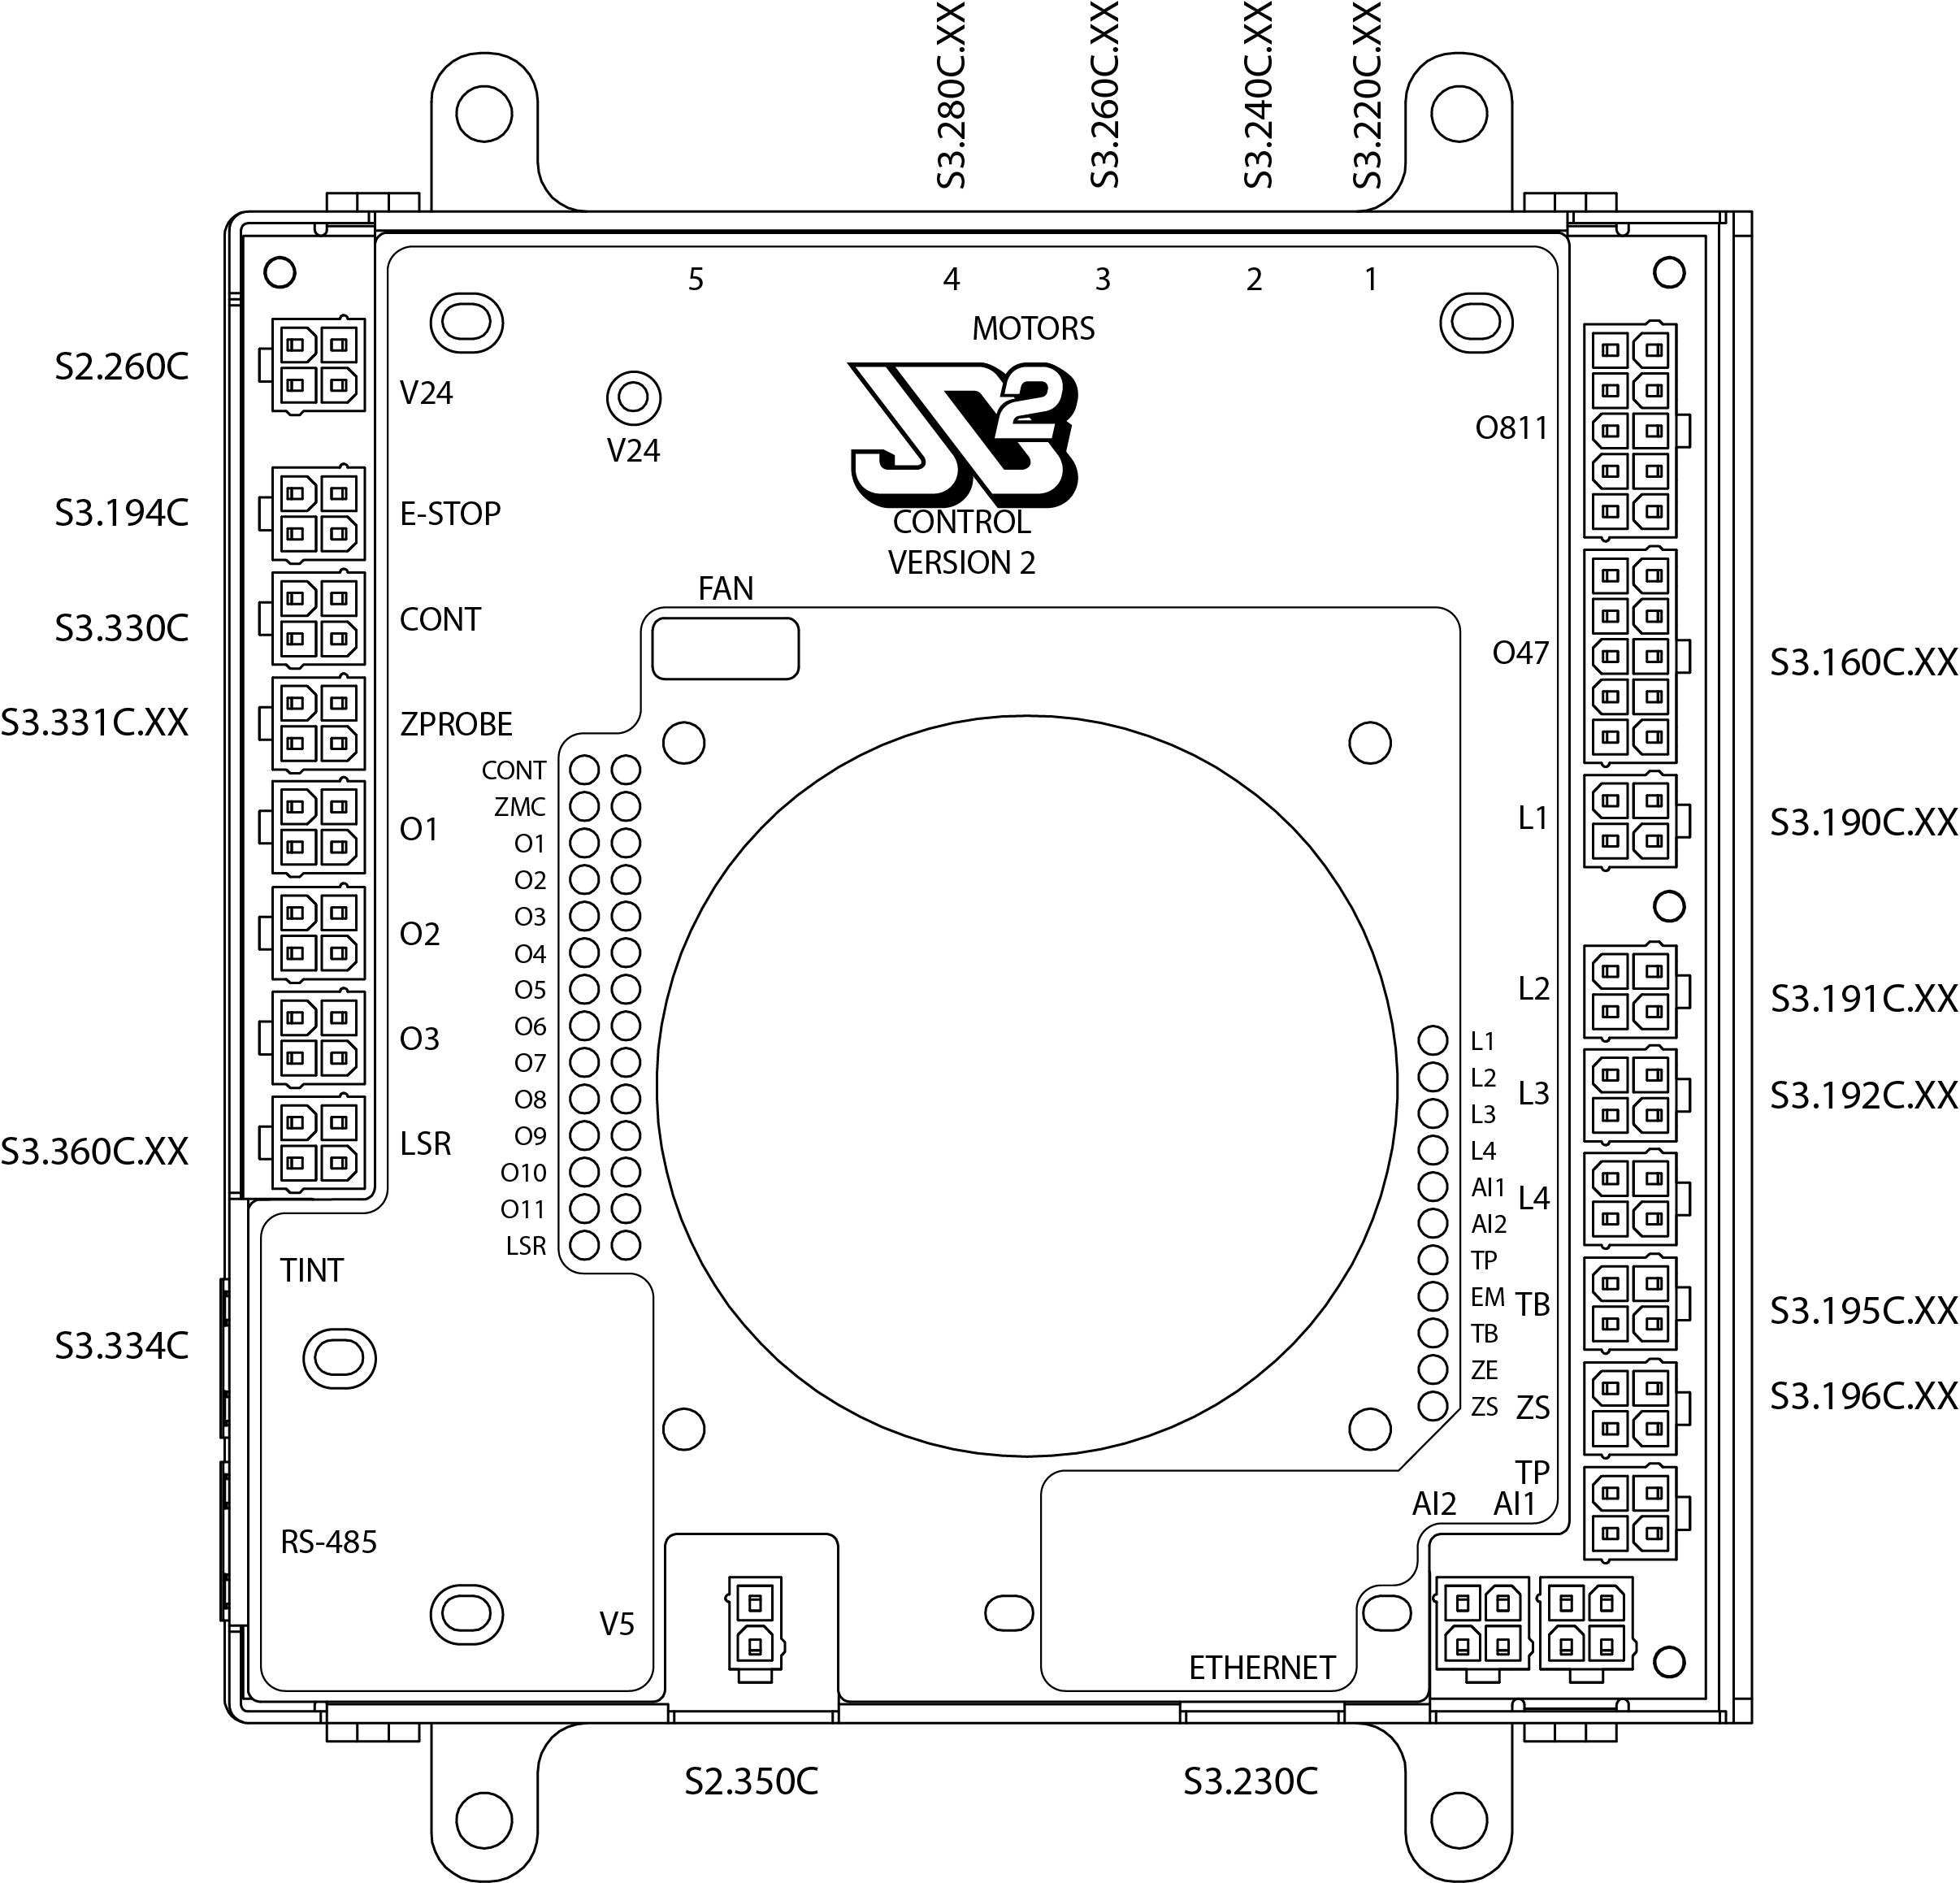
Please refer to the schematic diagram for proper connection of cables. Here is a printable diagram diagram to help:
- Connect new S2.350C to PS2 using a small flat head screw driver. The RED wire should be connected to a terminal marked +V, and the BLACK wire should be connected to a terminal marked -V.
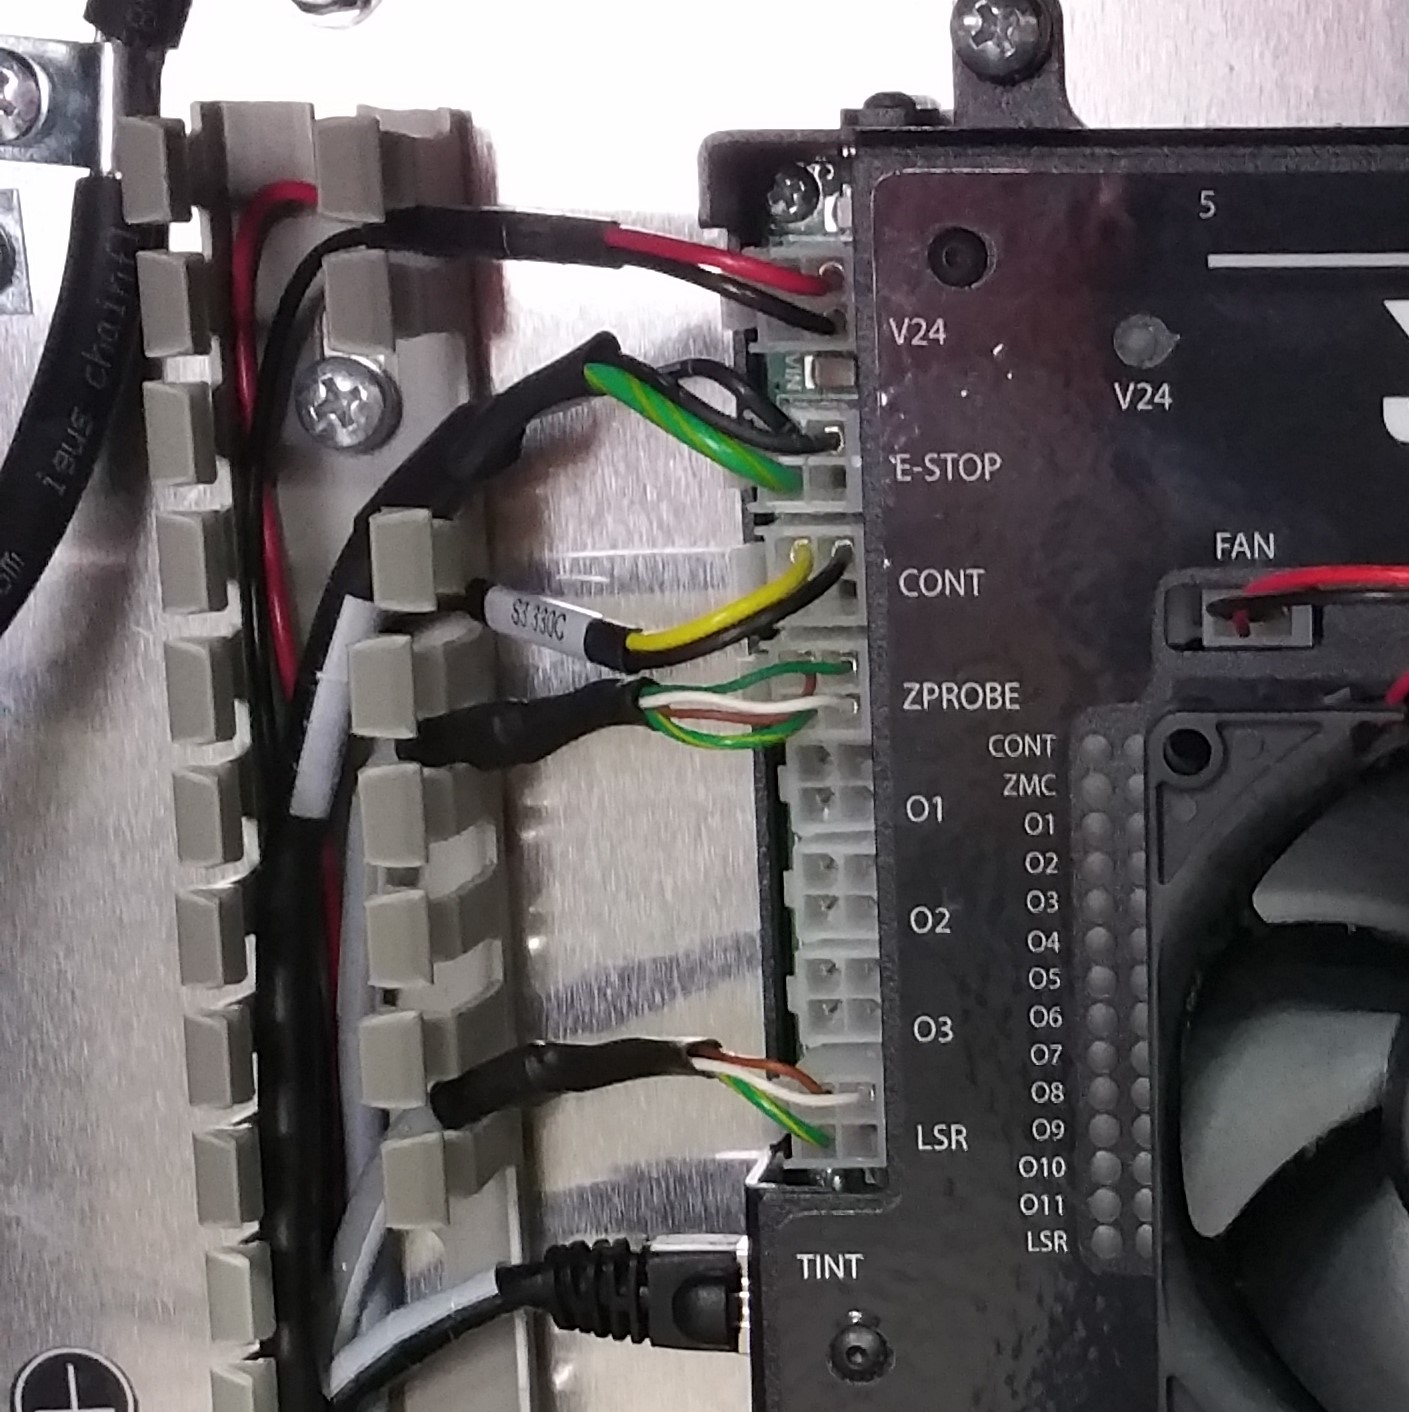
- Route S2.350C through the cable guide and connect the plug to the receptacle labeled V5 on PCB1.
- Connect S3.334C between PCB1 receptacle labeled TINT and PCB2 receptacle labeled CONTROL.
- Connect motor cables to top of PCB1 according to the schematic.
- Connect limit switches, inputs, etc. to PCB1 according to the schematic.
- Route S3.194C (E-STOP) through the cable guides to the new location in the upper left of PCB1 labeled E-STOP. It may be necessary to remove a finger from the guide to allow the cable to pass through and connect.
- Route S2.230C (Ethernet) through the lower cable guide and connect to the receptacle in PCB1 labeled ETHERNET.
- If you are not adding cabling for attachments, reinstall the cable covers.
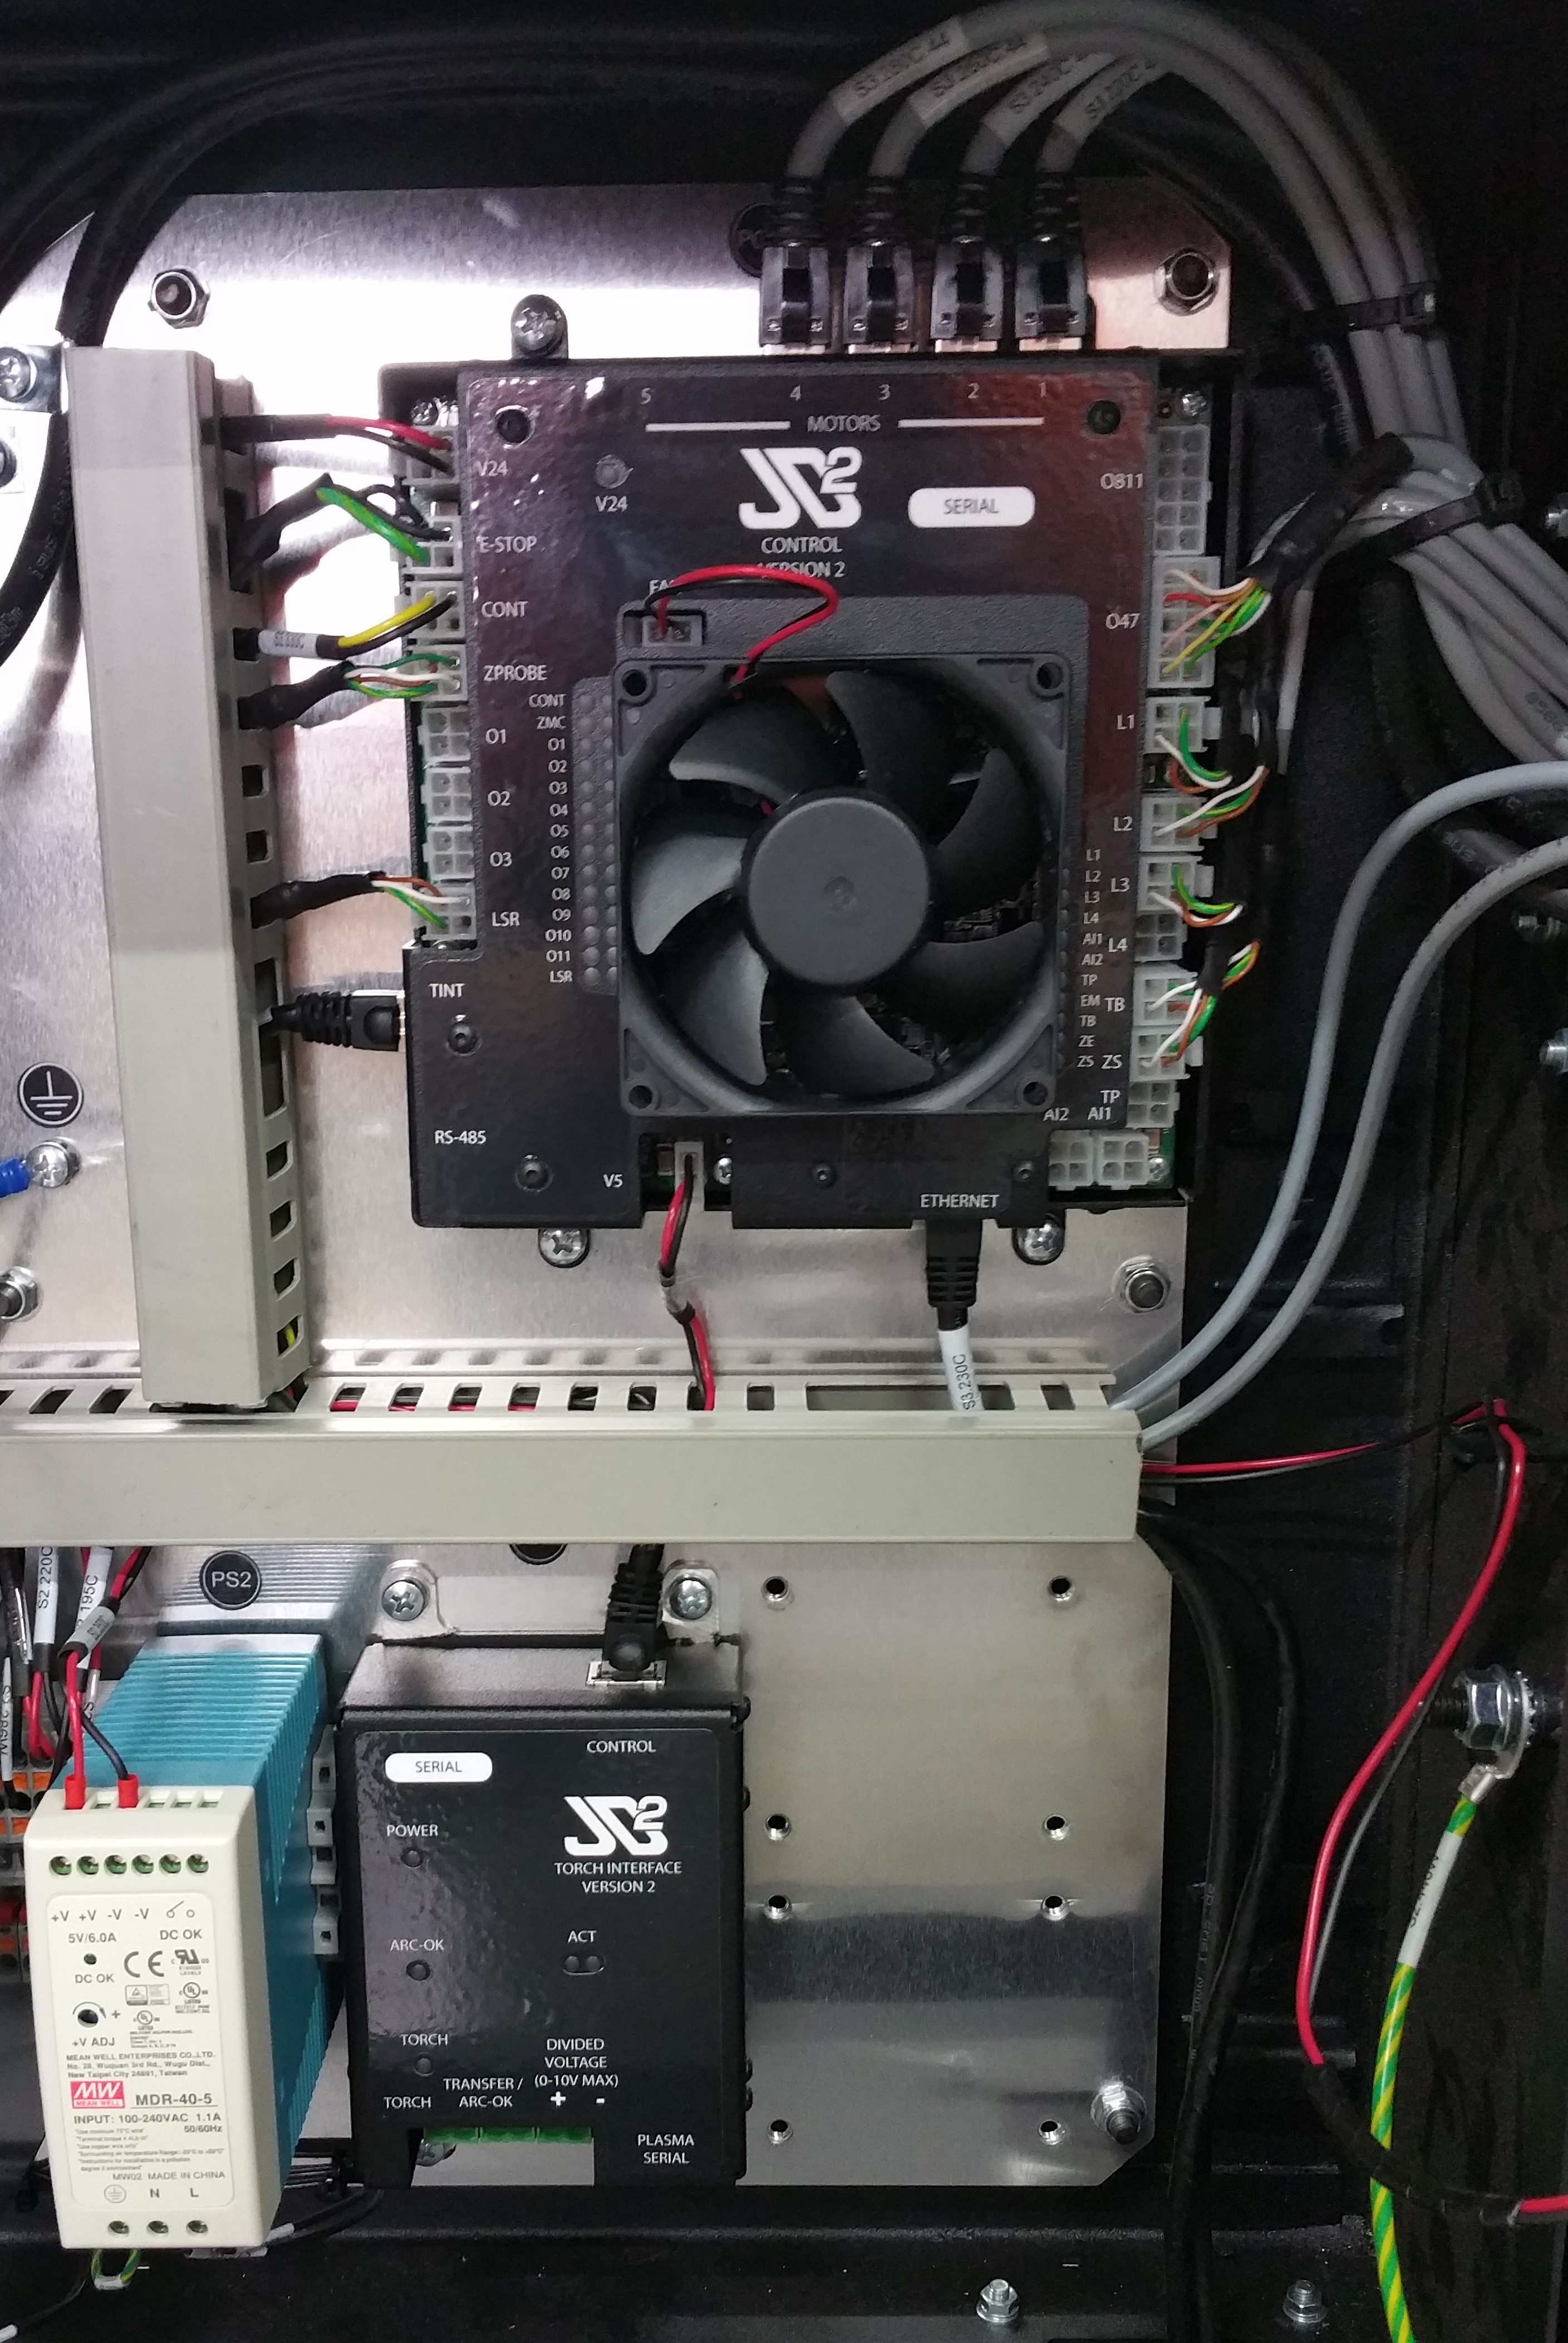
To complete wiring of PCB2 (Torch Interface) see Torch Interface Version 2 install instructions. Then, return, and complete Task 2.
Task 2 - Z-Probe
In the Z-Axis head we must replace PCB3. Estimated time for completion is 20 minutes.
Required Tooling
- 13mm Wrench
- 10mm Wrench
- 5mm Hex Key
- 4mm Hex Key
- Small Phillips Head Screw Driver
- Small Adjustable Wrench (or 5.5mm Socket)
- Wire Cutters
Remove Covers
Hazardous Voltage
Disconnect power to the machine before completing the following steps.
- Unplug the two cables connected to the Z-Axis motor.
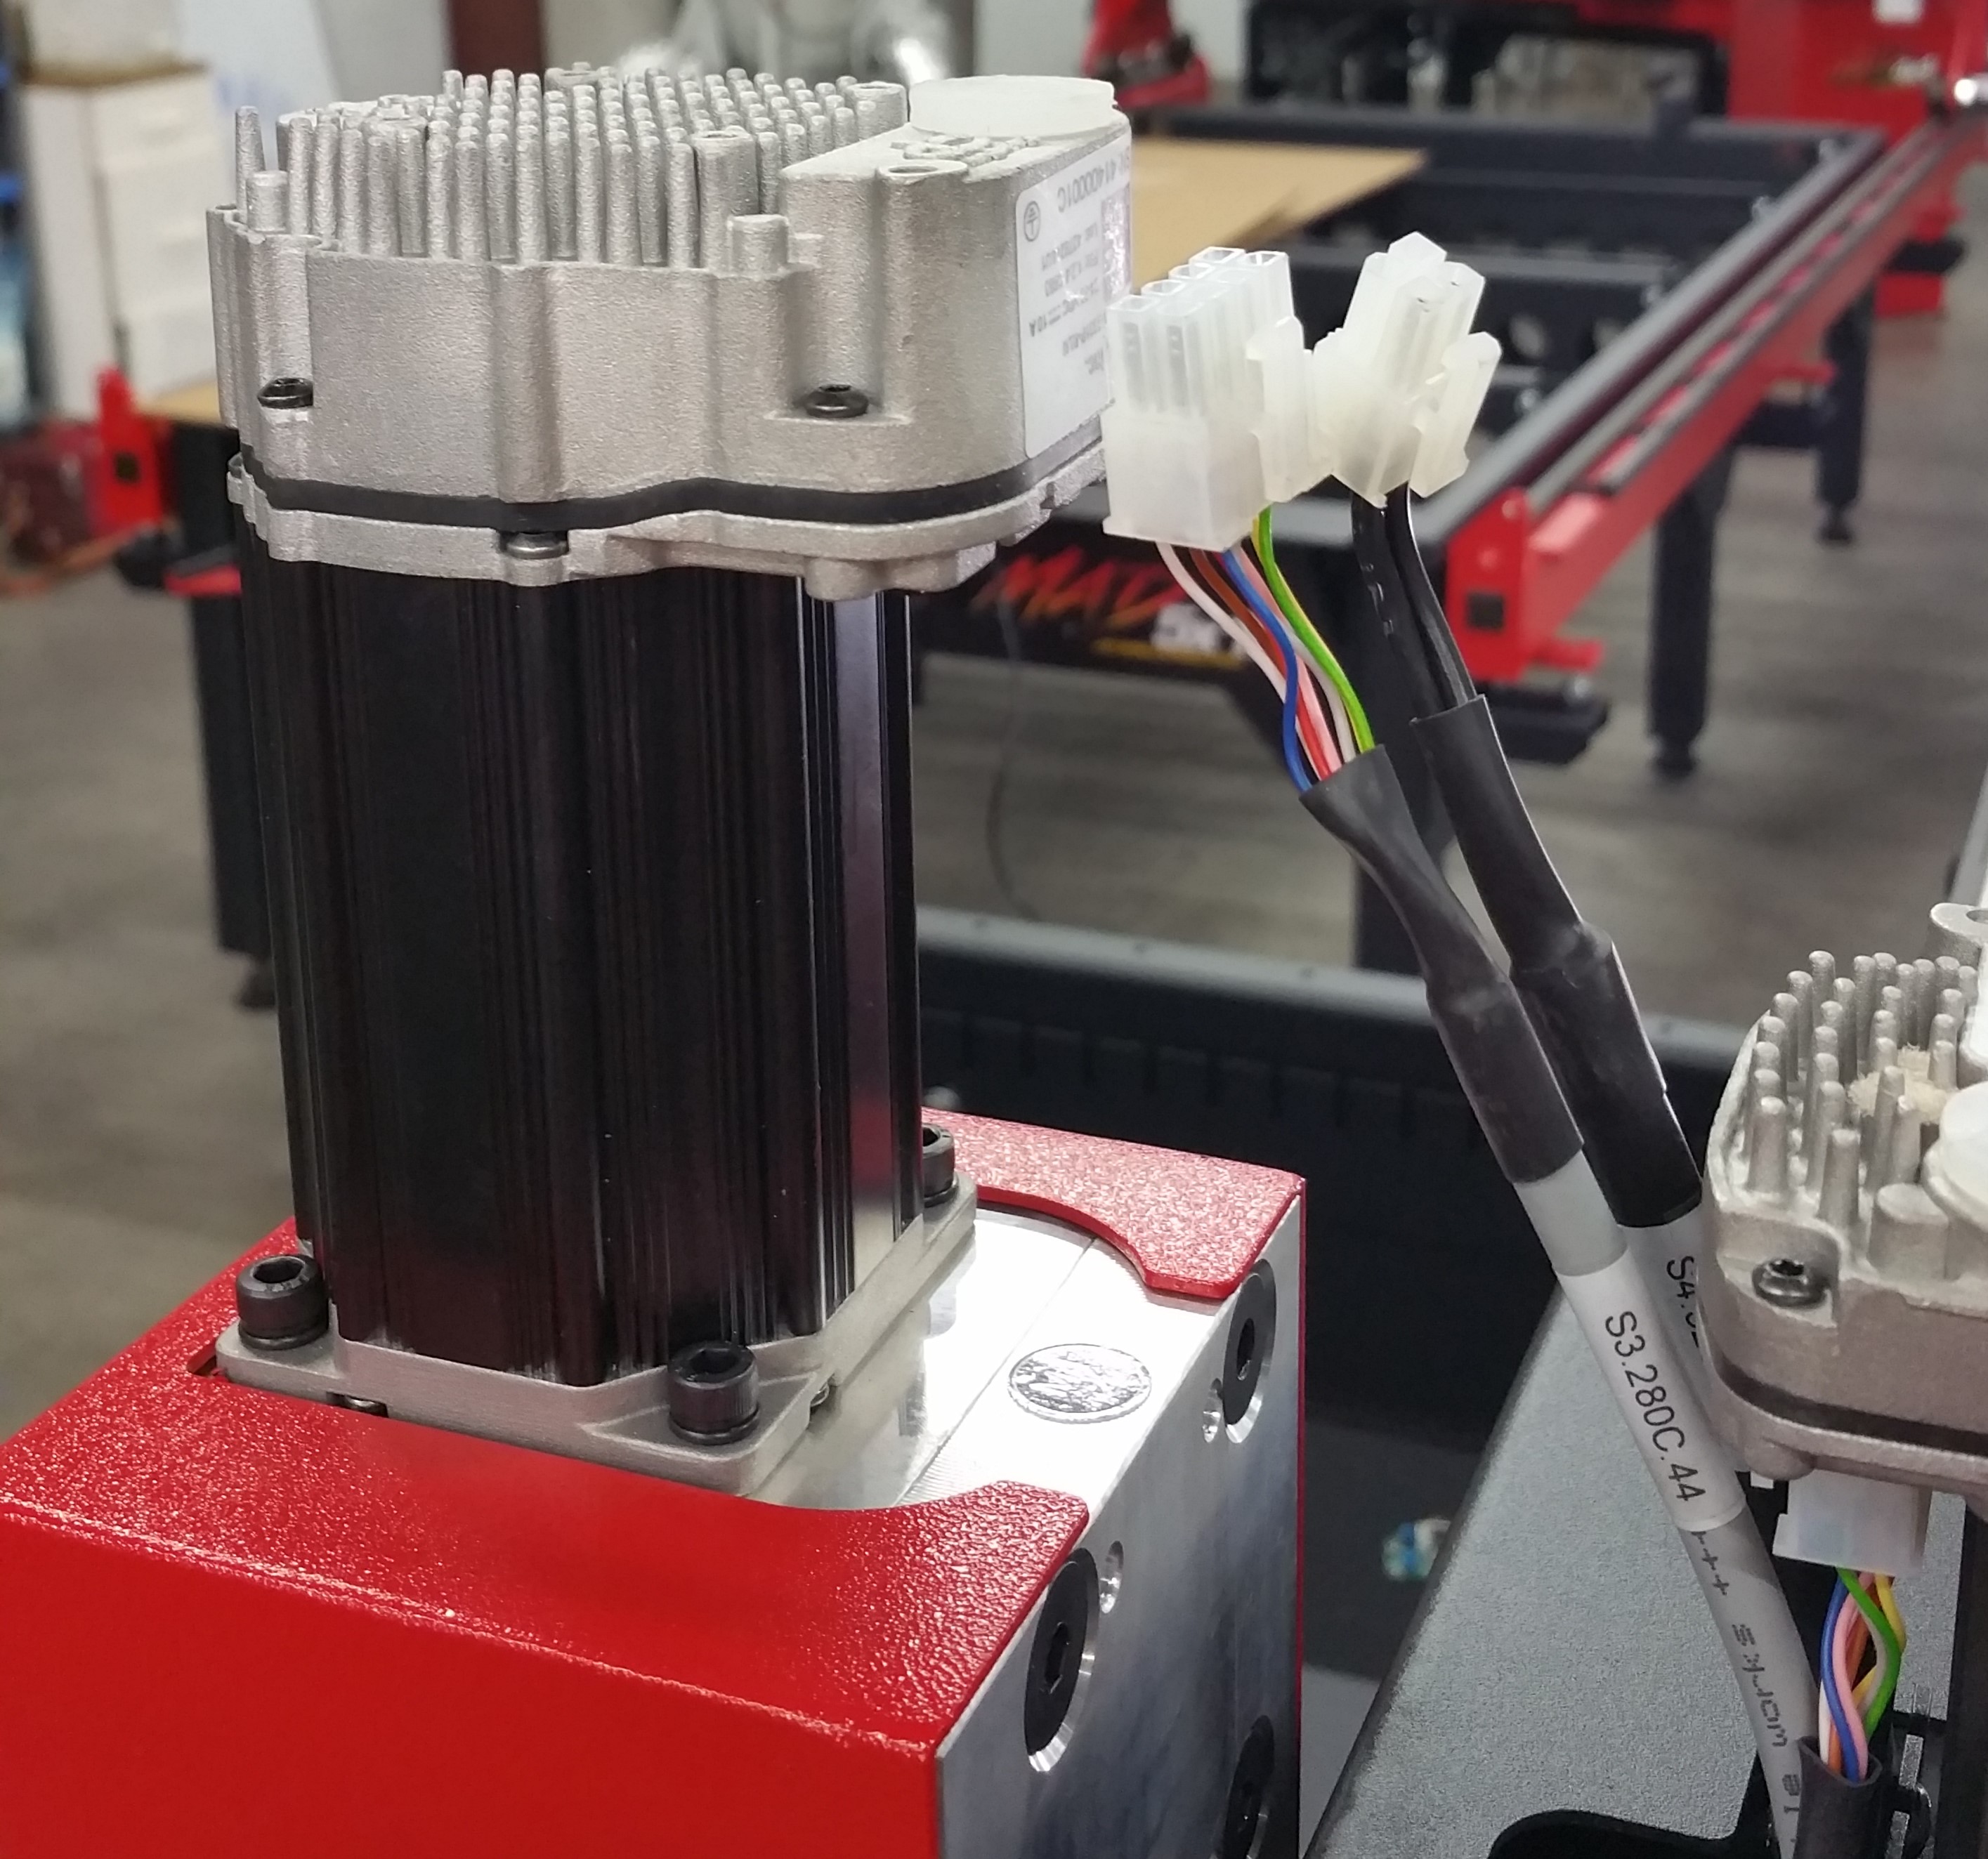
- Remove the four (4) bolts attaching the Z-Axis cover. This may require a 13mm wrench or a 5mm hex key depending on date of manufacture. Slide the cover straight up to remove.
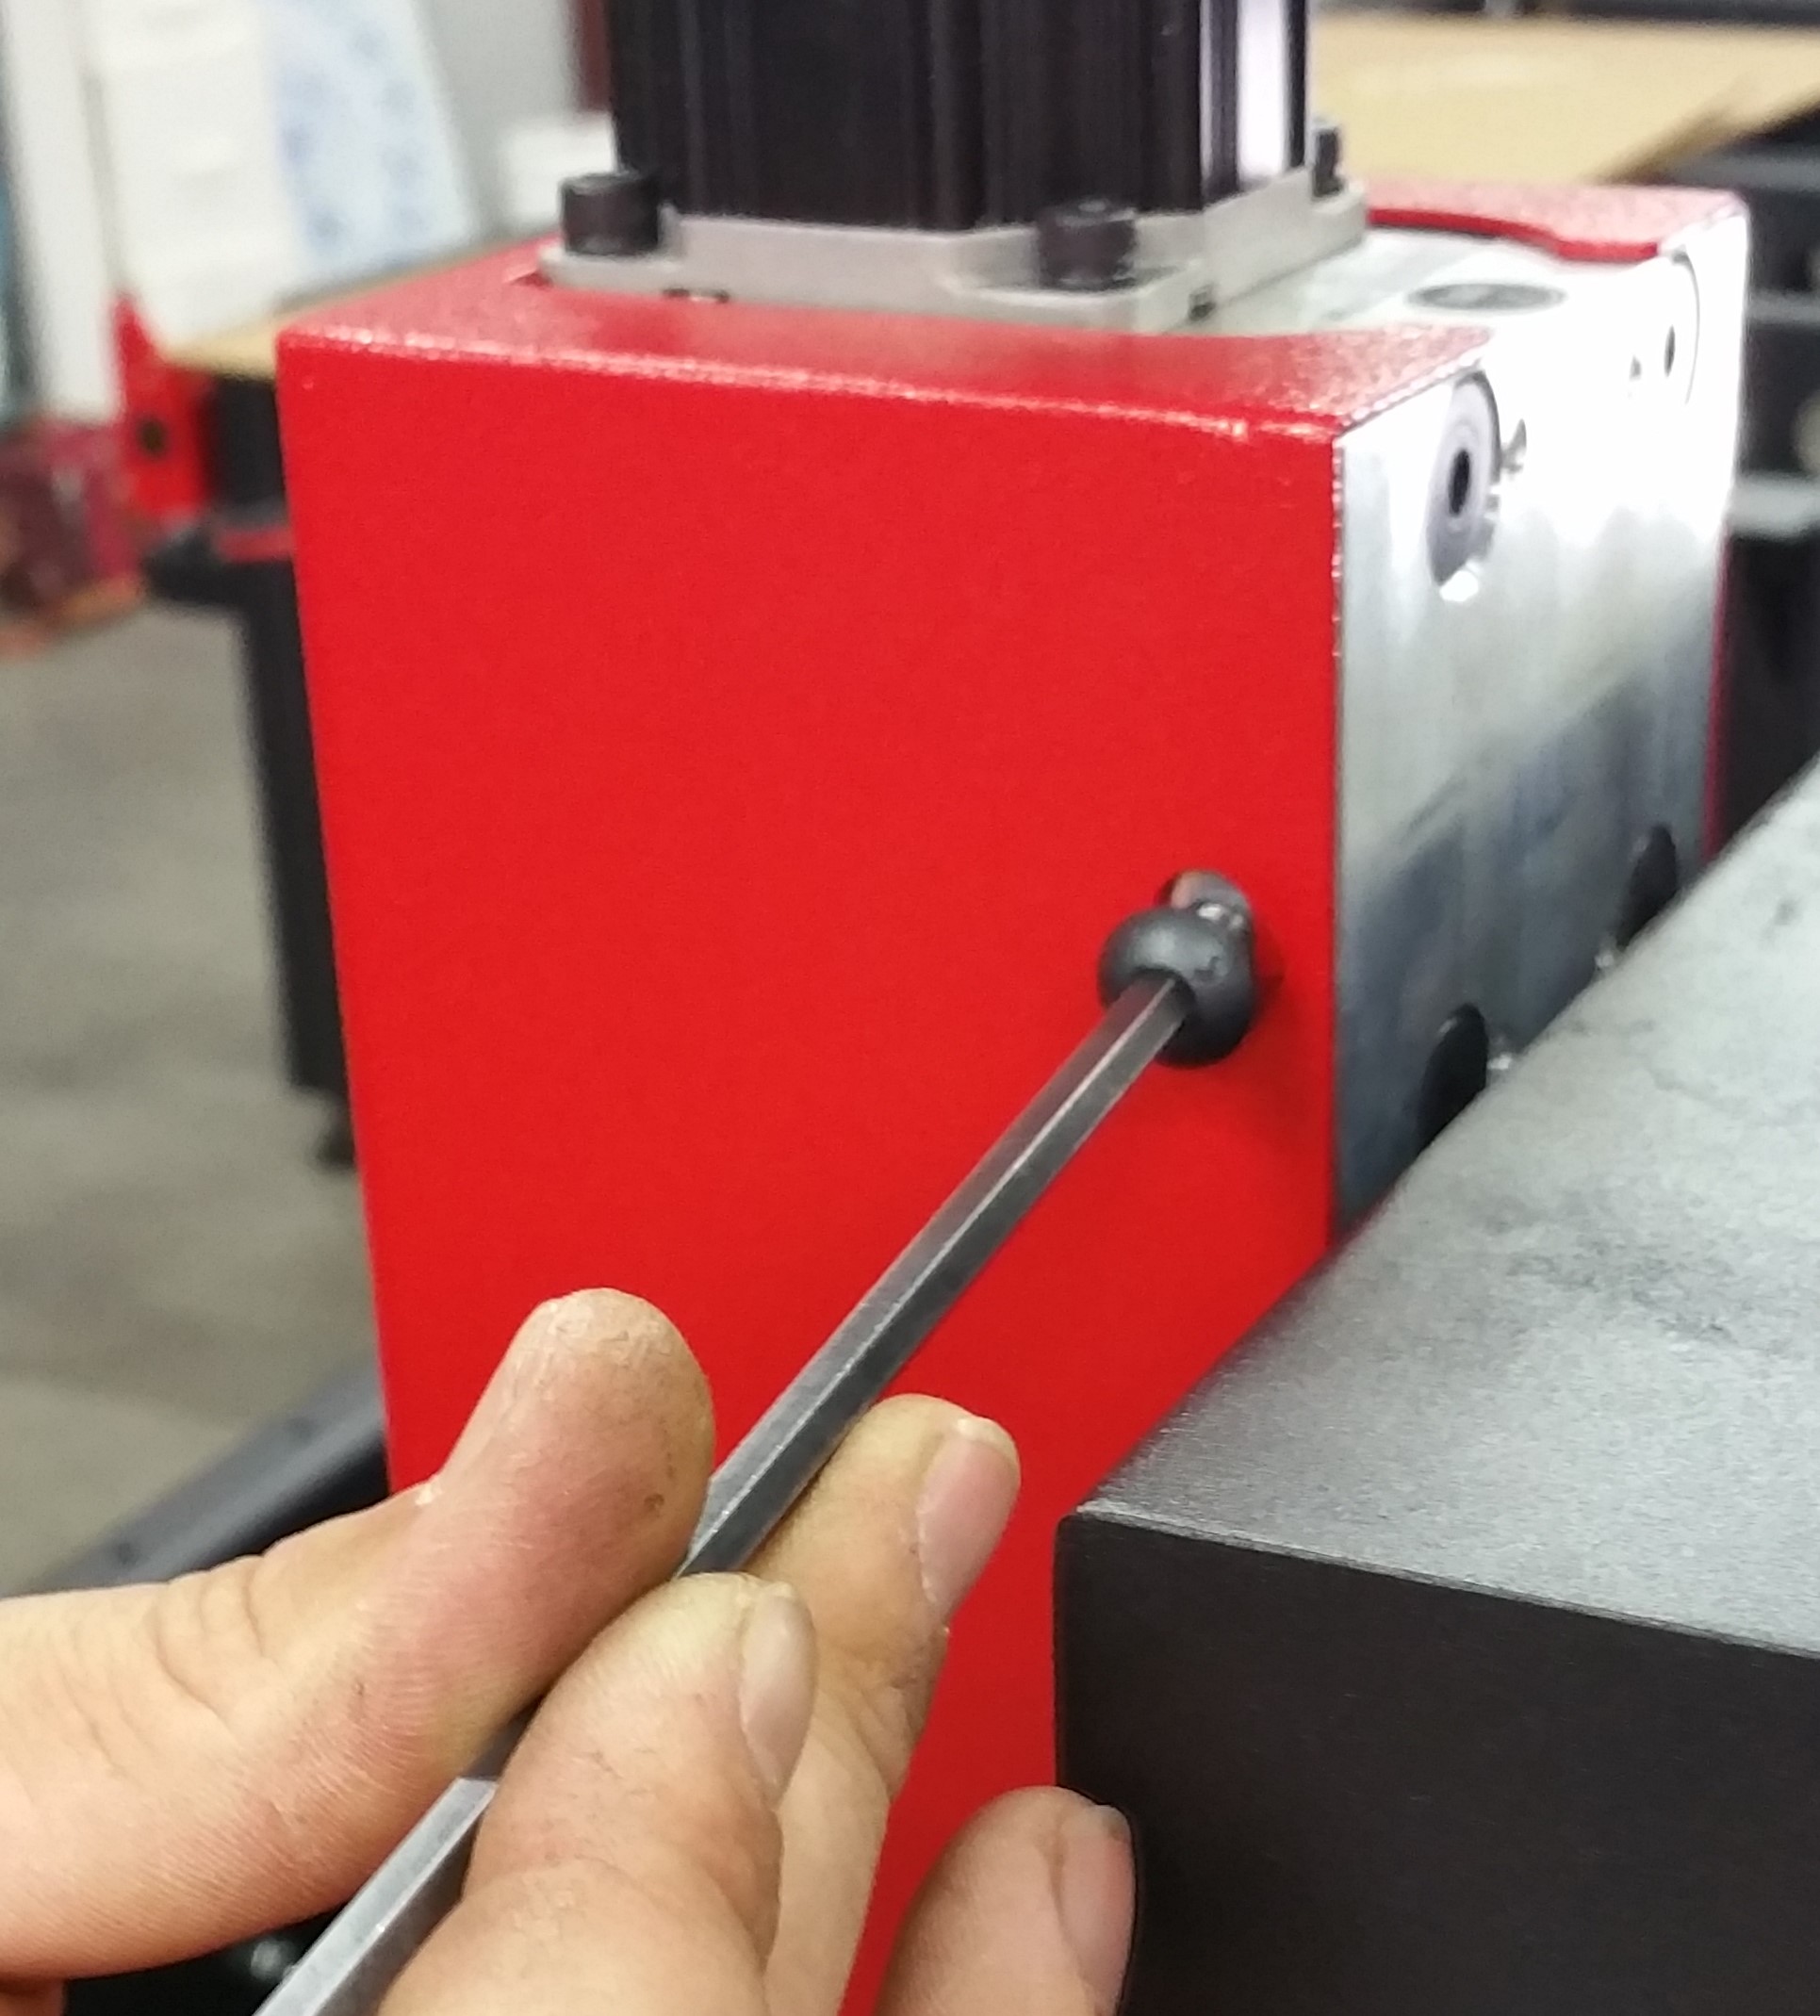
- Remove the two X-Axis cover bolts from the front of the X-Axis plate using a 4mm hex key.
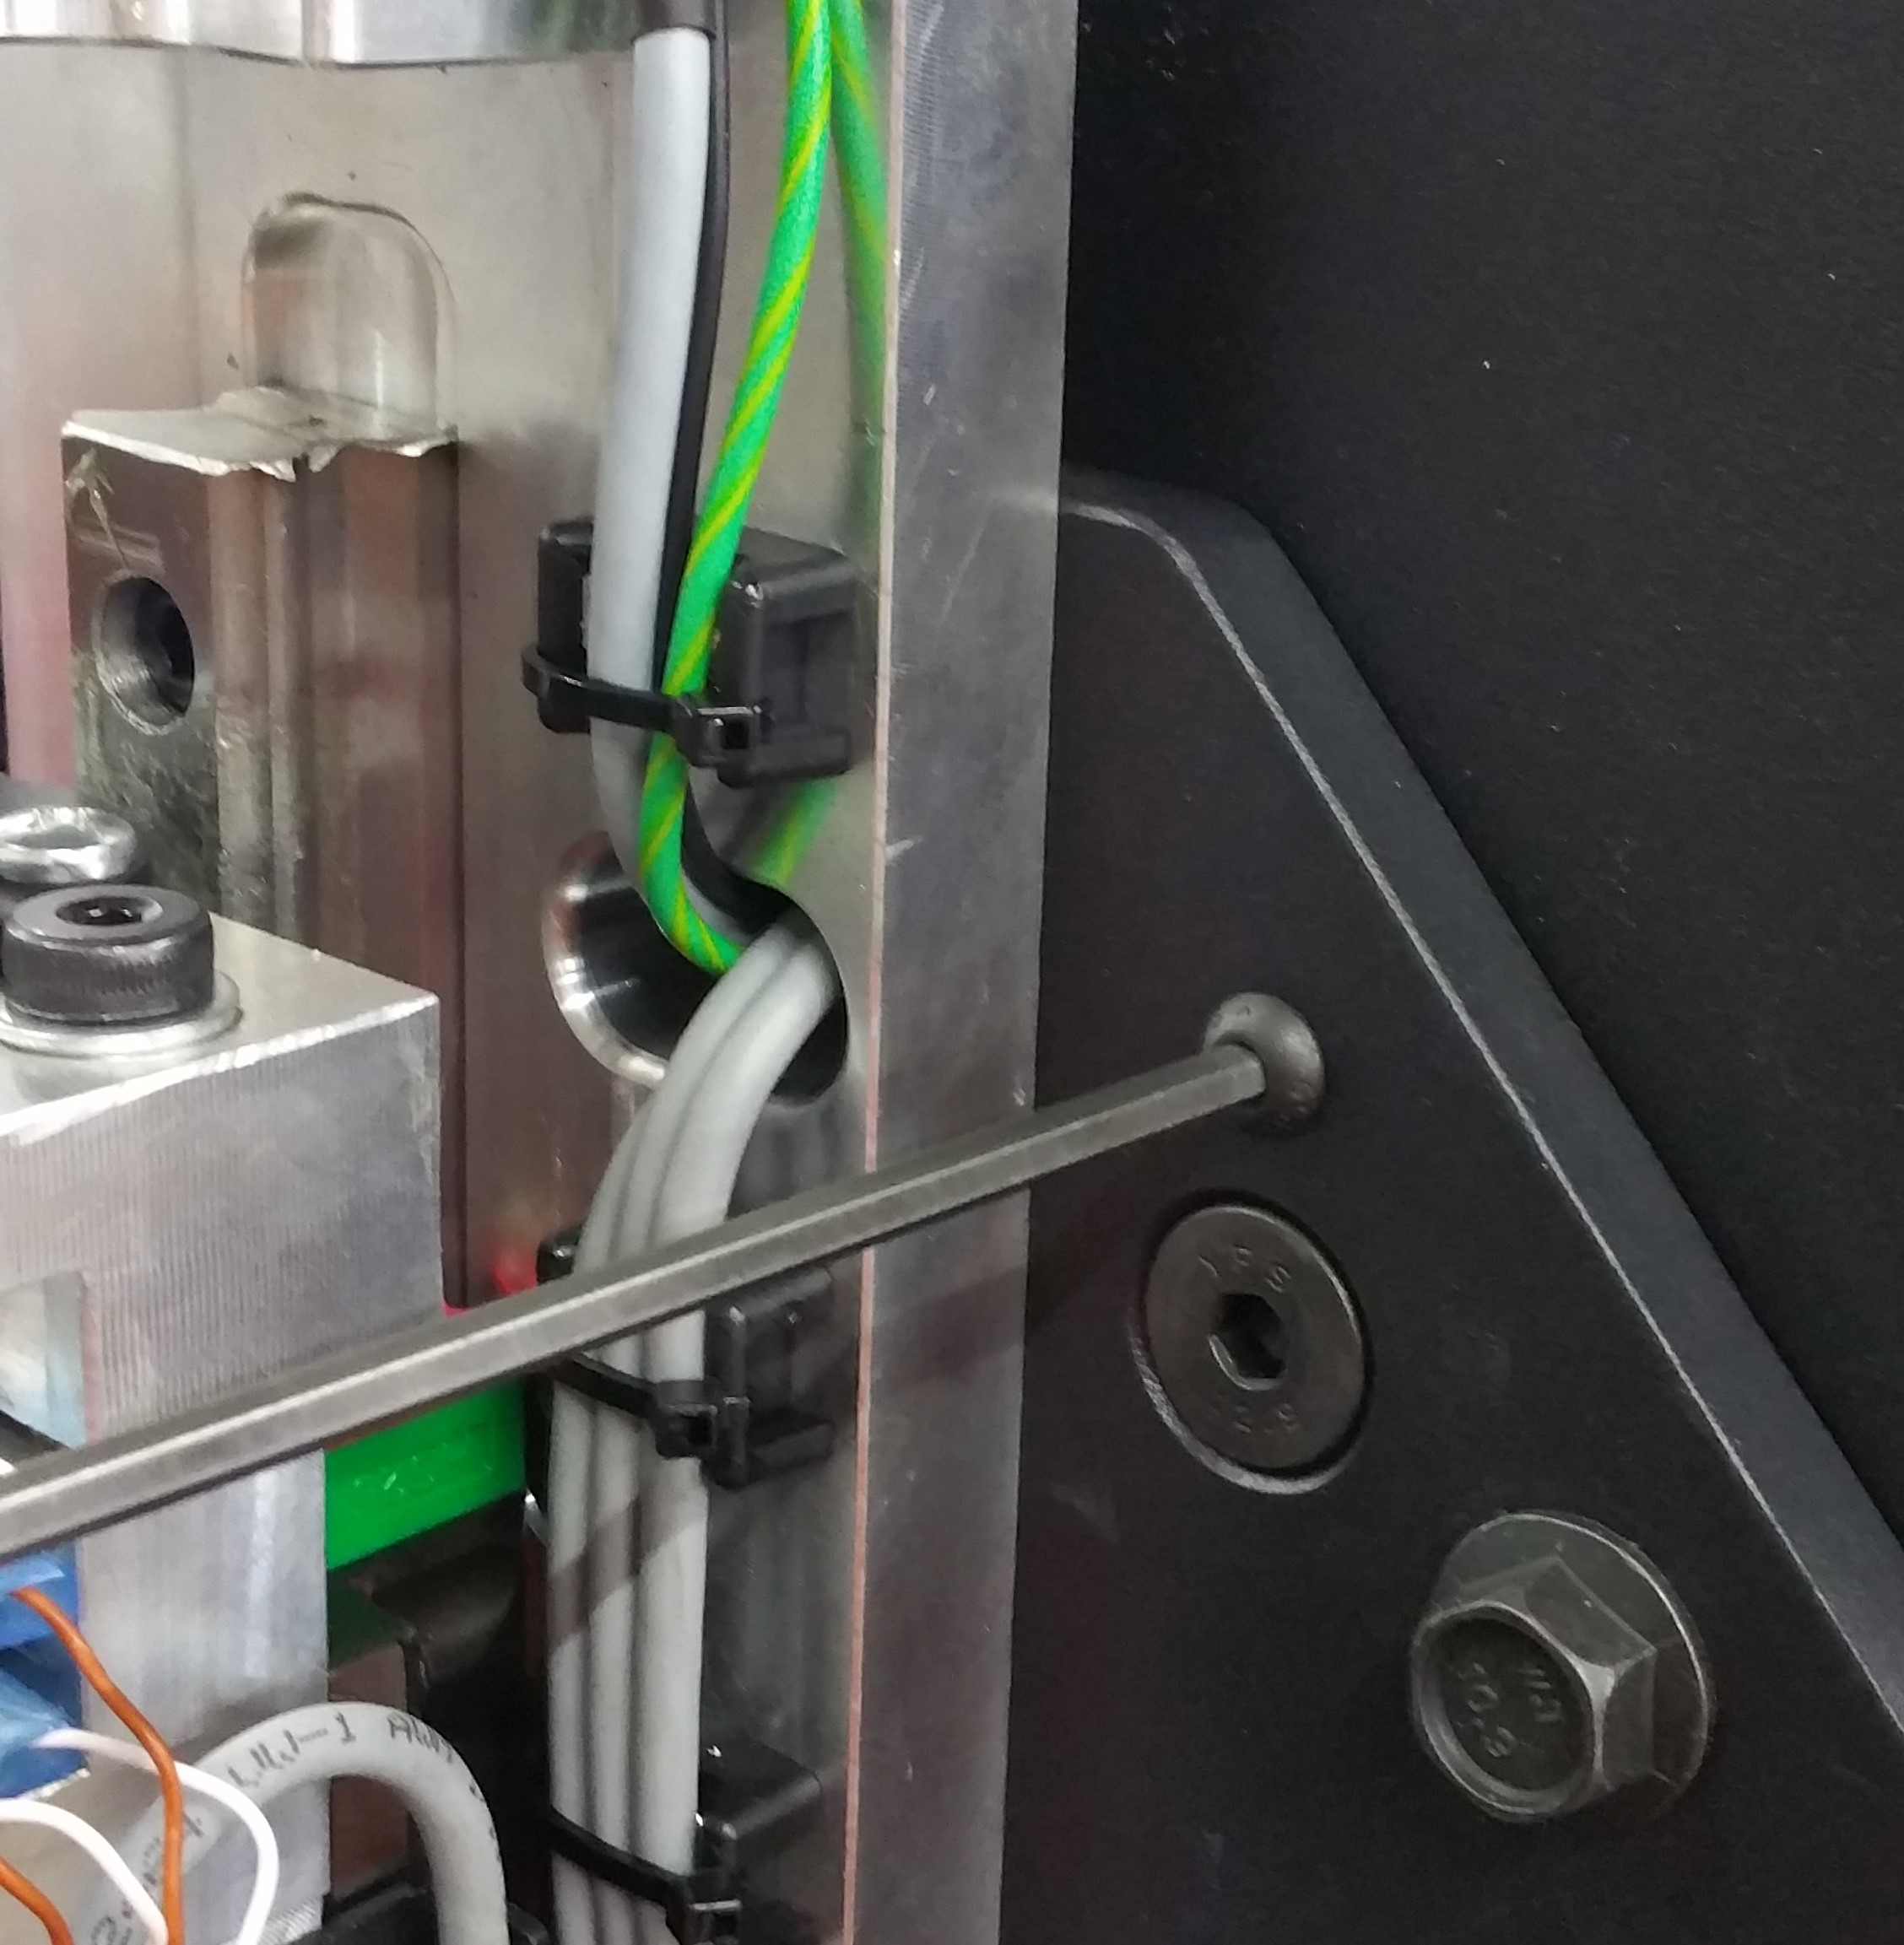
- Remove the rear X-Axis cover bolt using a 10mm wrench. Lift the X-Axis cover to remove.
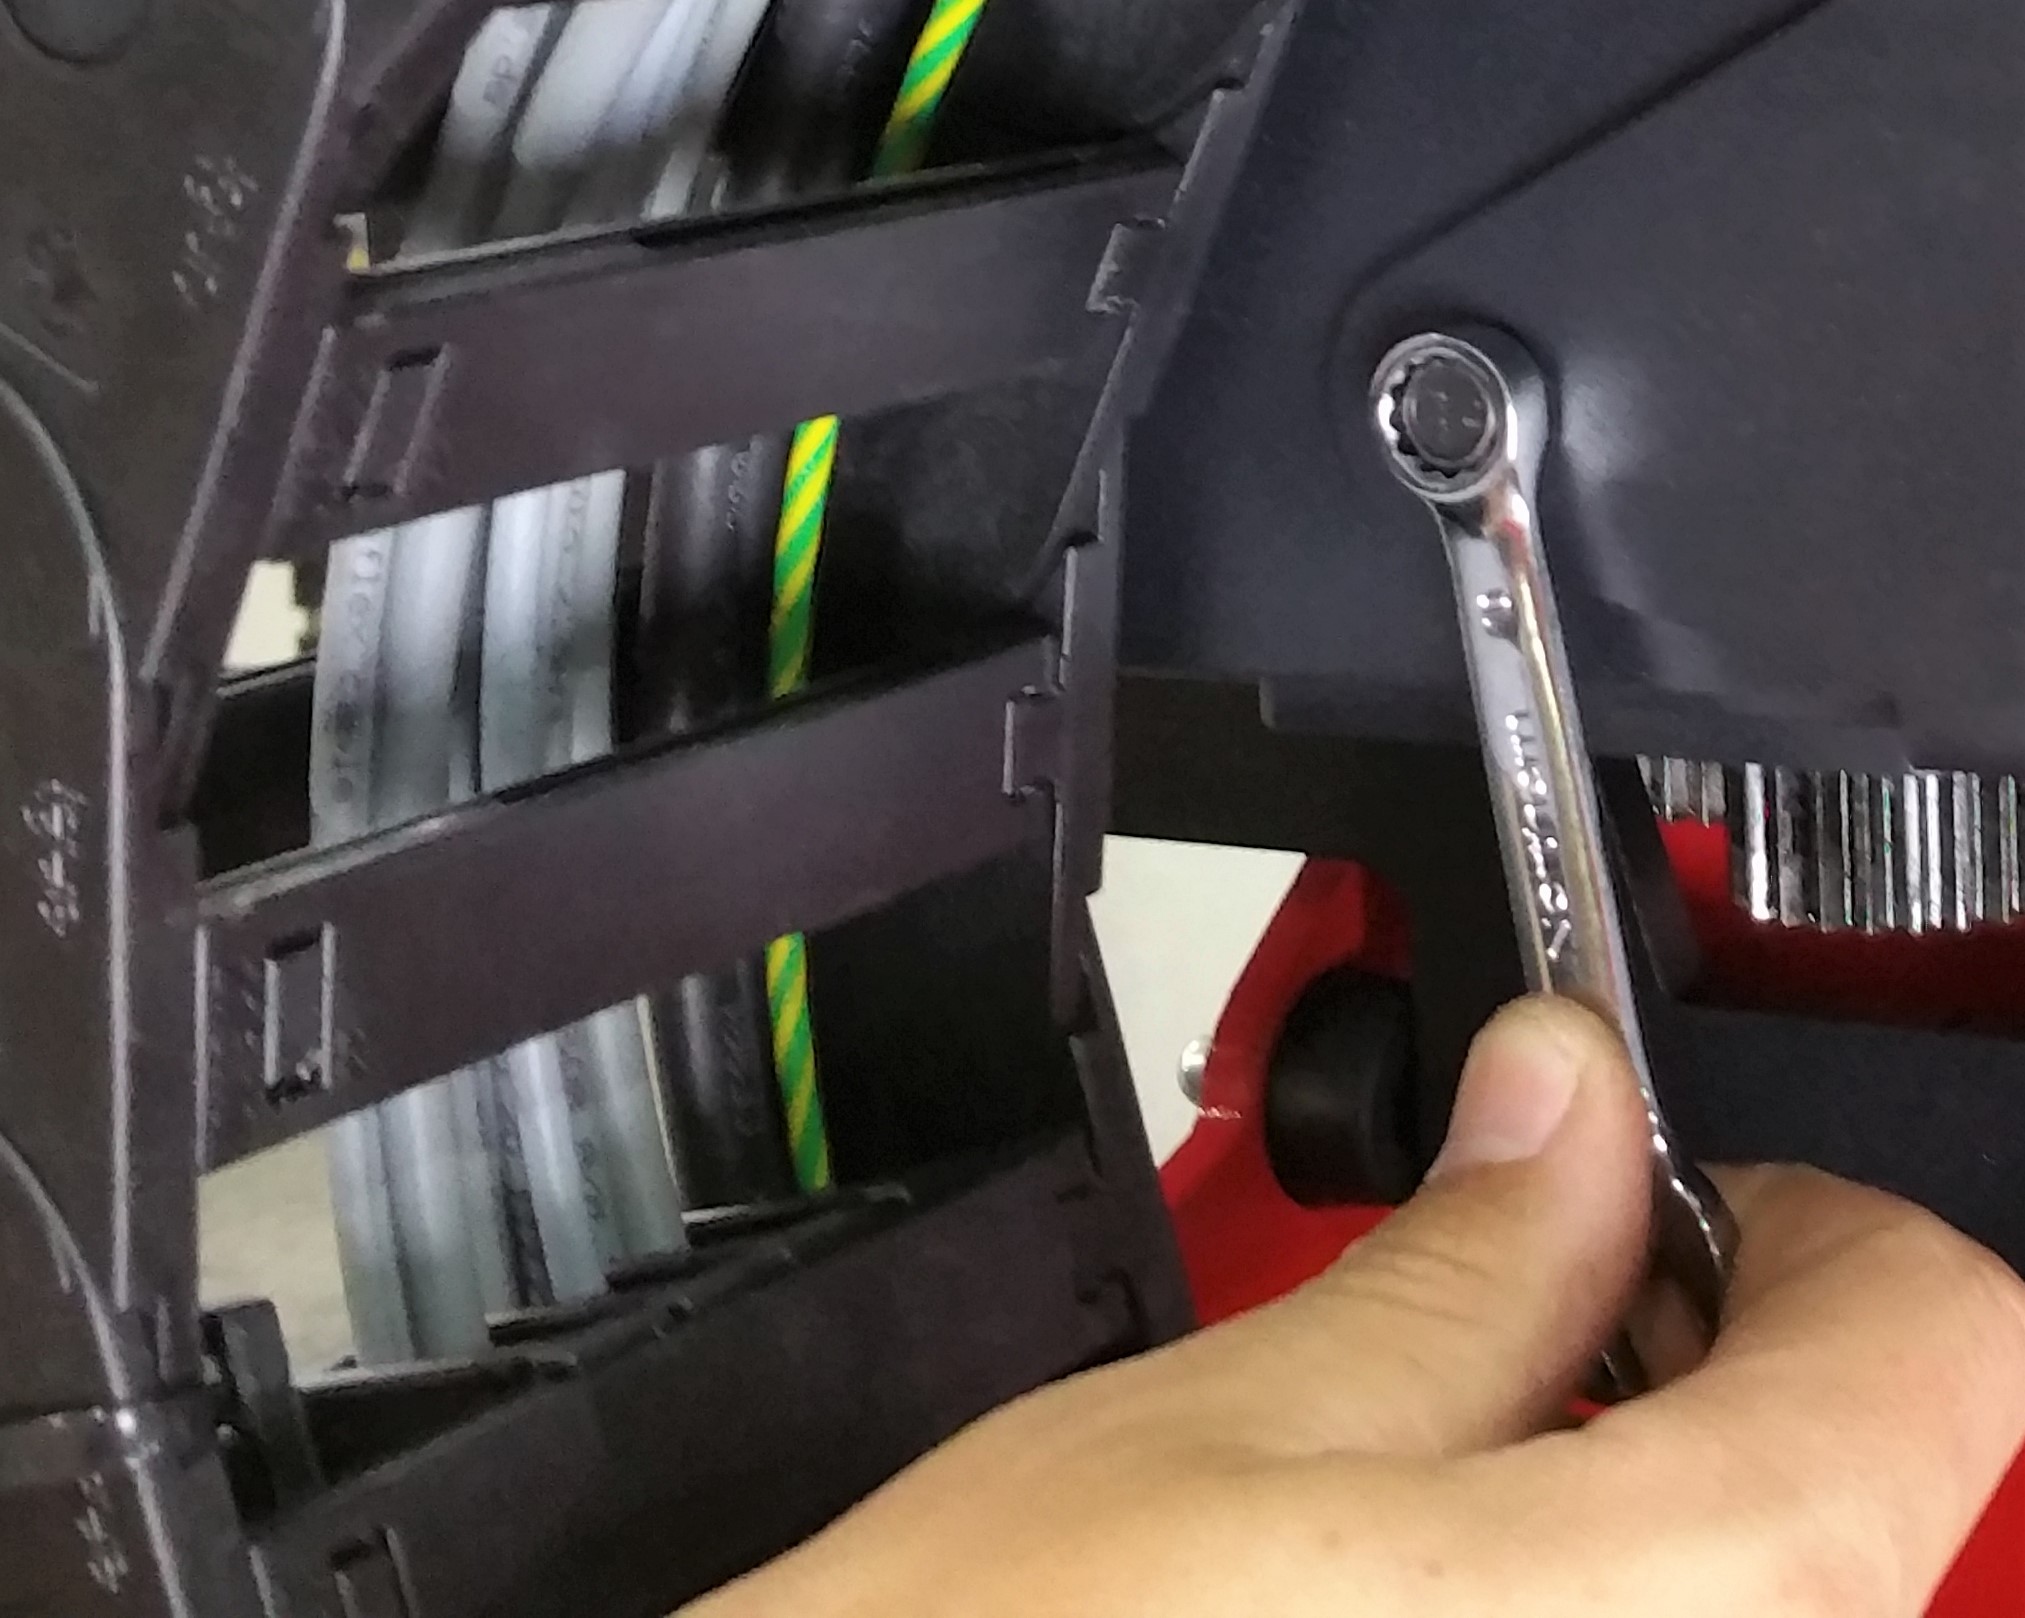
Remove Version 1 Hardware
- Remove the zip-tie attaching cables coming from PCB3 to the clamp in the Z-Axis head. Be very careful not to nick any cable insulation.
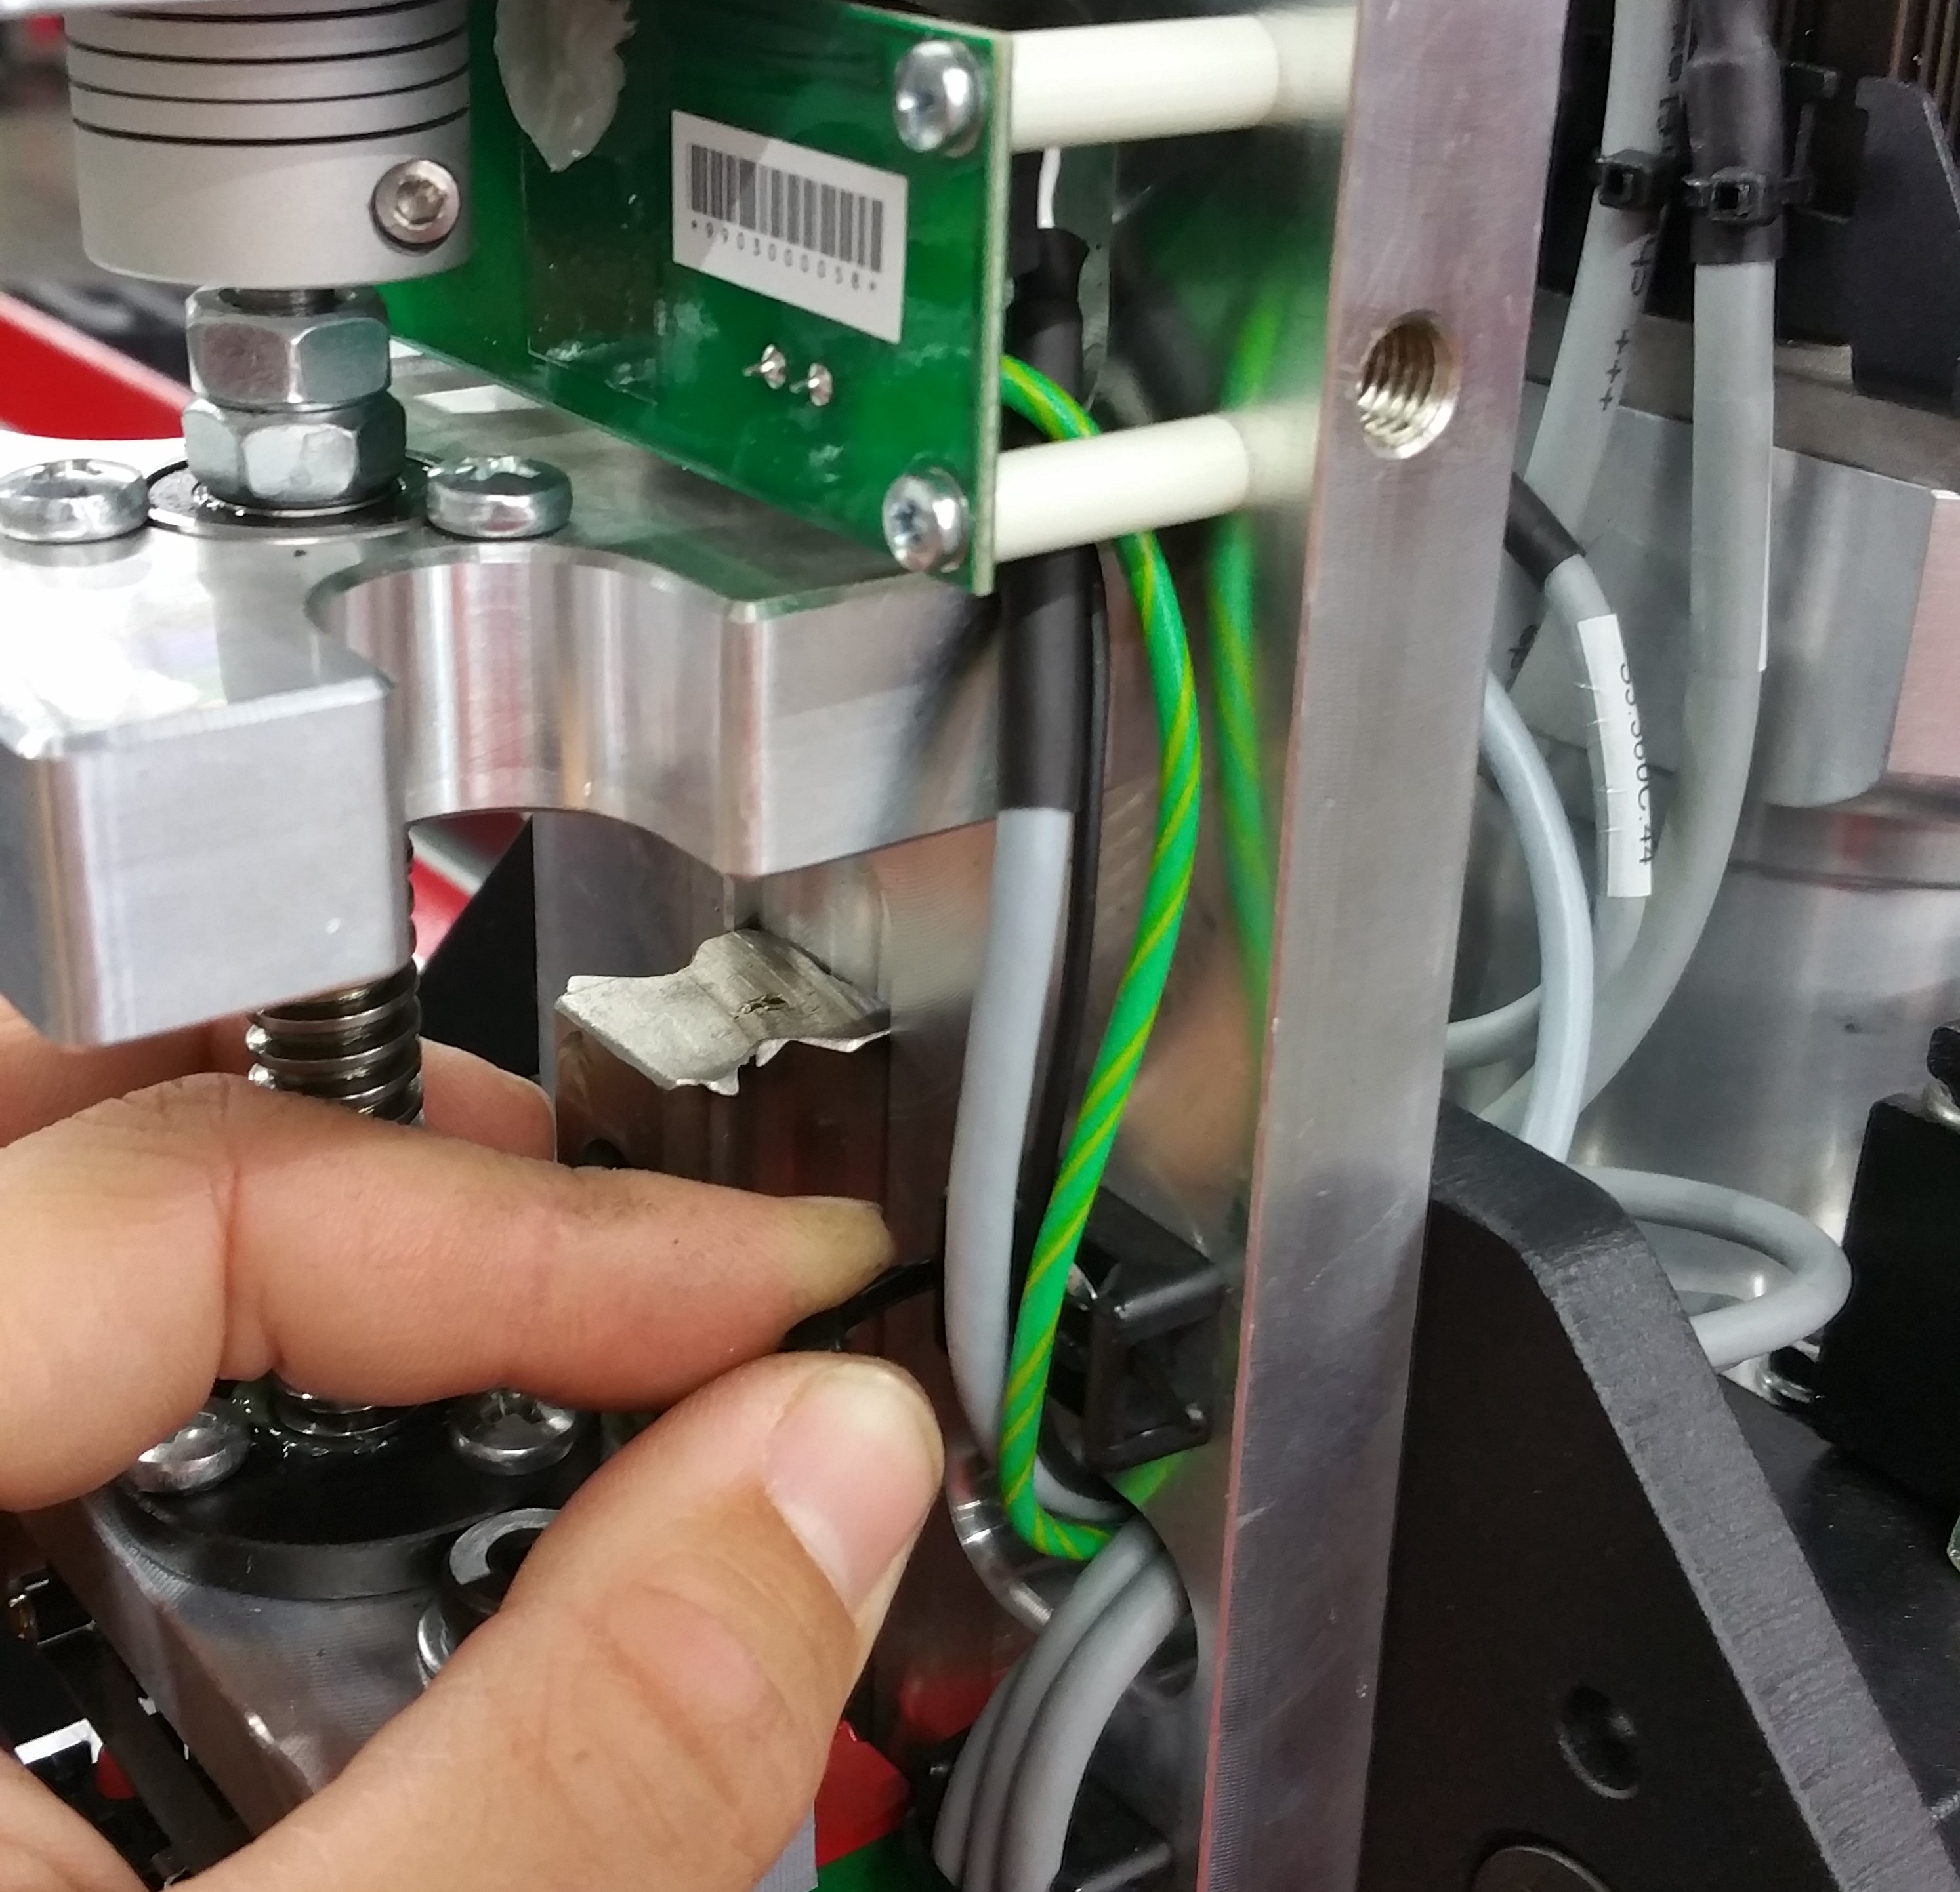
- If your machine is equipped with metal clamps, loosen them now to allow the cables to pass through.
- Remove the zip-tie grouping cables behind the X-Axis plate.
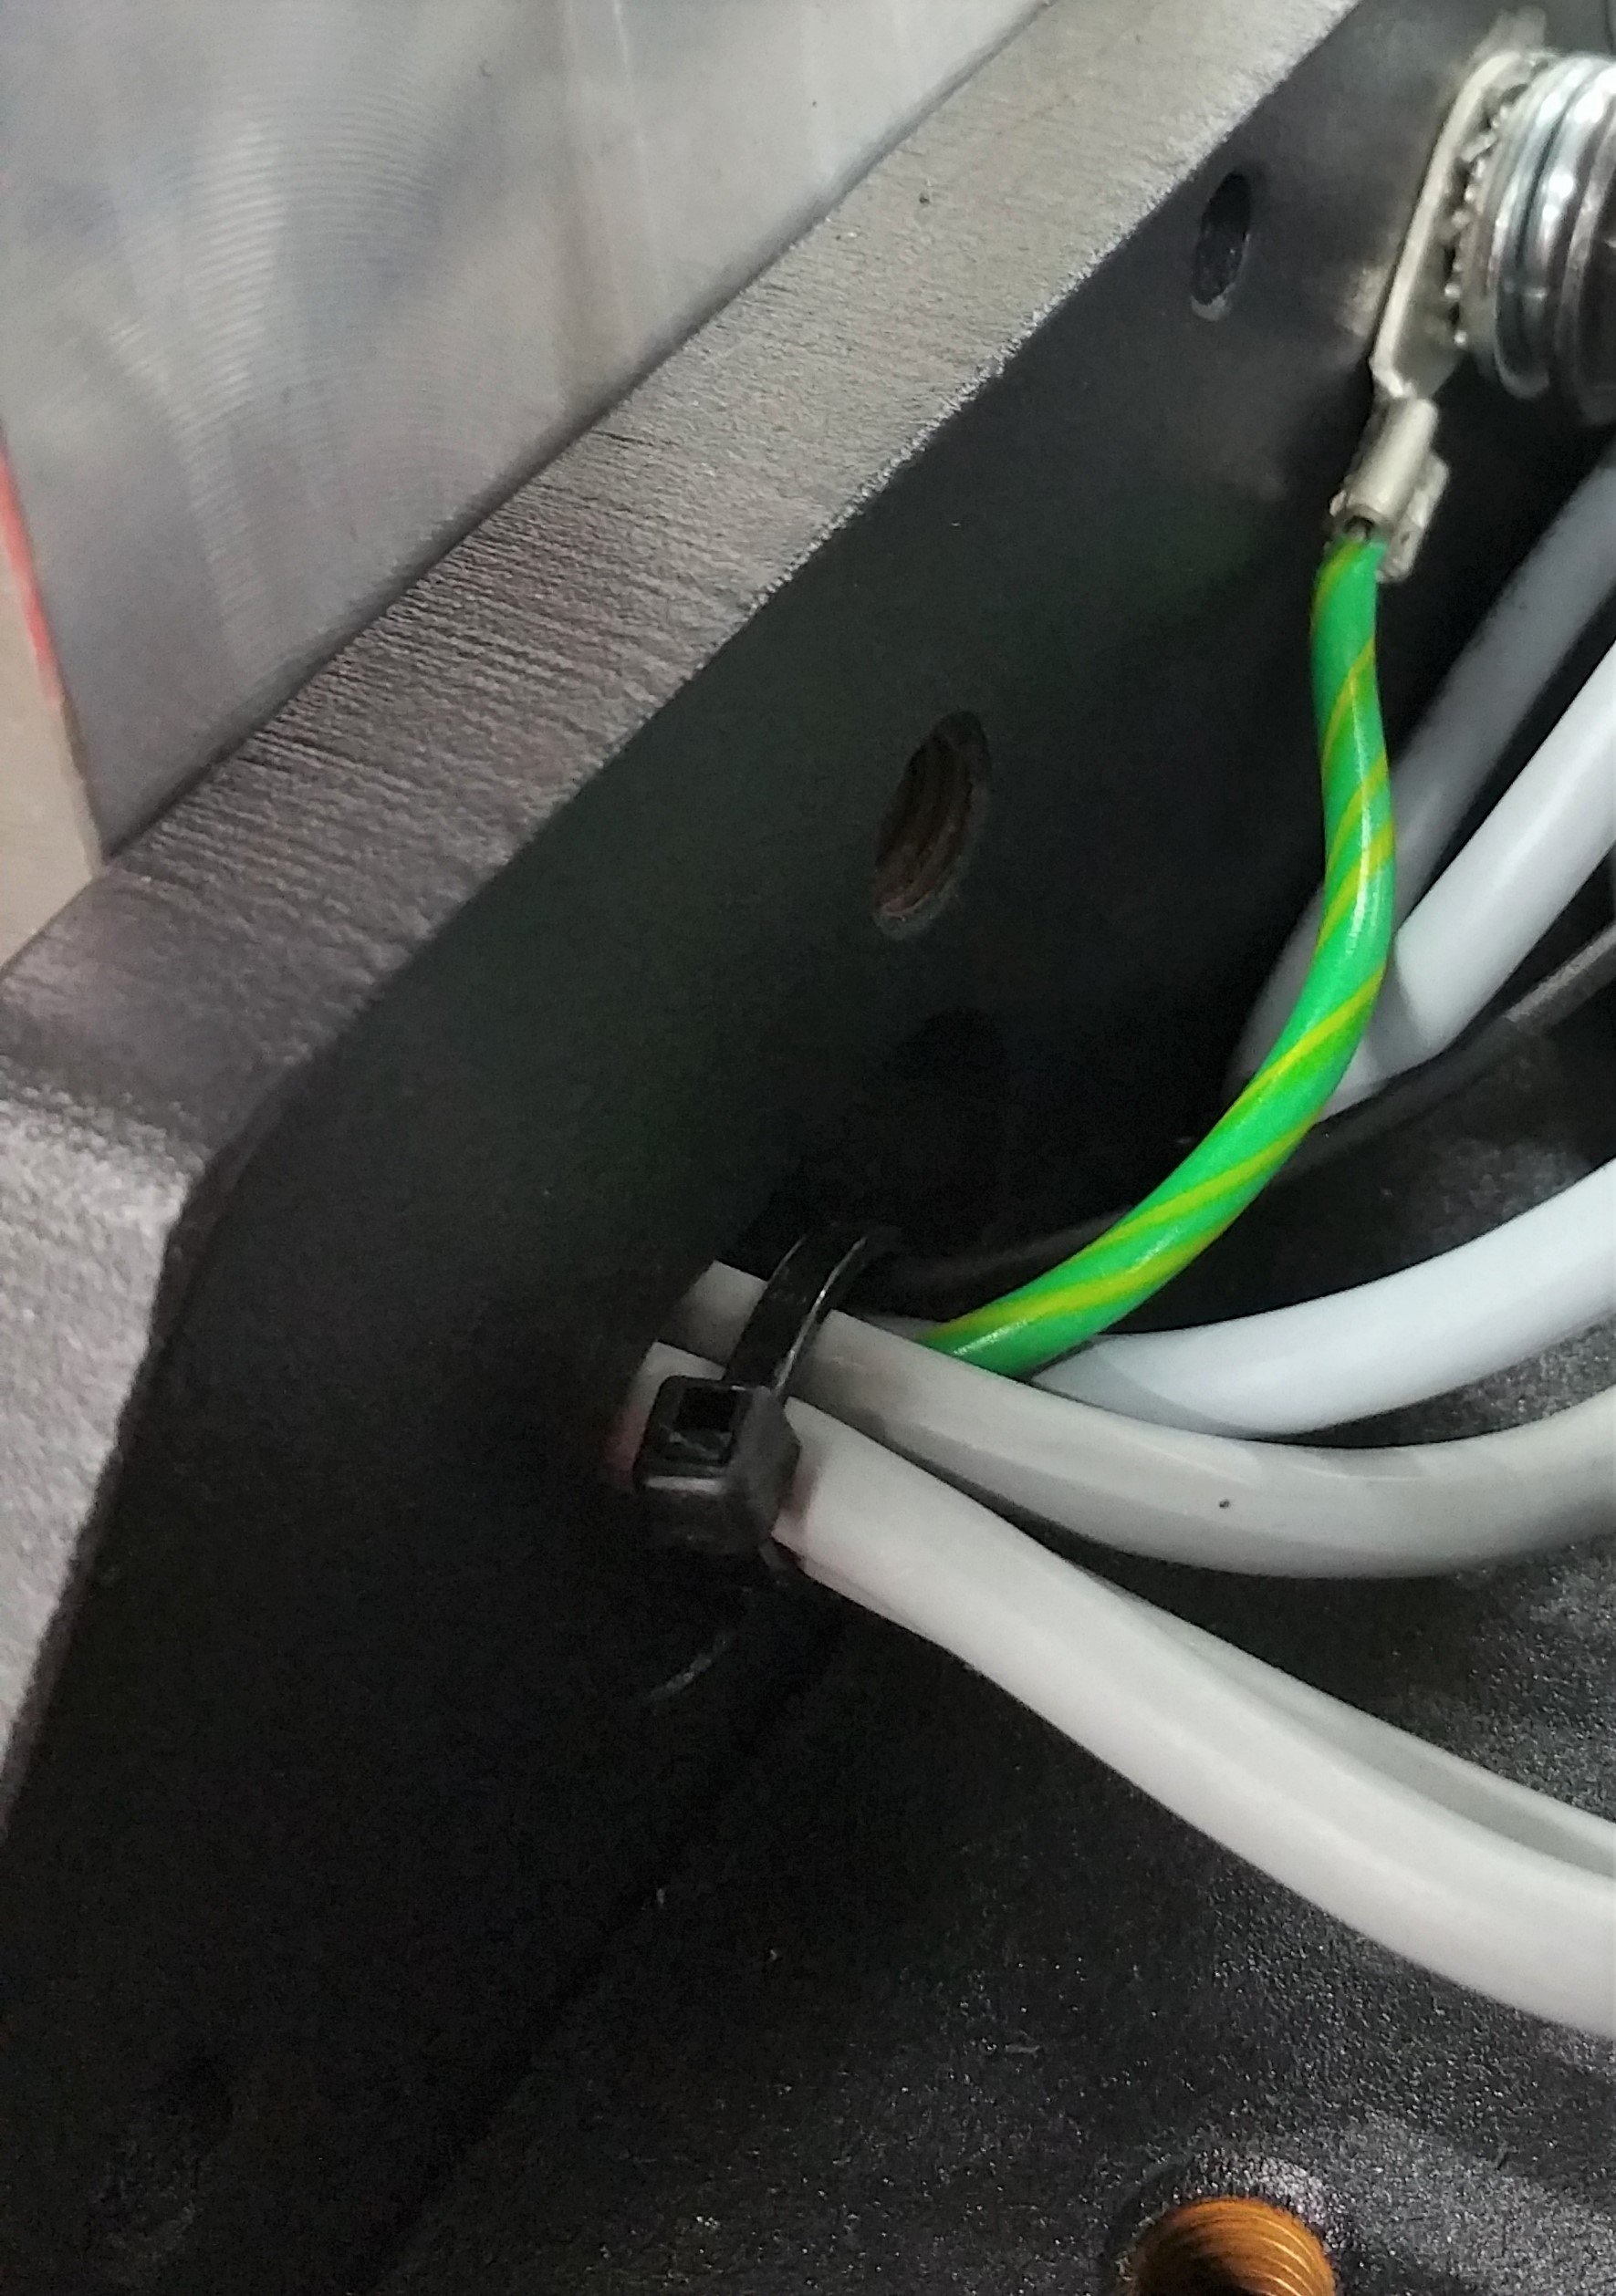
- Unplug S3.331C.XX from the mating cable, and gently pull the cable pigtail through the X-Axis plate.
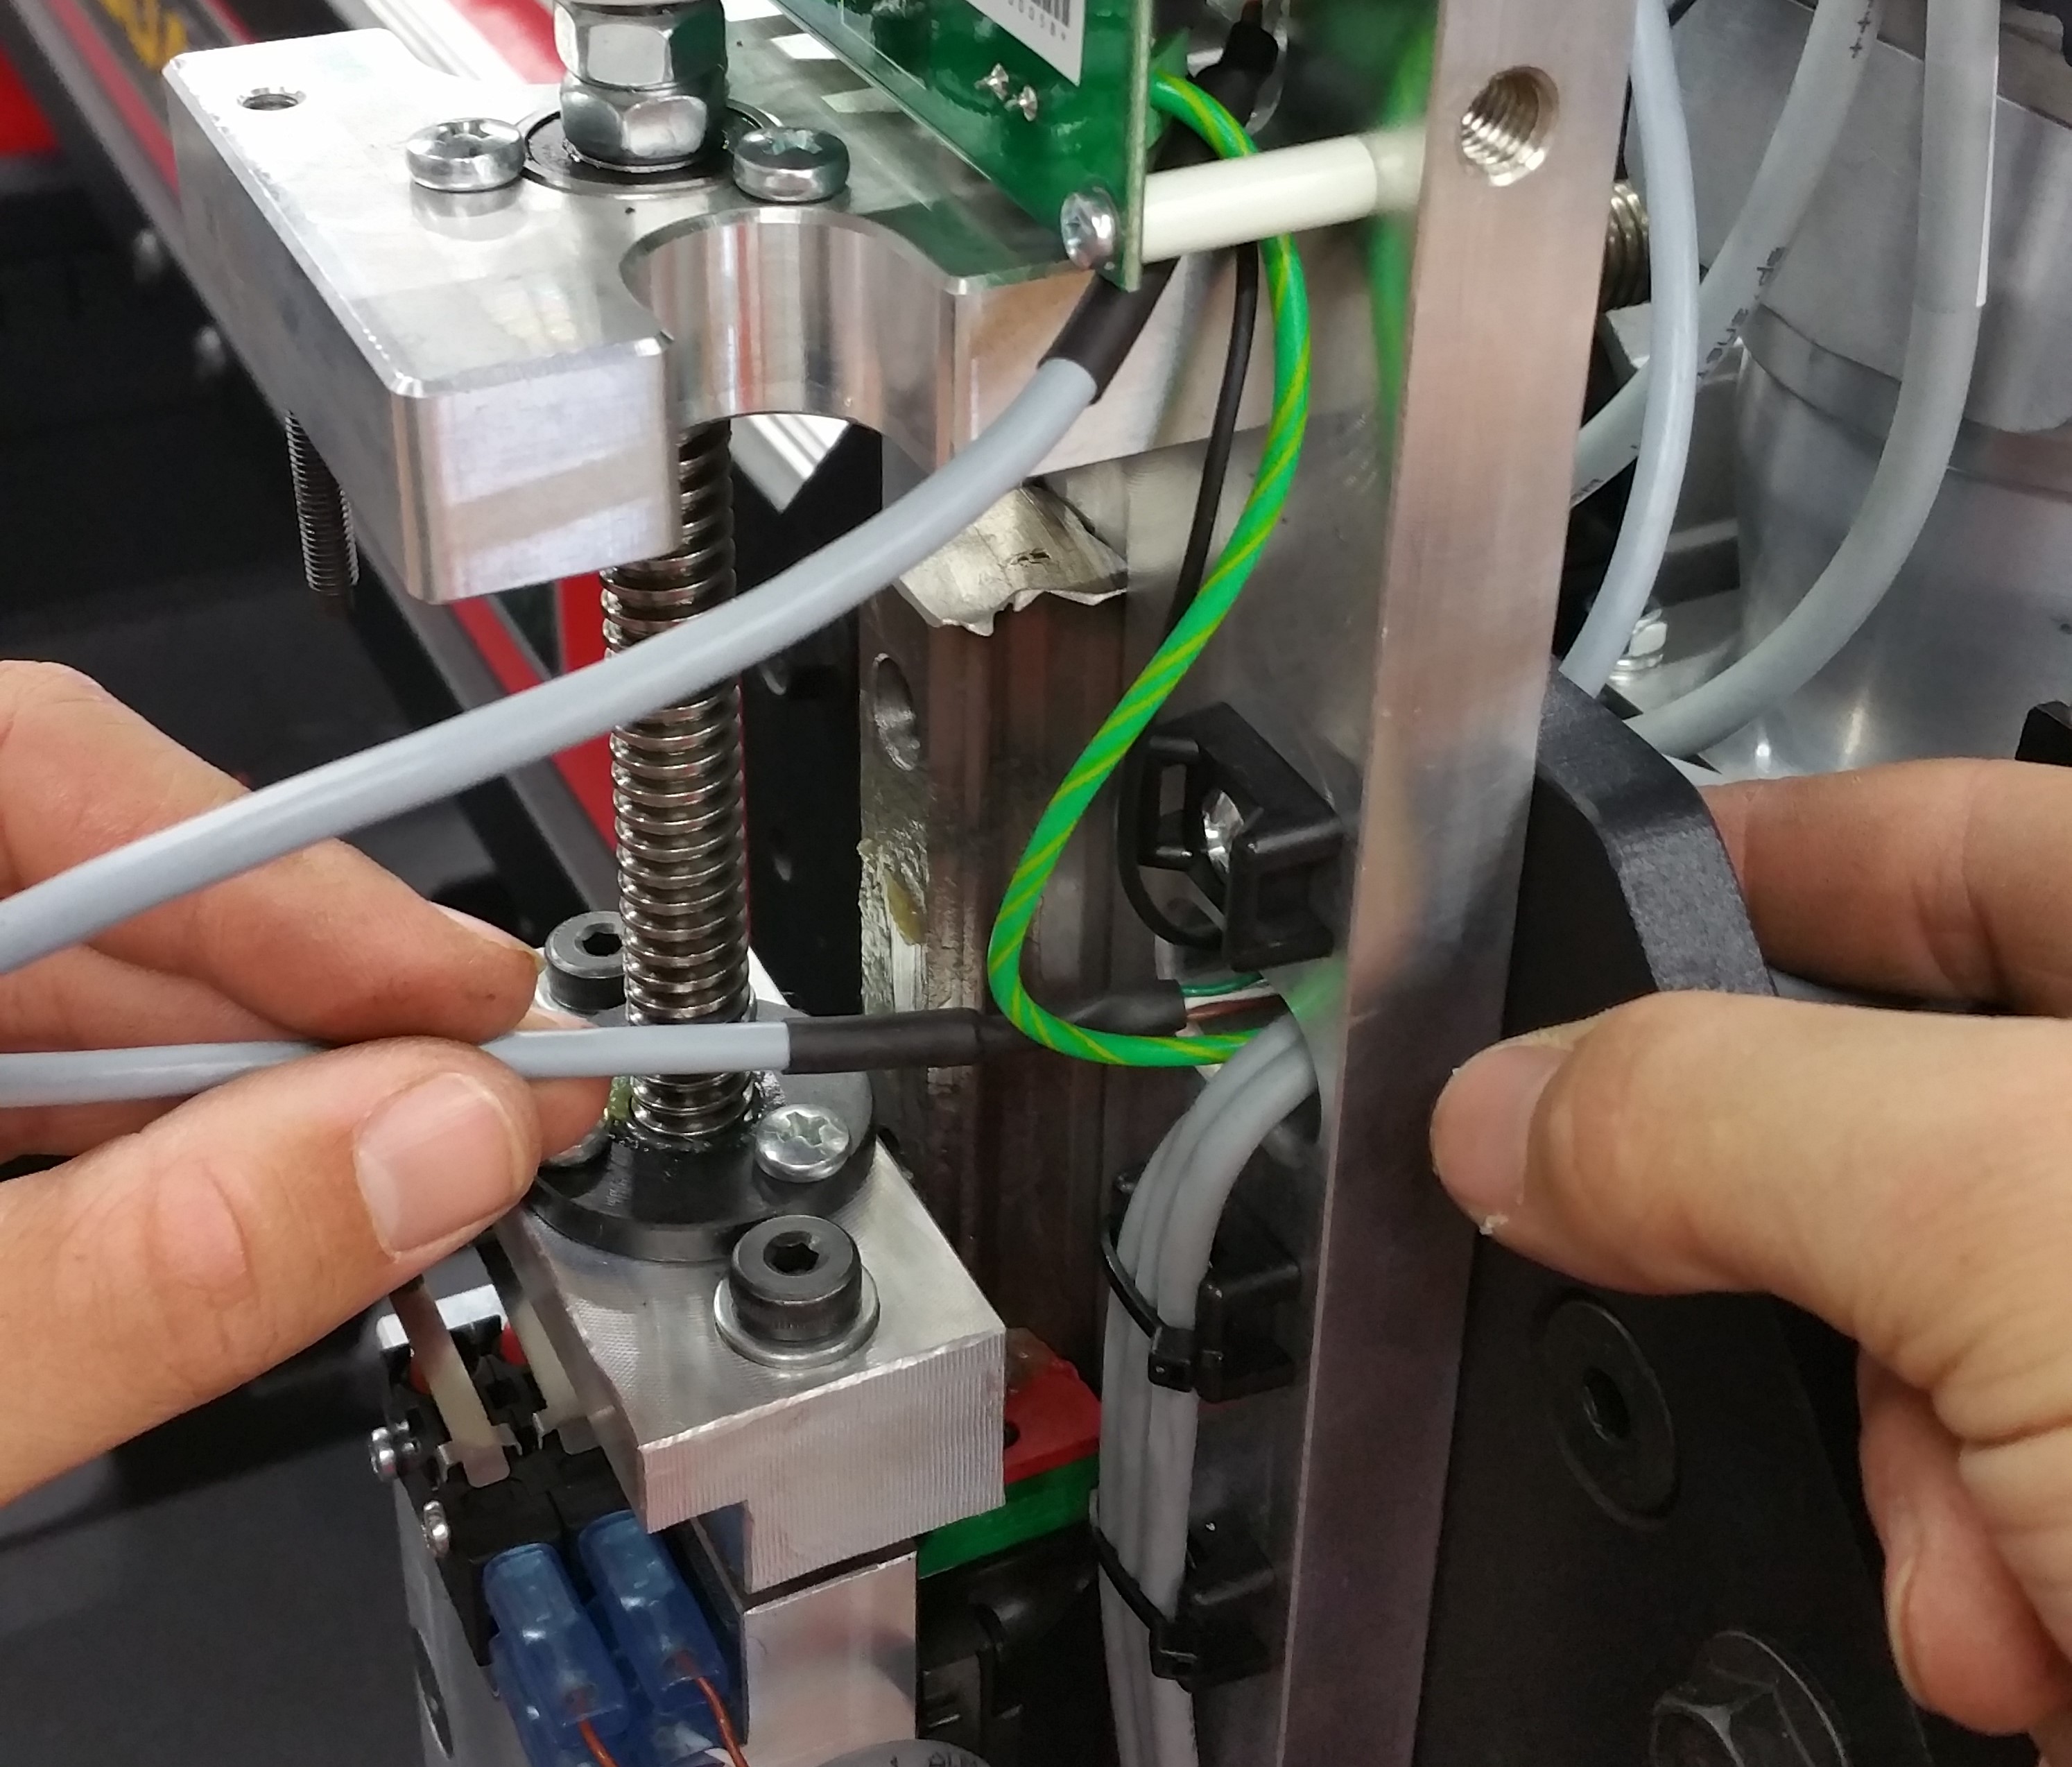
- Use a small phillips head screw driver to remove the four (4) M3 screws mounting the Version 1 PCB3. If your machine is equipped with long M3 screws, the standoffs will fall out. Discard these spacers and long screws.
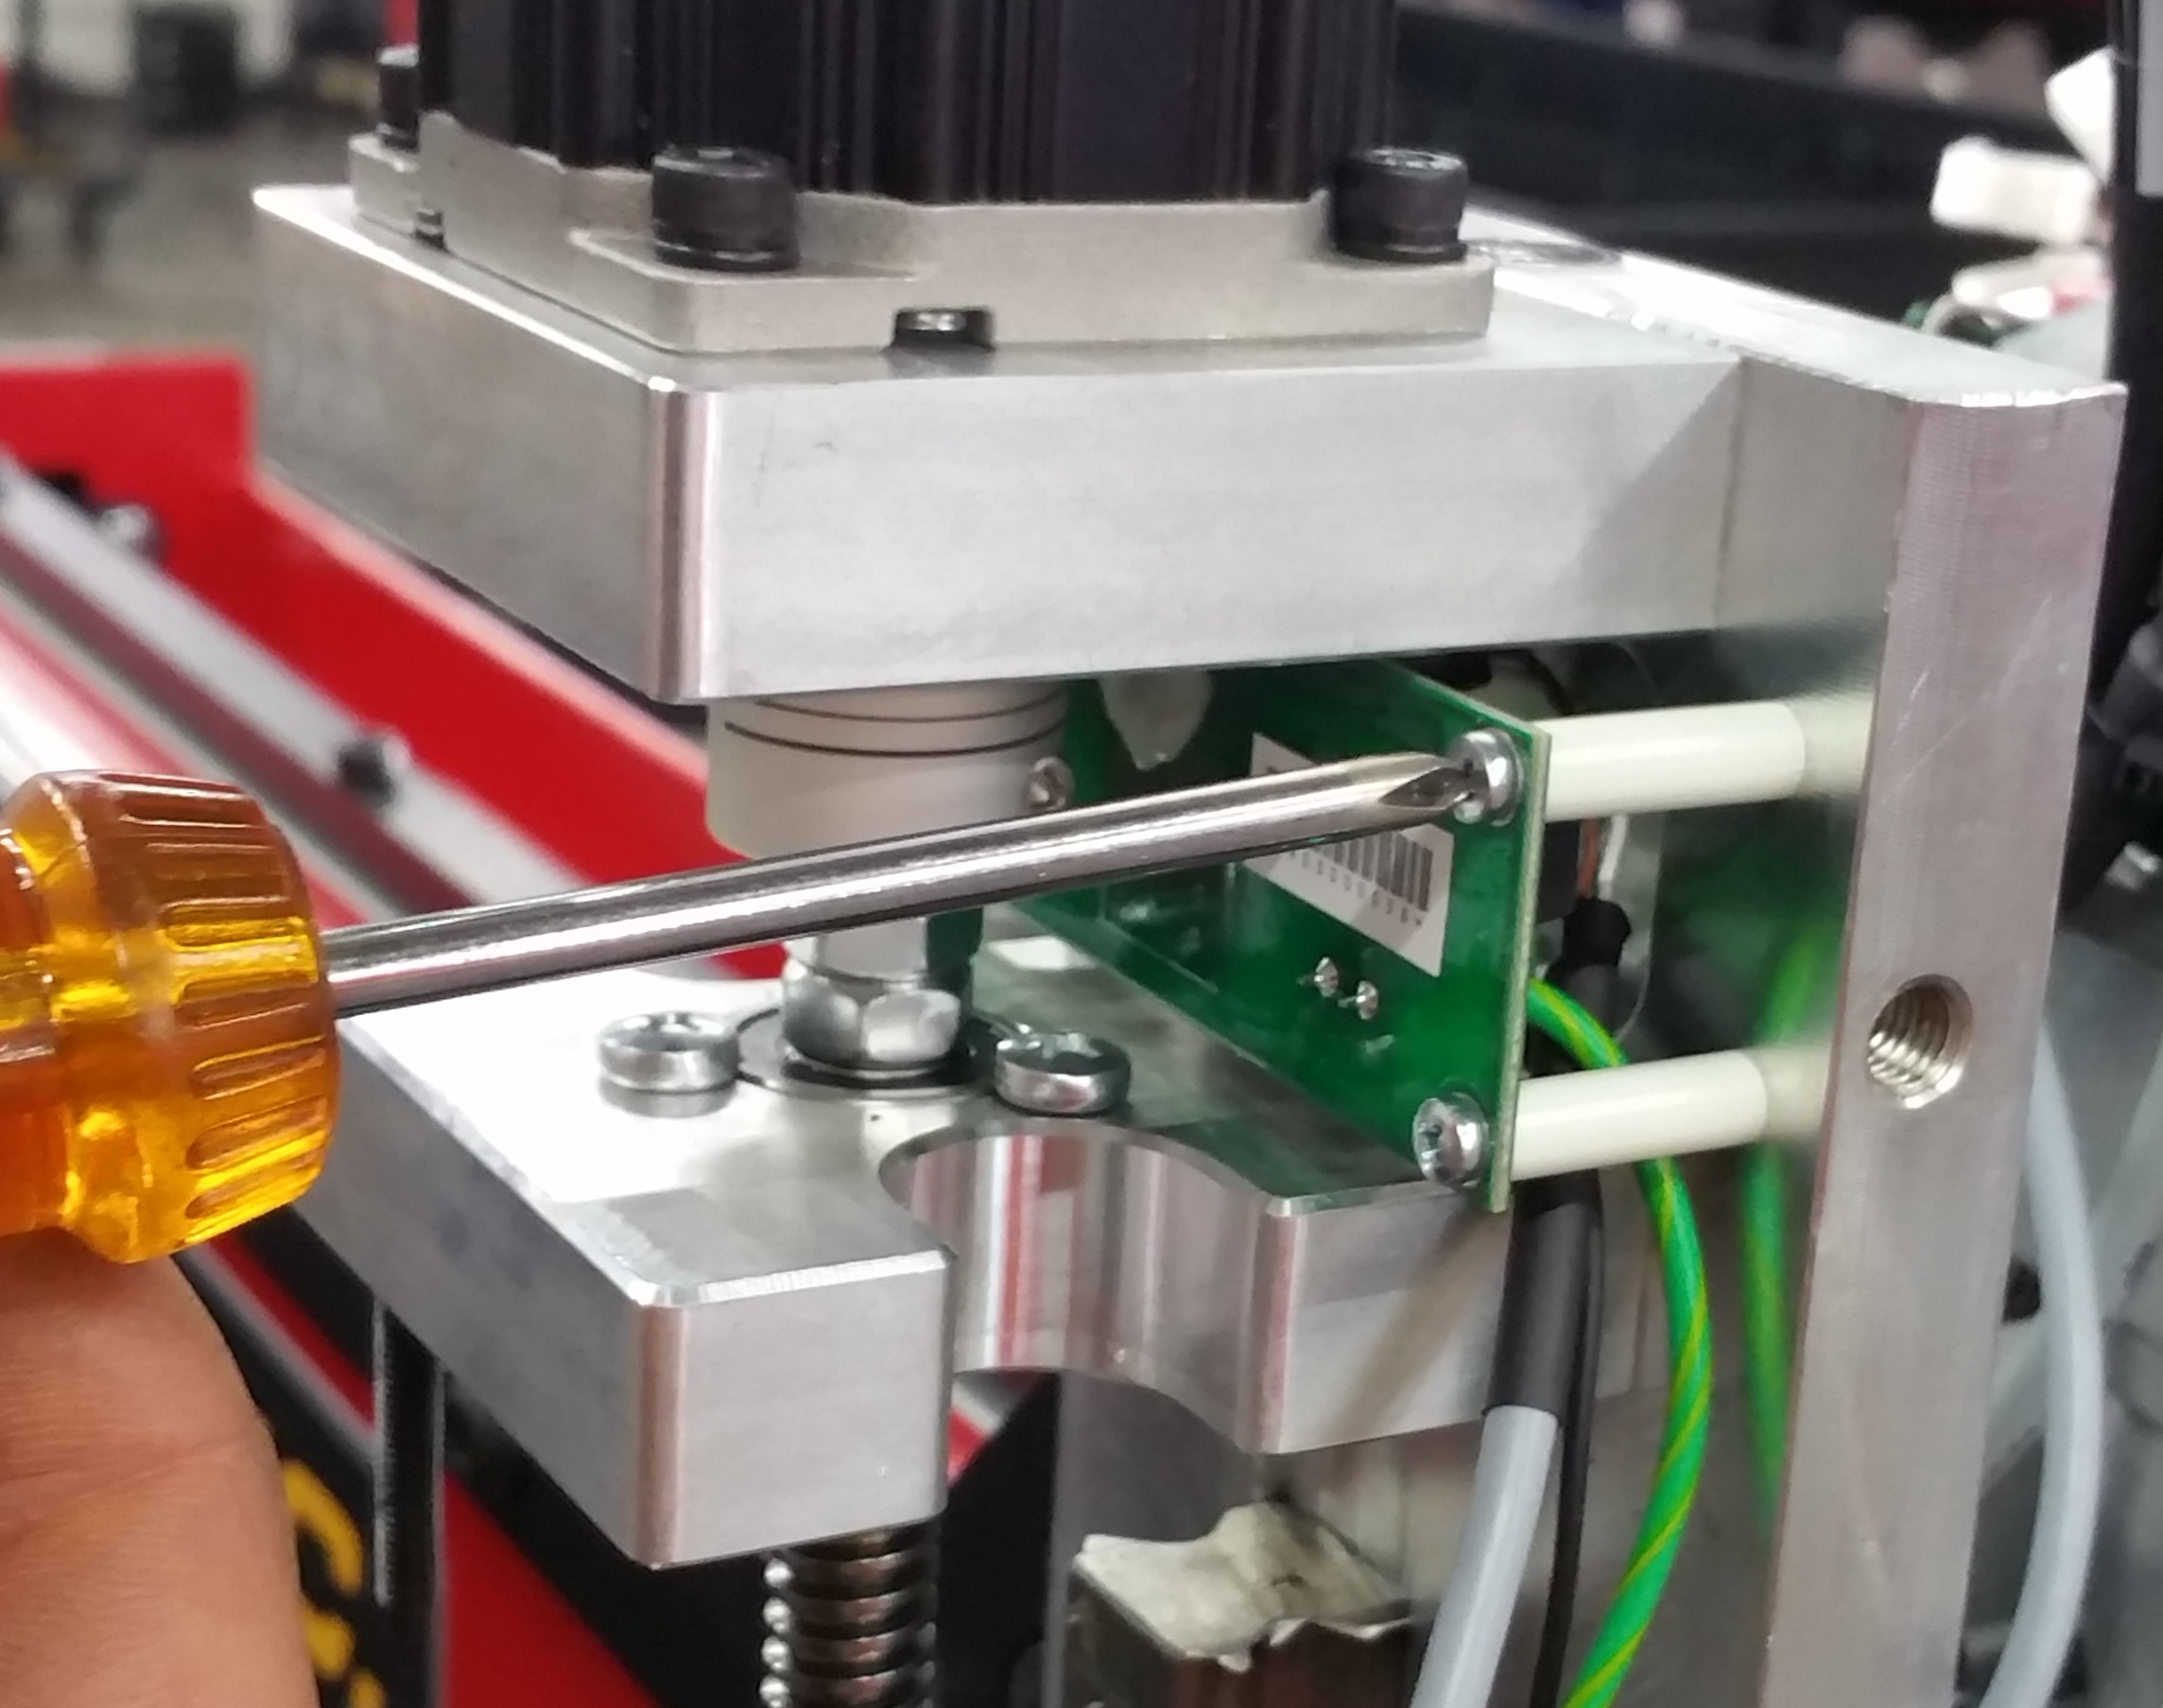
- Slide PCB3 to the right torward the cable hole to gain access to the connectors on the top of the board.
- Remove both the BLACK ohmic probe wire, and the GREEN/YELLOW ground reference wire by pressing the small tabs to release the spring clamp and gently pulling each wire.
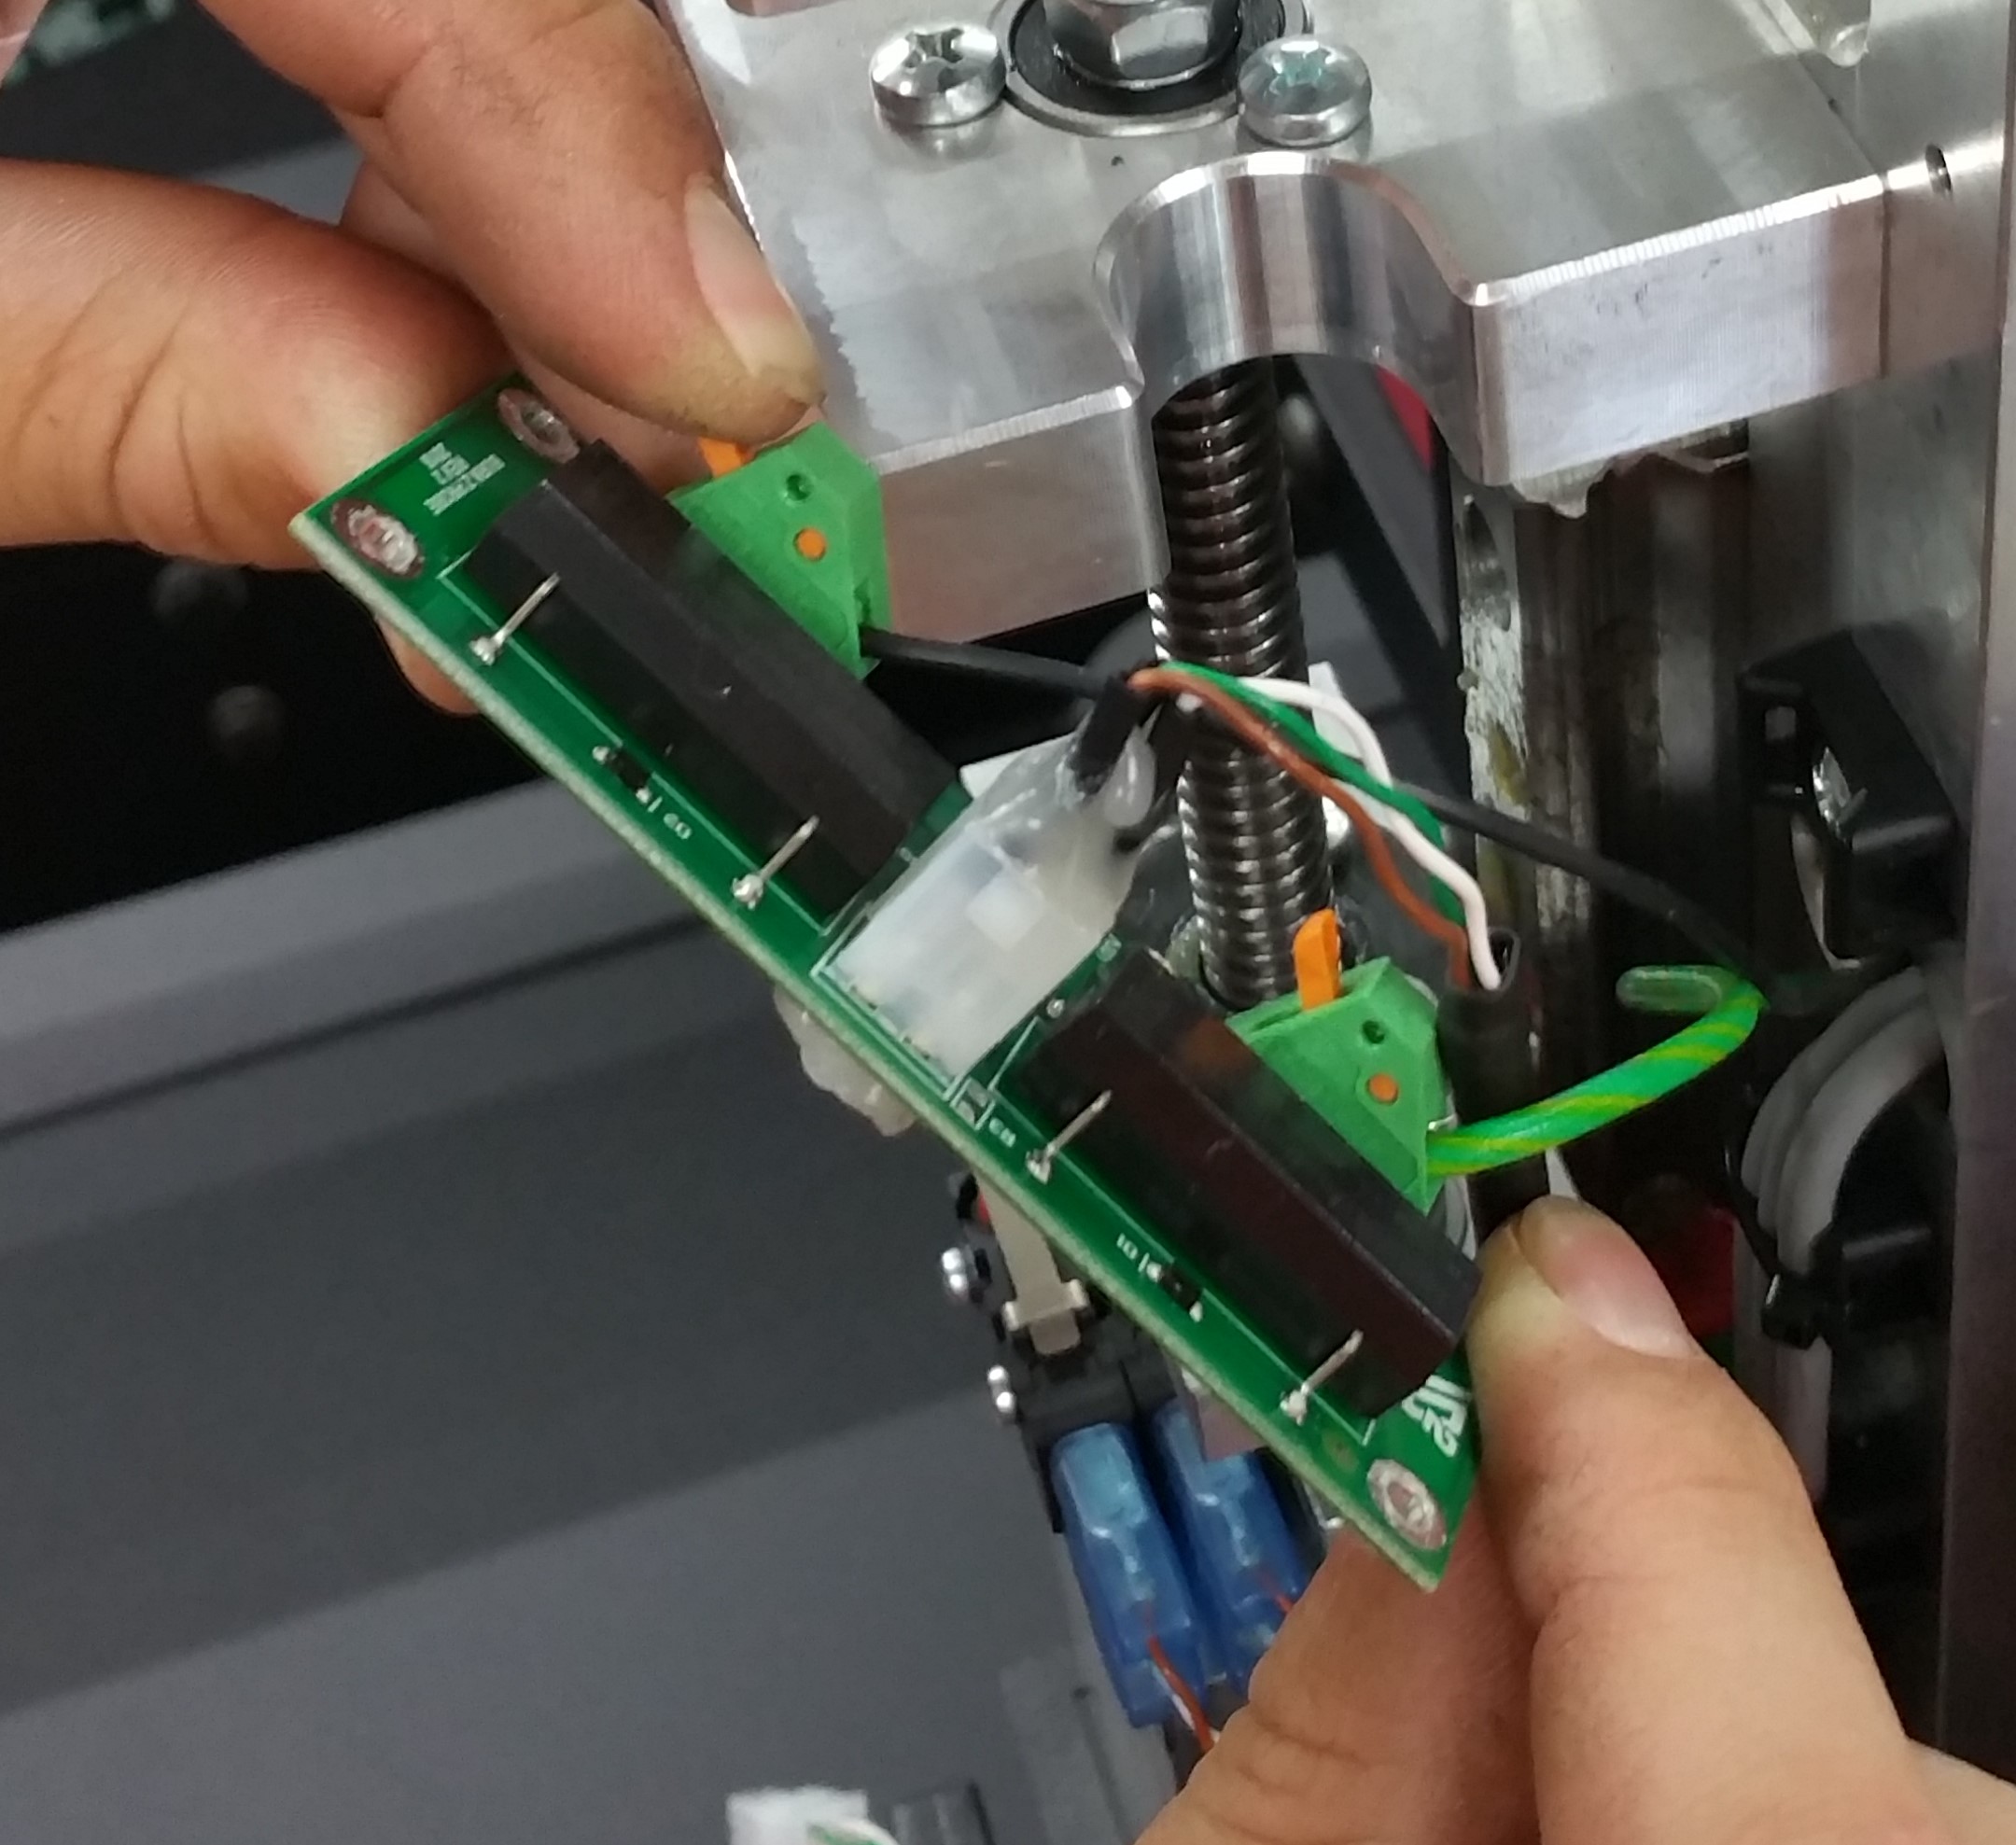
- Place the Version 1 PCB3 into the box for return shipment to JD Squared.
- If equipped, remove long aluminum standoffs.
- Pull GREEN/YELLOW wire through the X-Axis plate for removal.
- Remove the ring terminal side of the GREEN/YELLOW wire using a 13mm wrench.
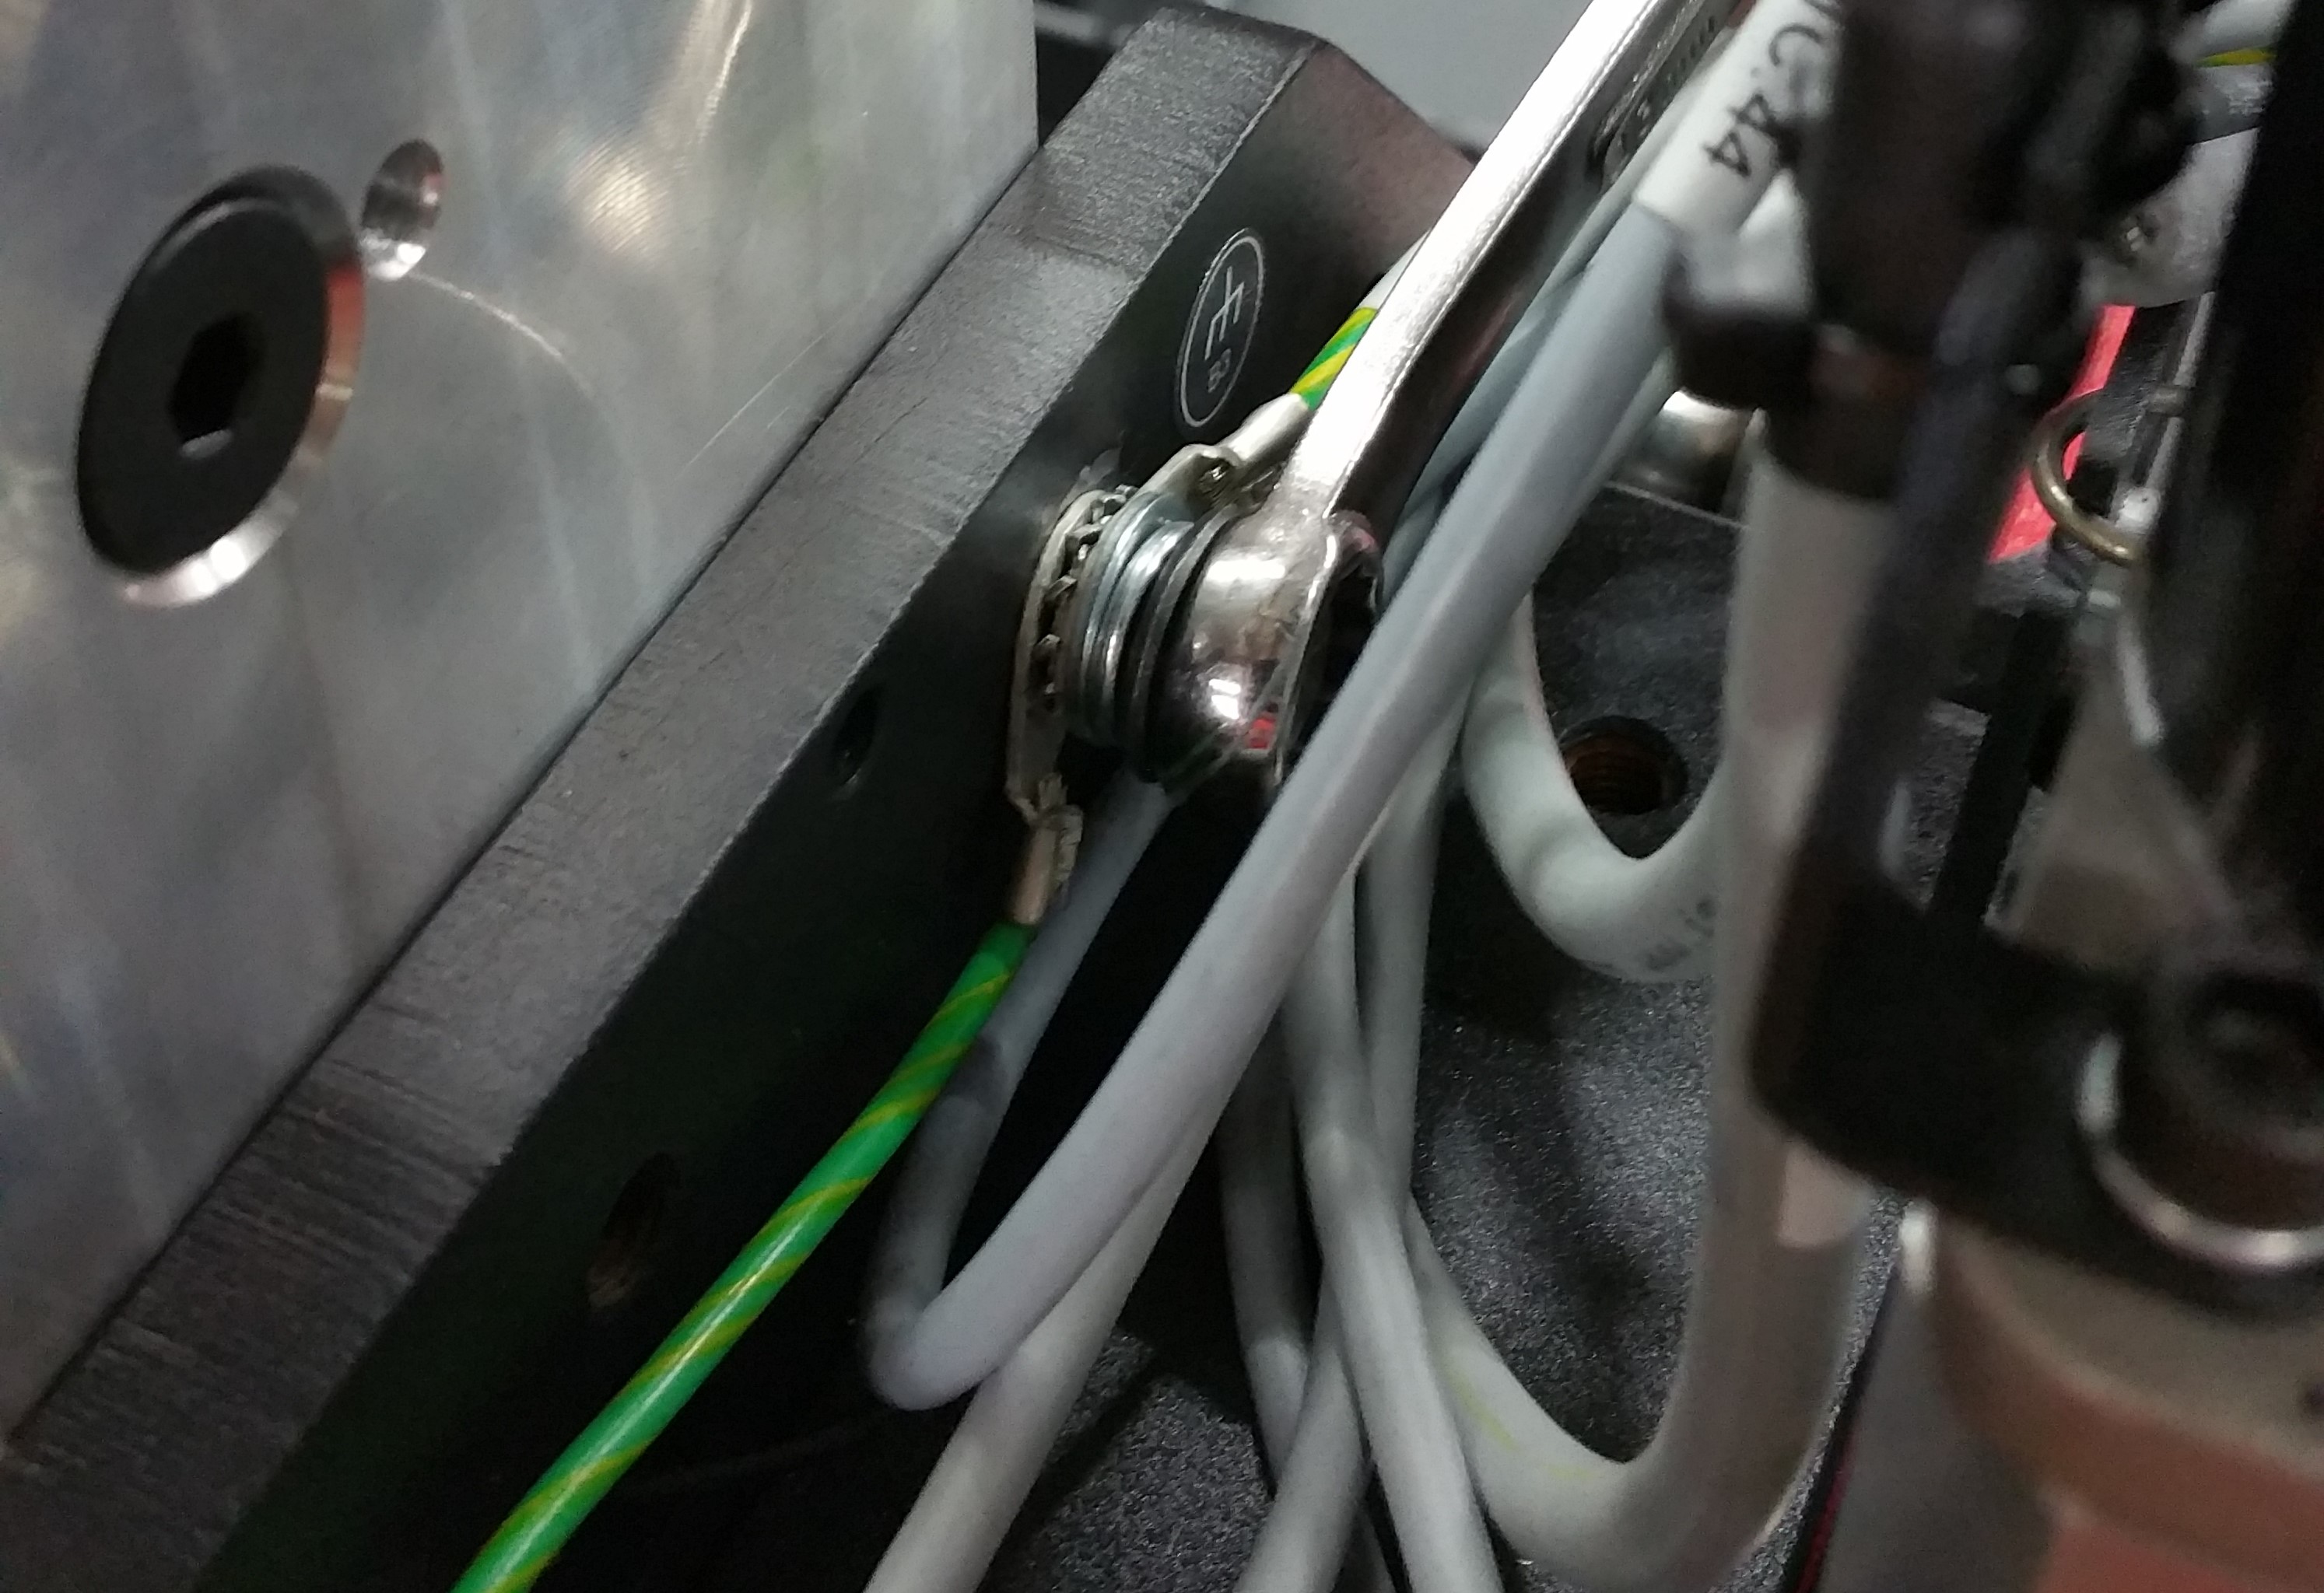
- OPTION A: If your machine has the ground in the rear of the X-Axis plate, use the included M8 washer in place of the removed ring terminal to space the bolt properly before reinstallation.
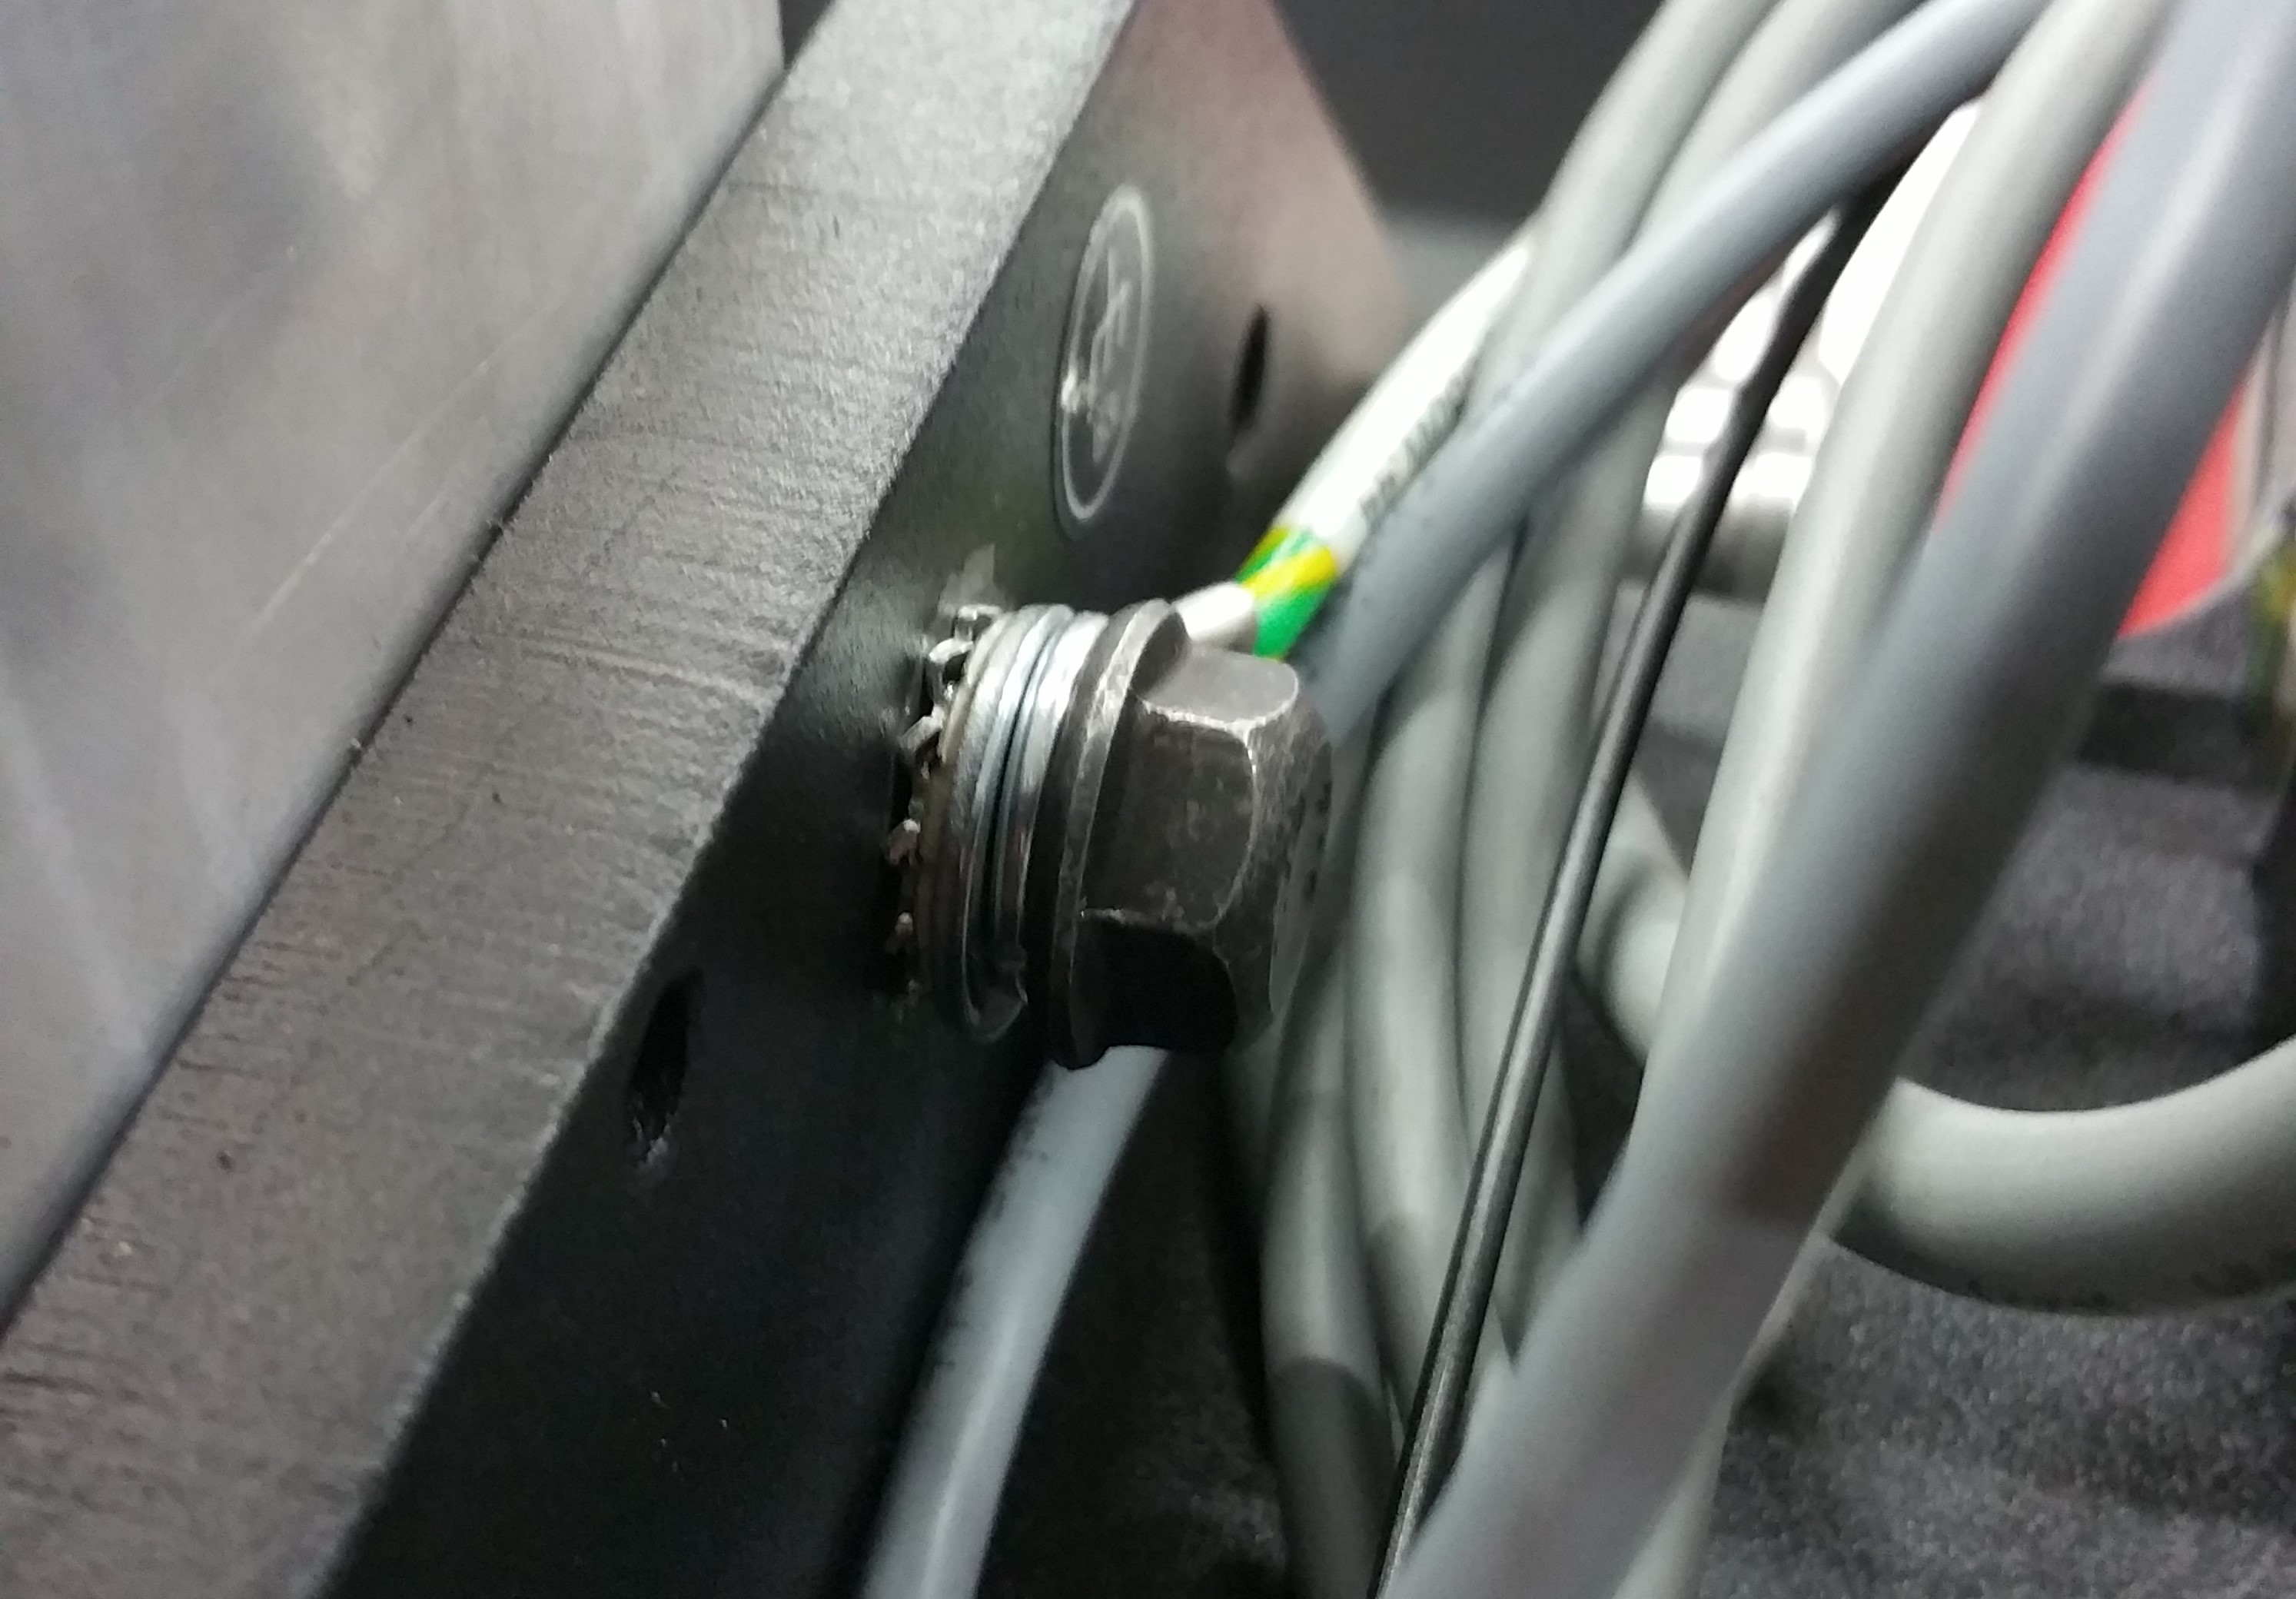
- OPTION B: Replace the GREEN/YELLOW wire with the new provided GREEN/YELLOW wire that has a large ring terminal on end, and a small ring terminal on the second end. Route the small ring terminal back through the X-Axis plate.
Install Version 2 Hardware
Handling the PCB
The PCB is protected with a conformal coating. However, always handle the board by the edges.
- Install the provided M3x8mm standoffs in the four PCB3 mounting locations. Do not overtighten or the standoffs may break.
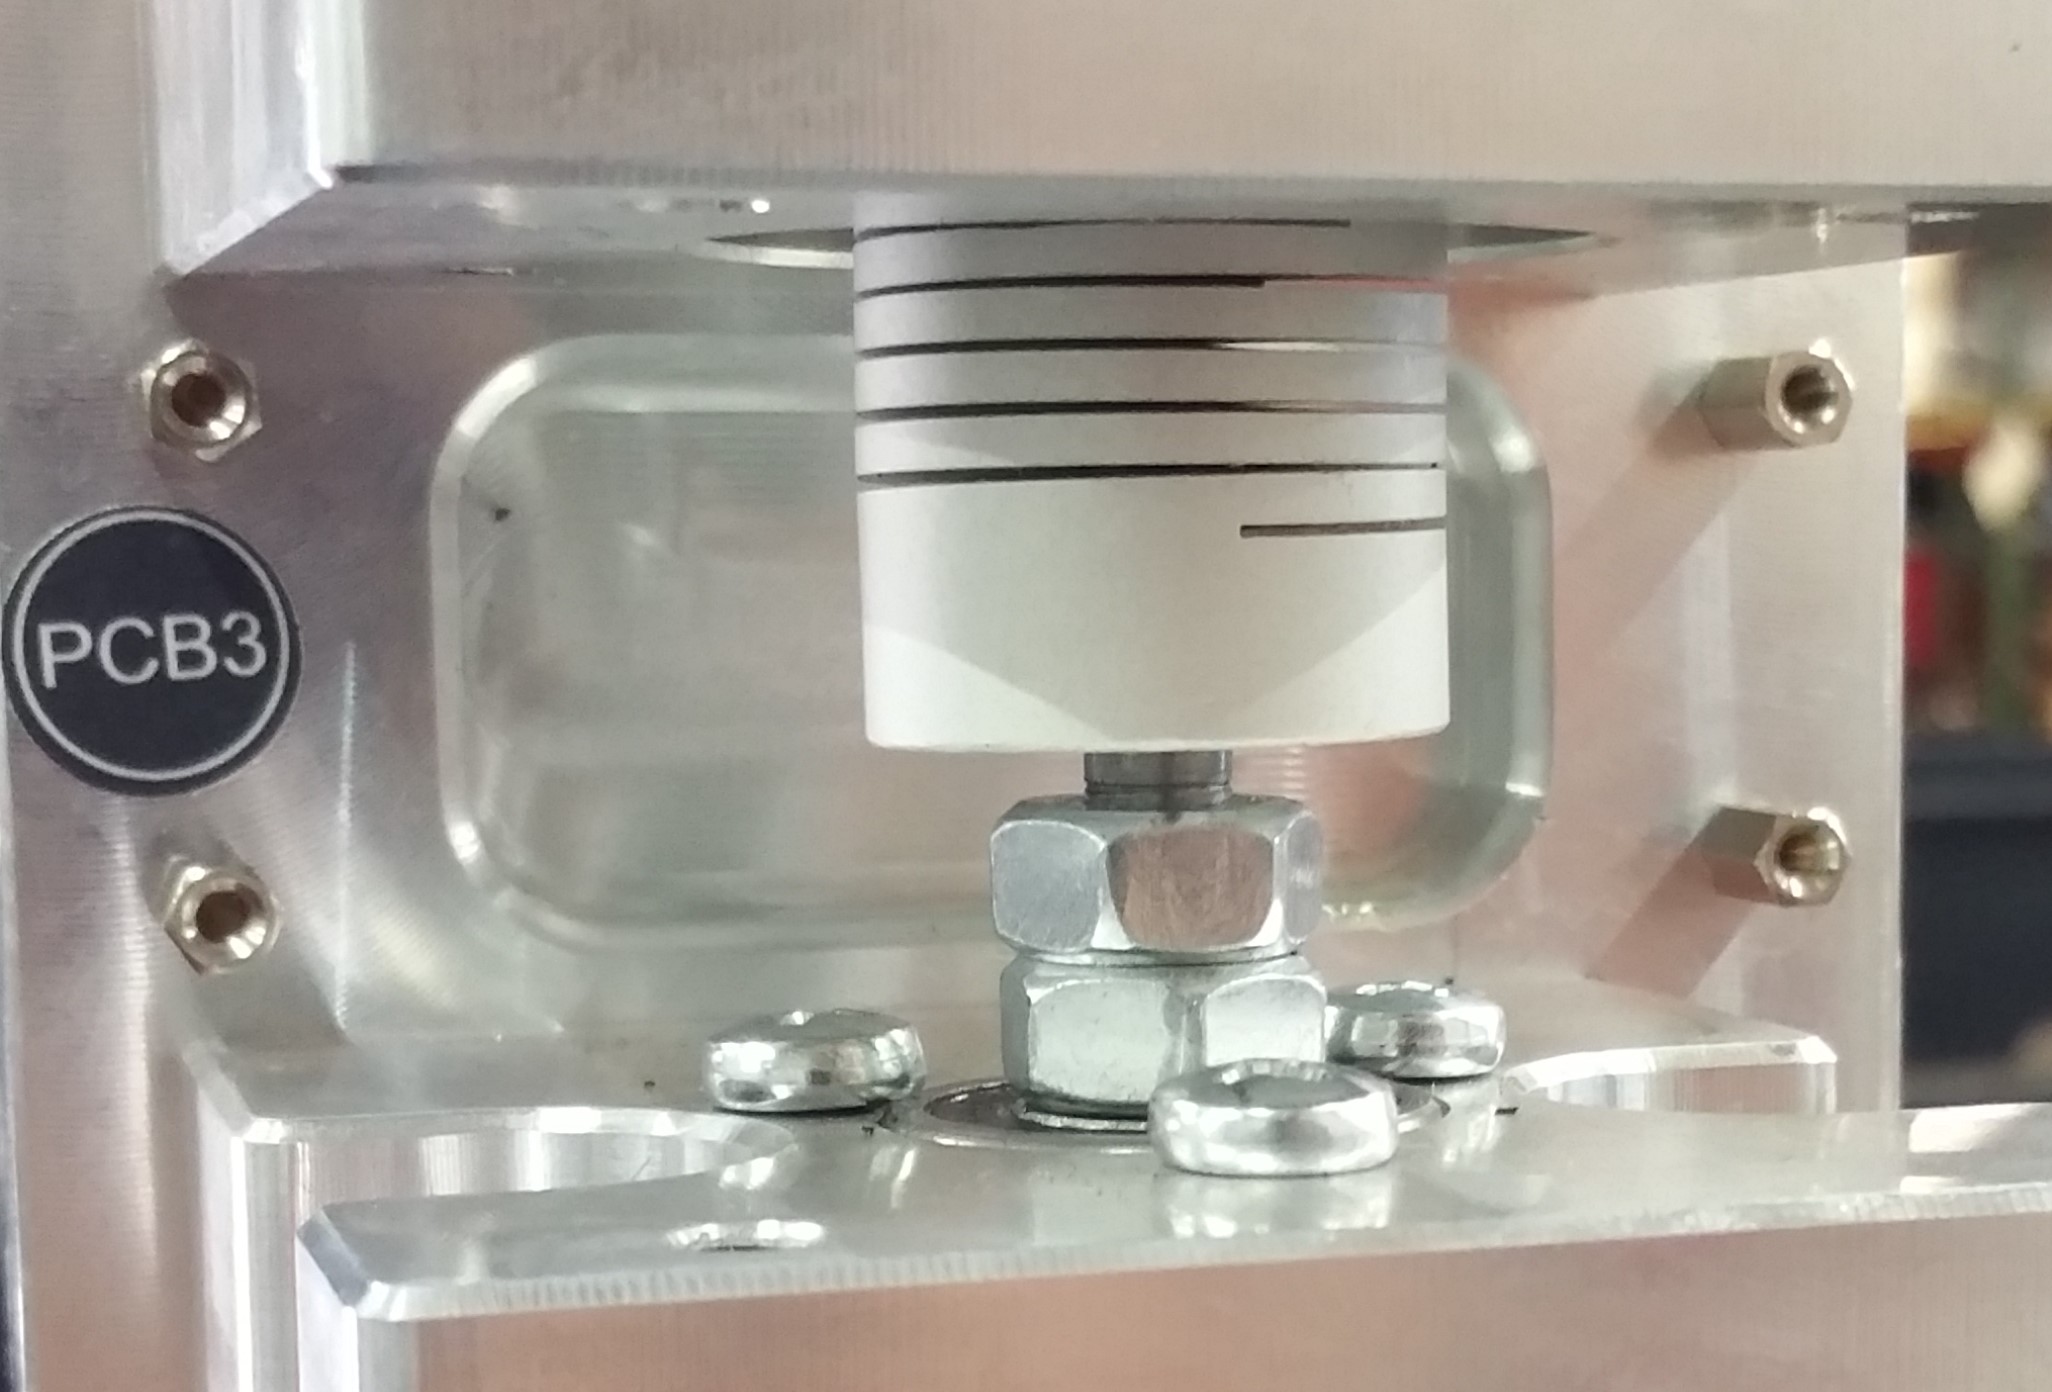
- Slide the Version 2 PCB3 behind the motor coupling and install on the standoffs using the provided M3x6mm screws and phillips head screw driver. OPTION B ONLY: Install the small ring terminal of the GREEN/YELLOW wire under the lower right mounting screw designated by the grounding symbol.
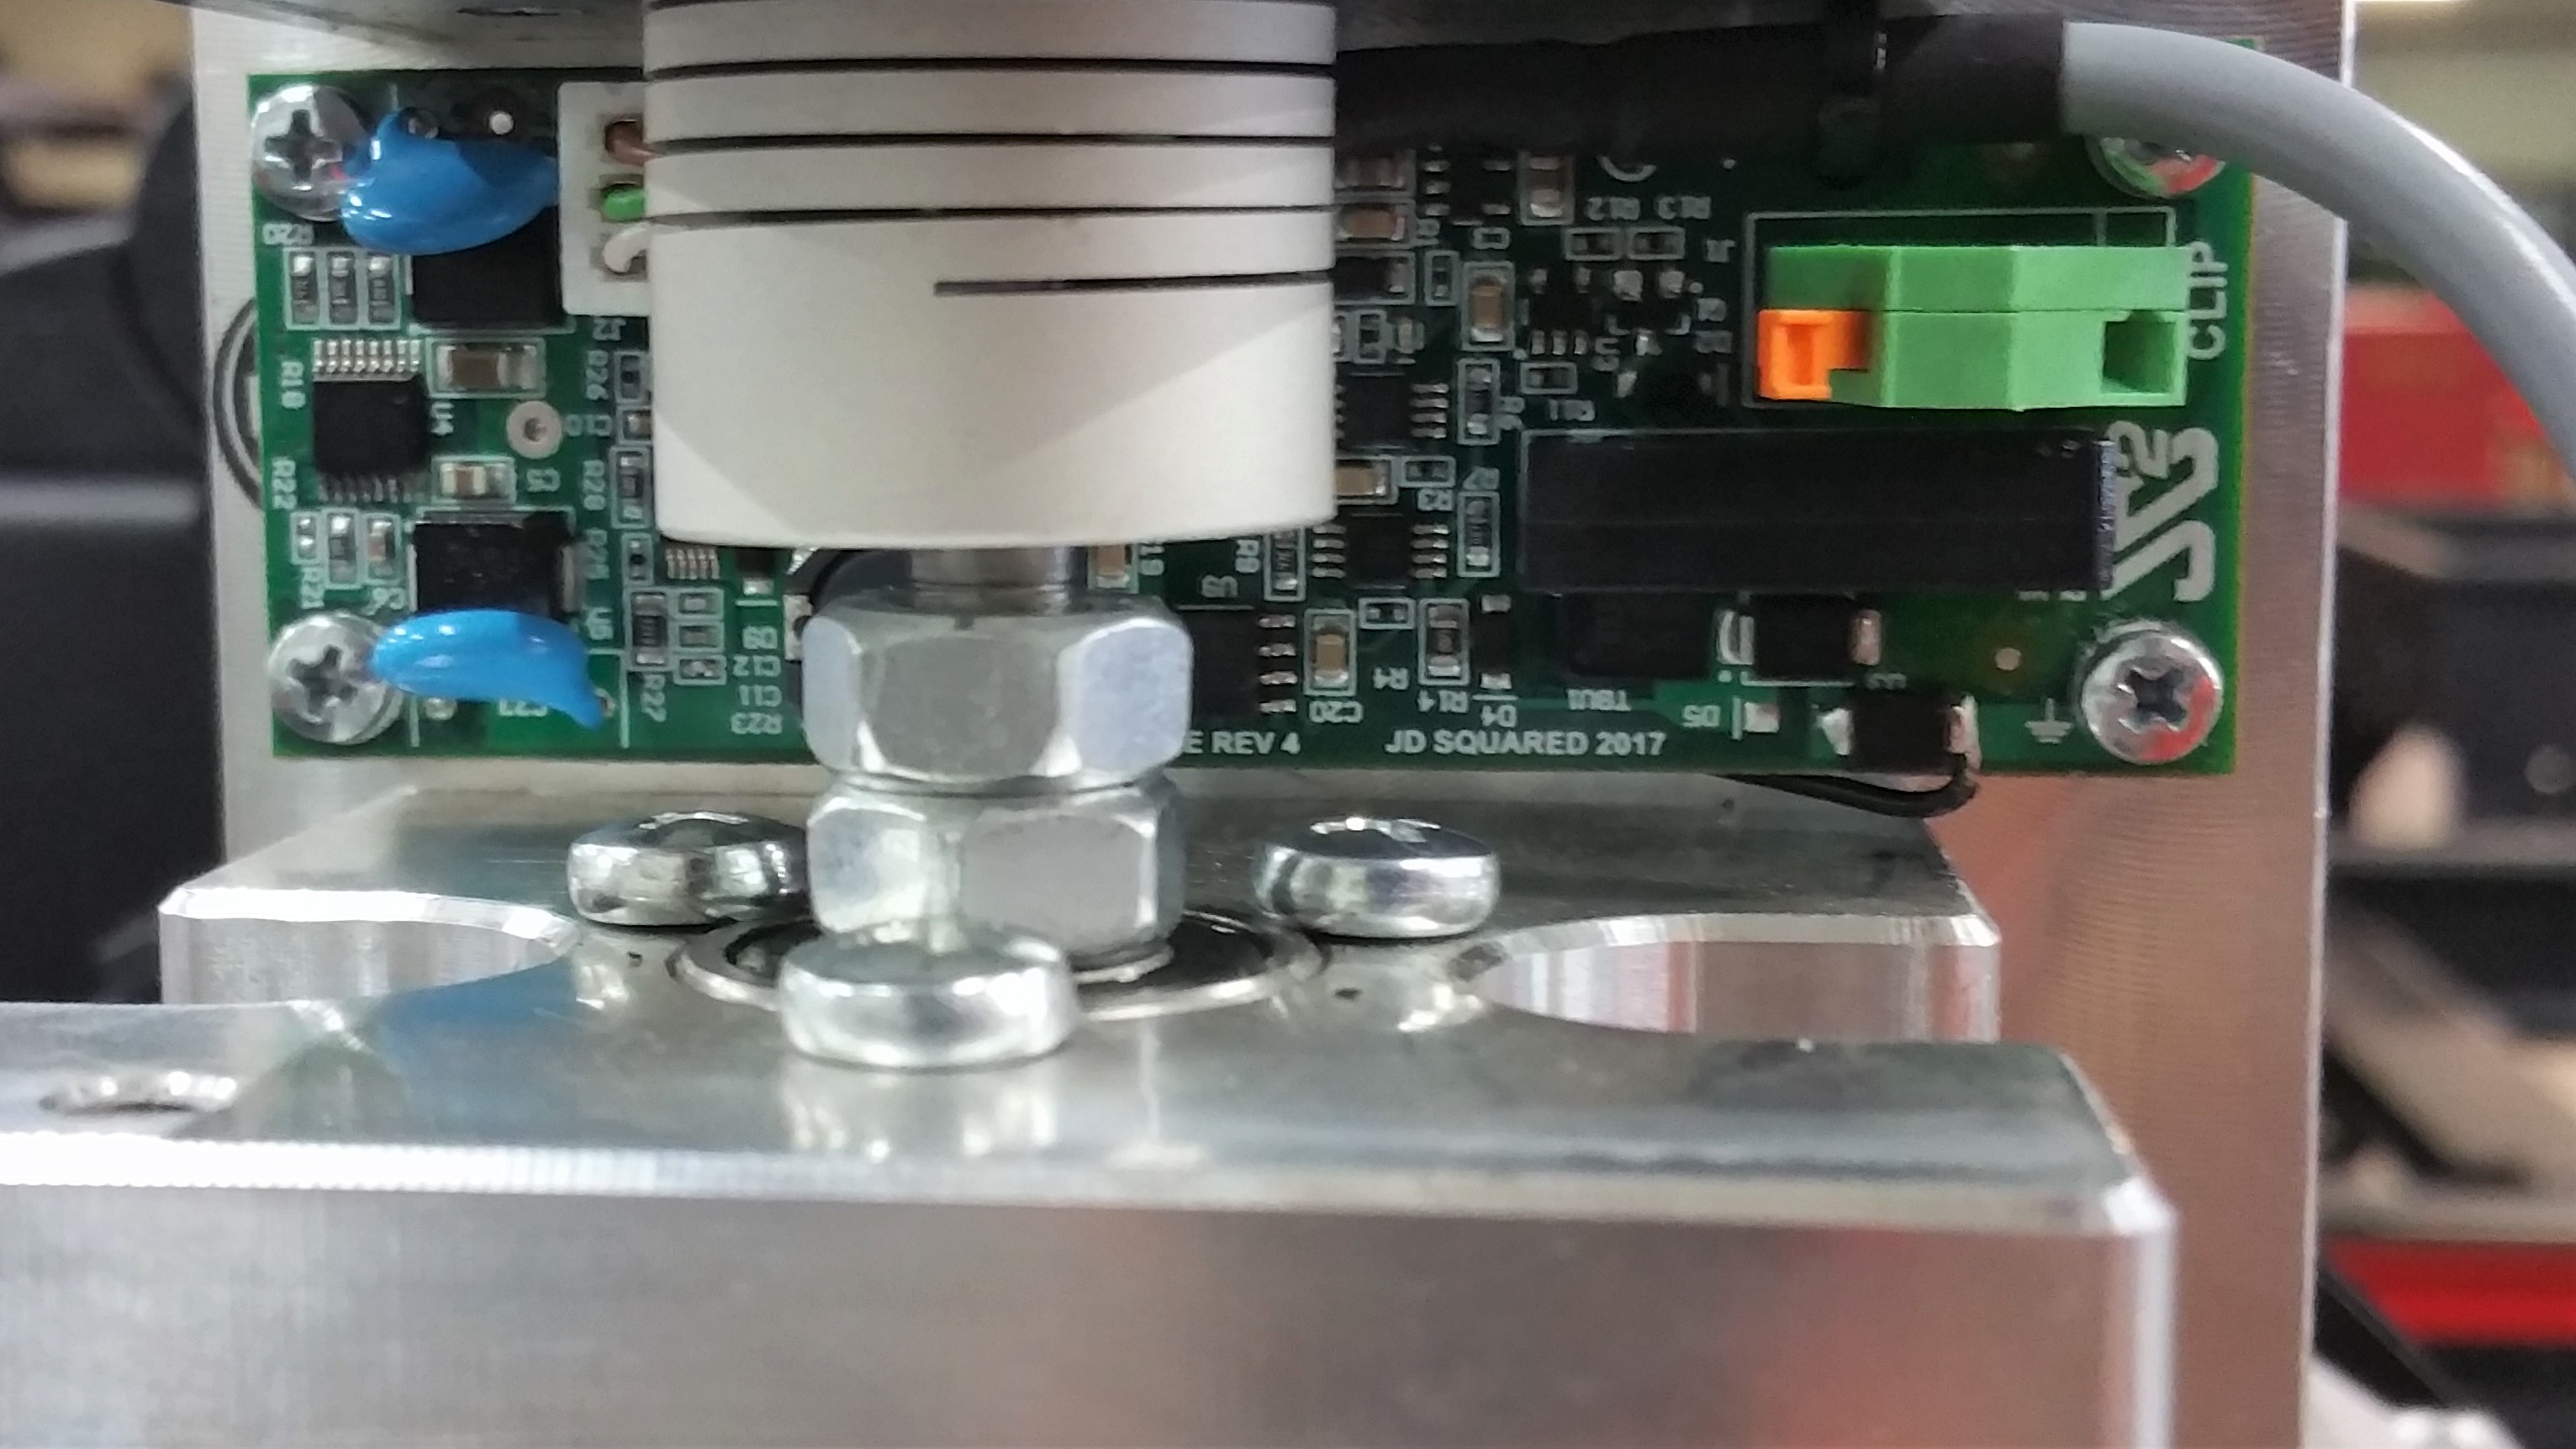
- Connect the black ohmic probe wire to the spring cage terminal labeled CLIP on PCB3.
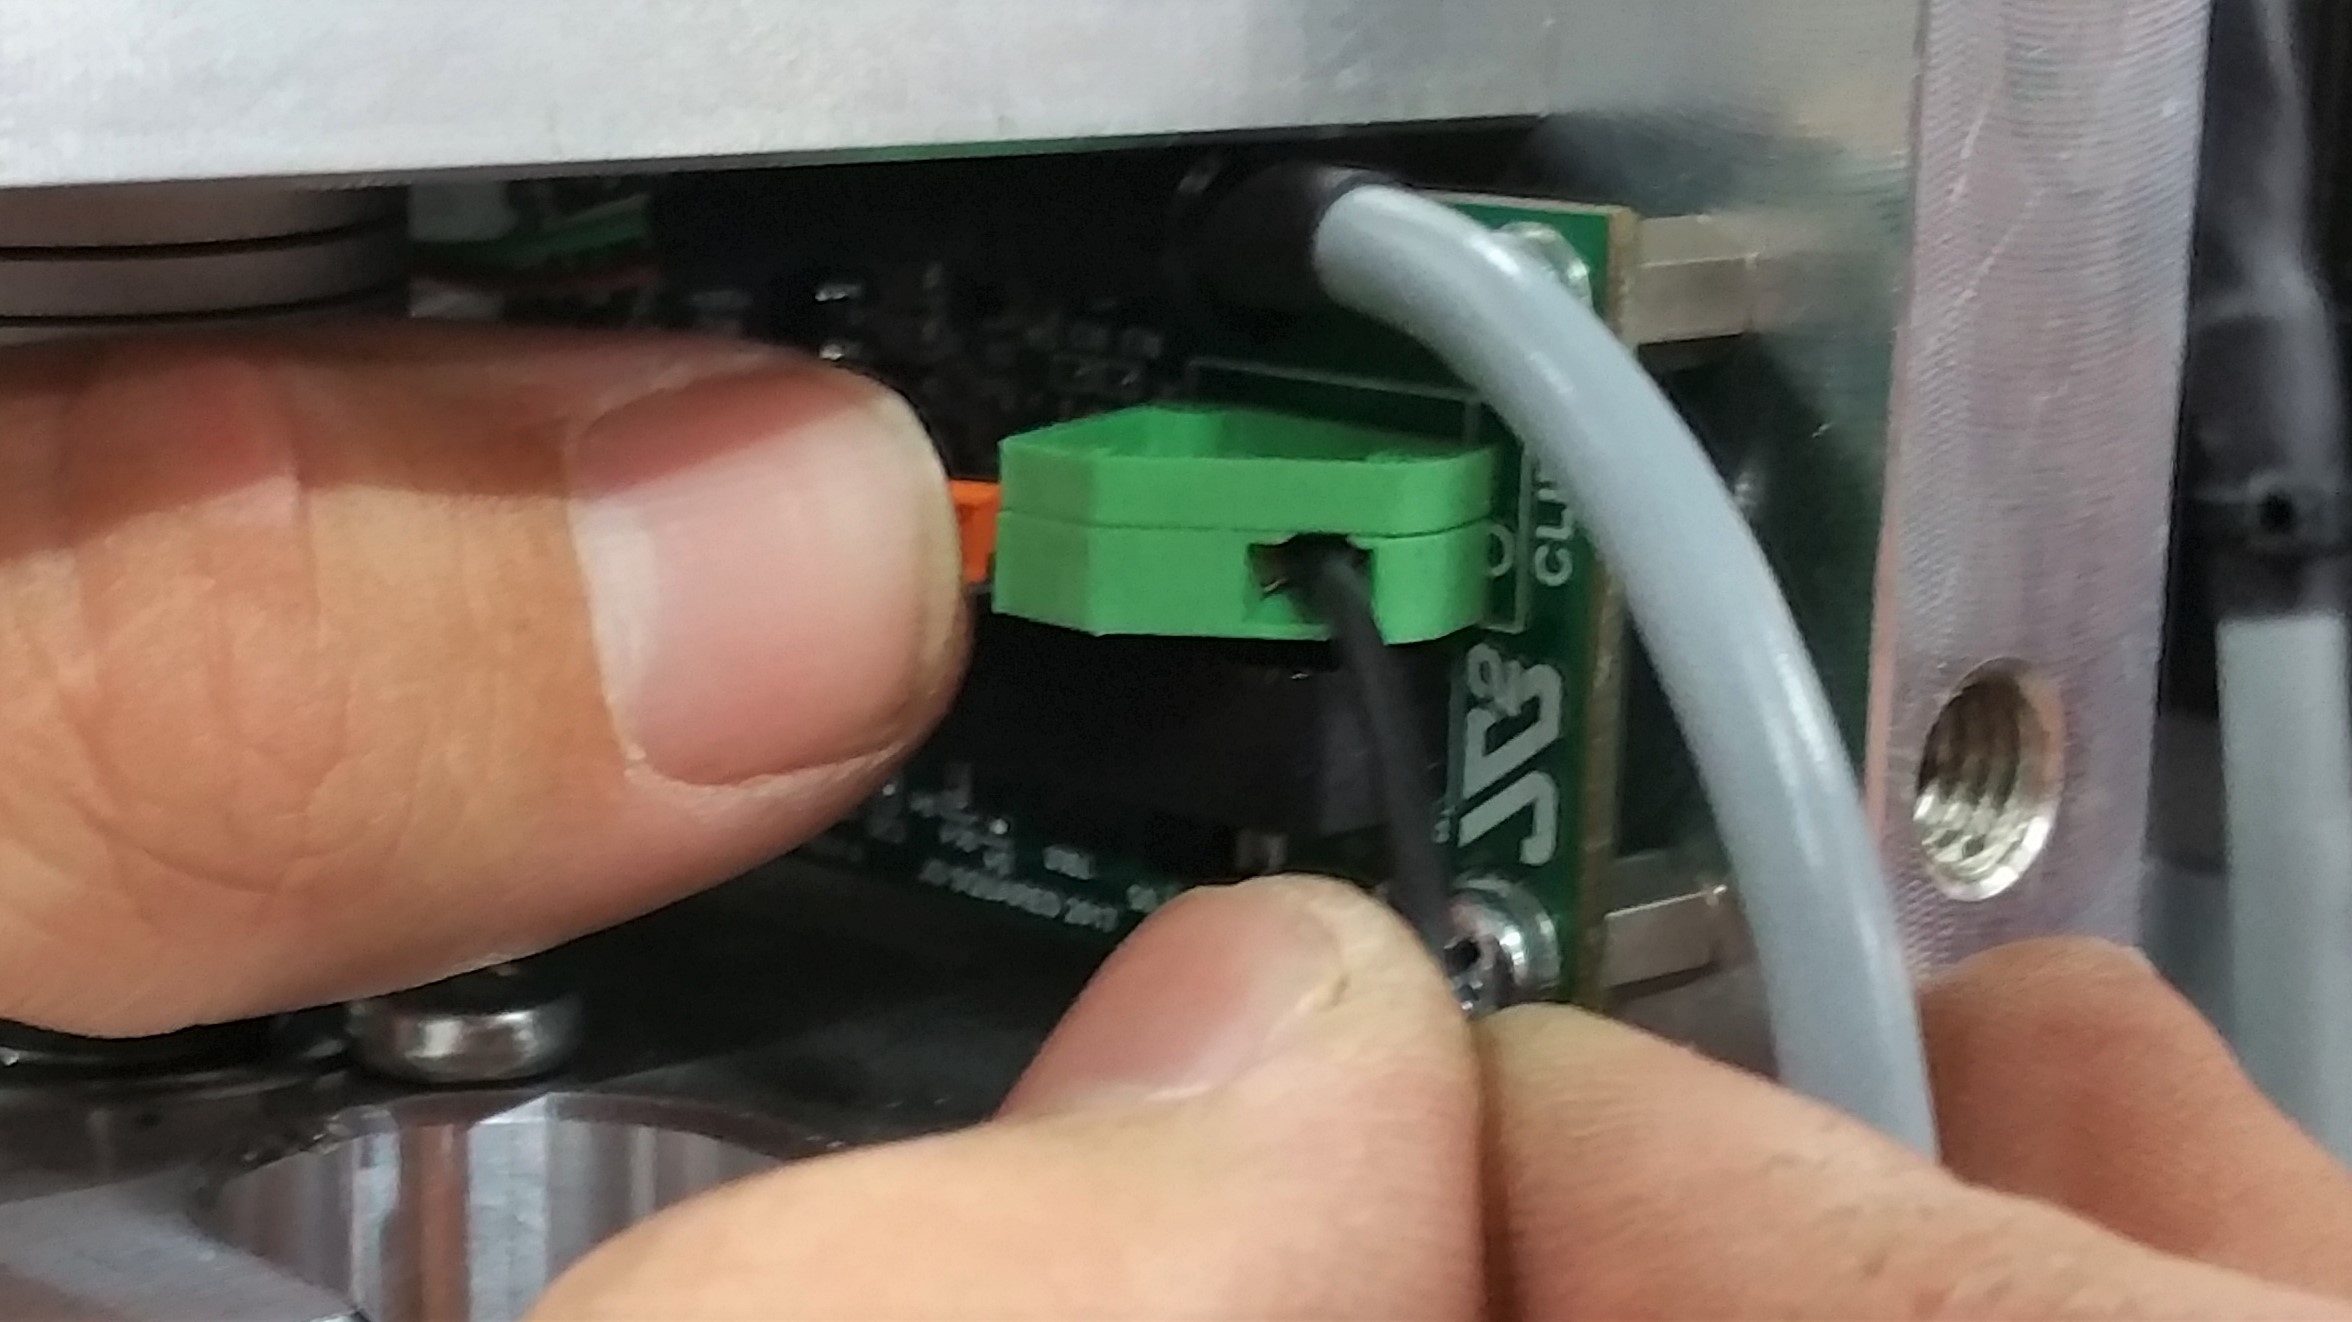
- Route the PCB3 cable S5.300C through the X-Axis plate and connect to S3.331C.XX.
- Tidy the cables inside the Z-Axis head using one of the provided zip-ties. Do not overtighten the zip-ties or they will damage the cable.
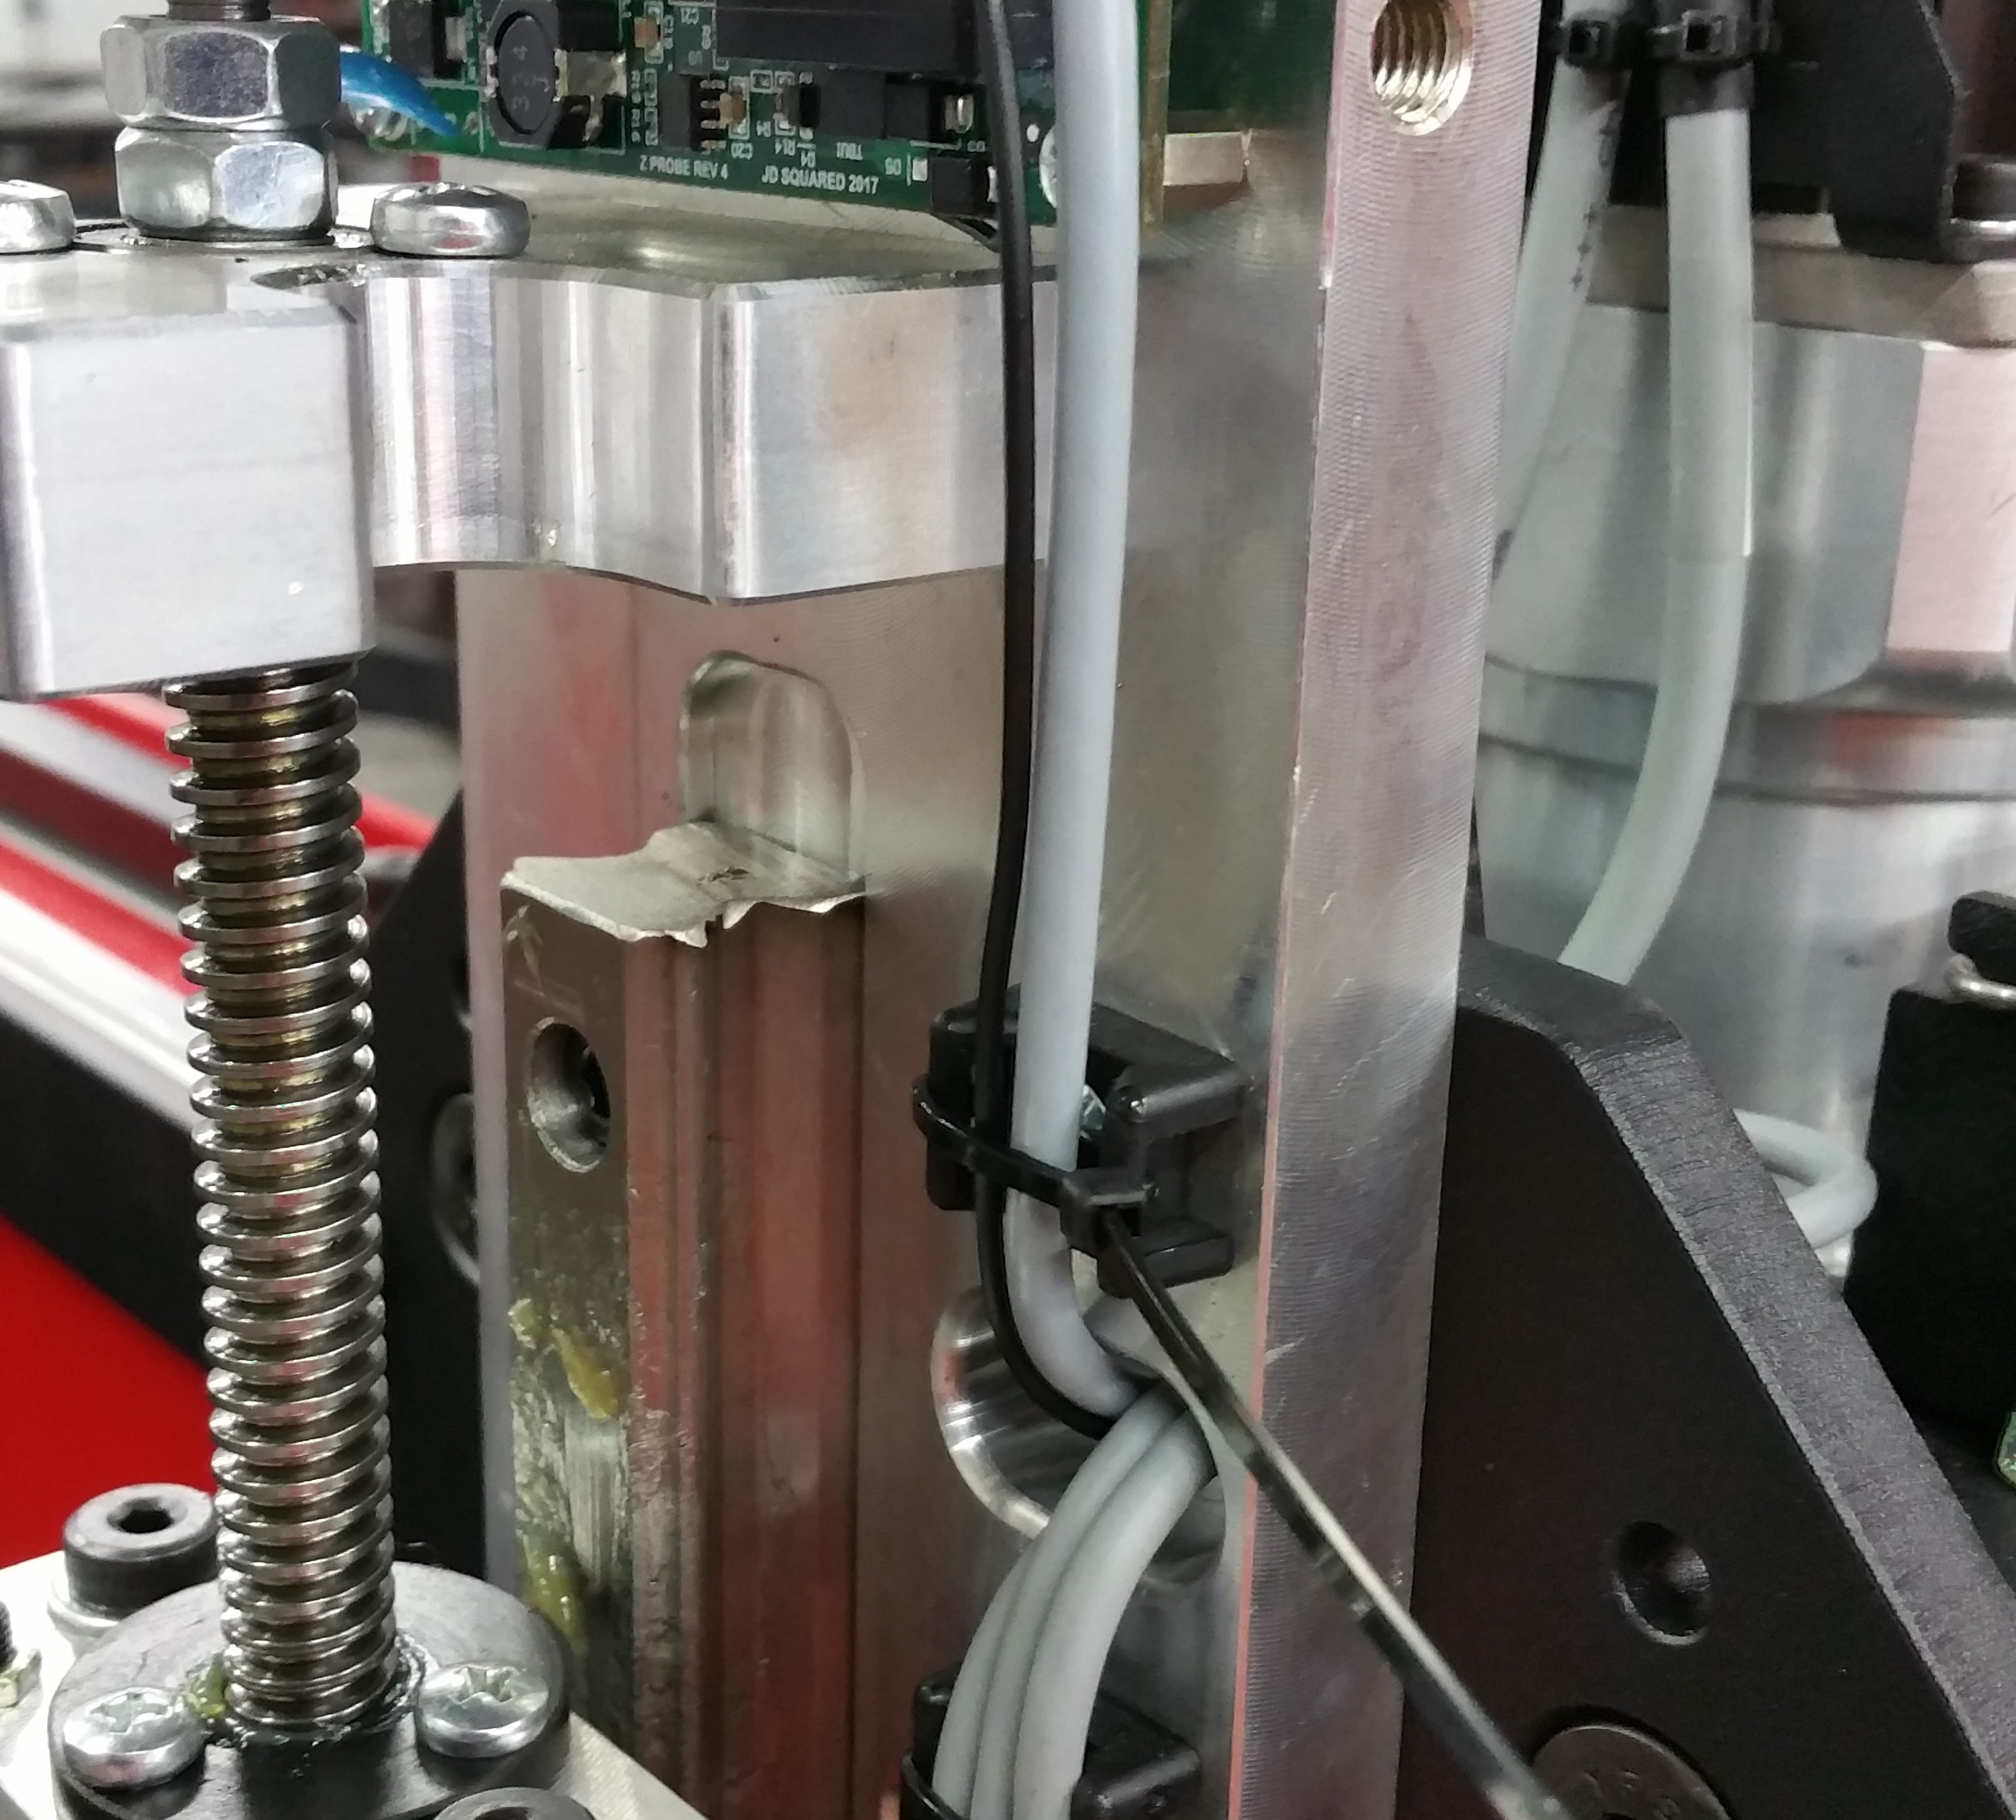
- Anchor the cables coming through the X-Axis plate using a second zip-tie.
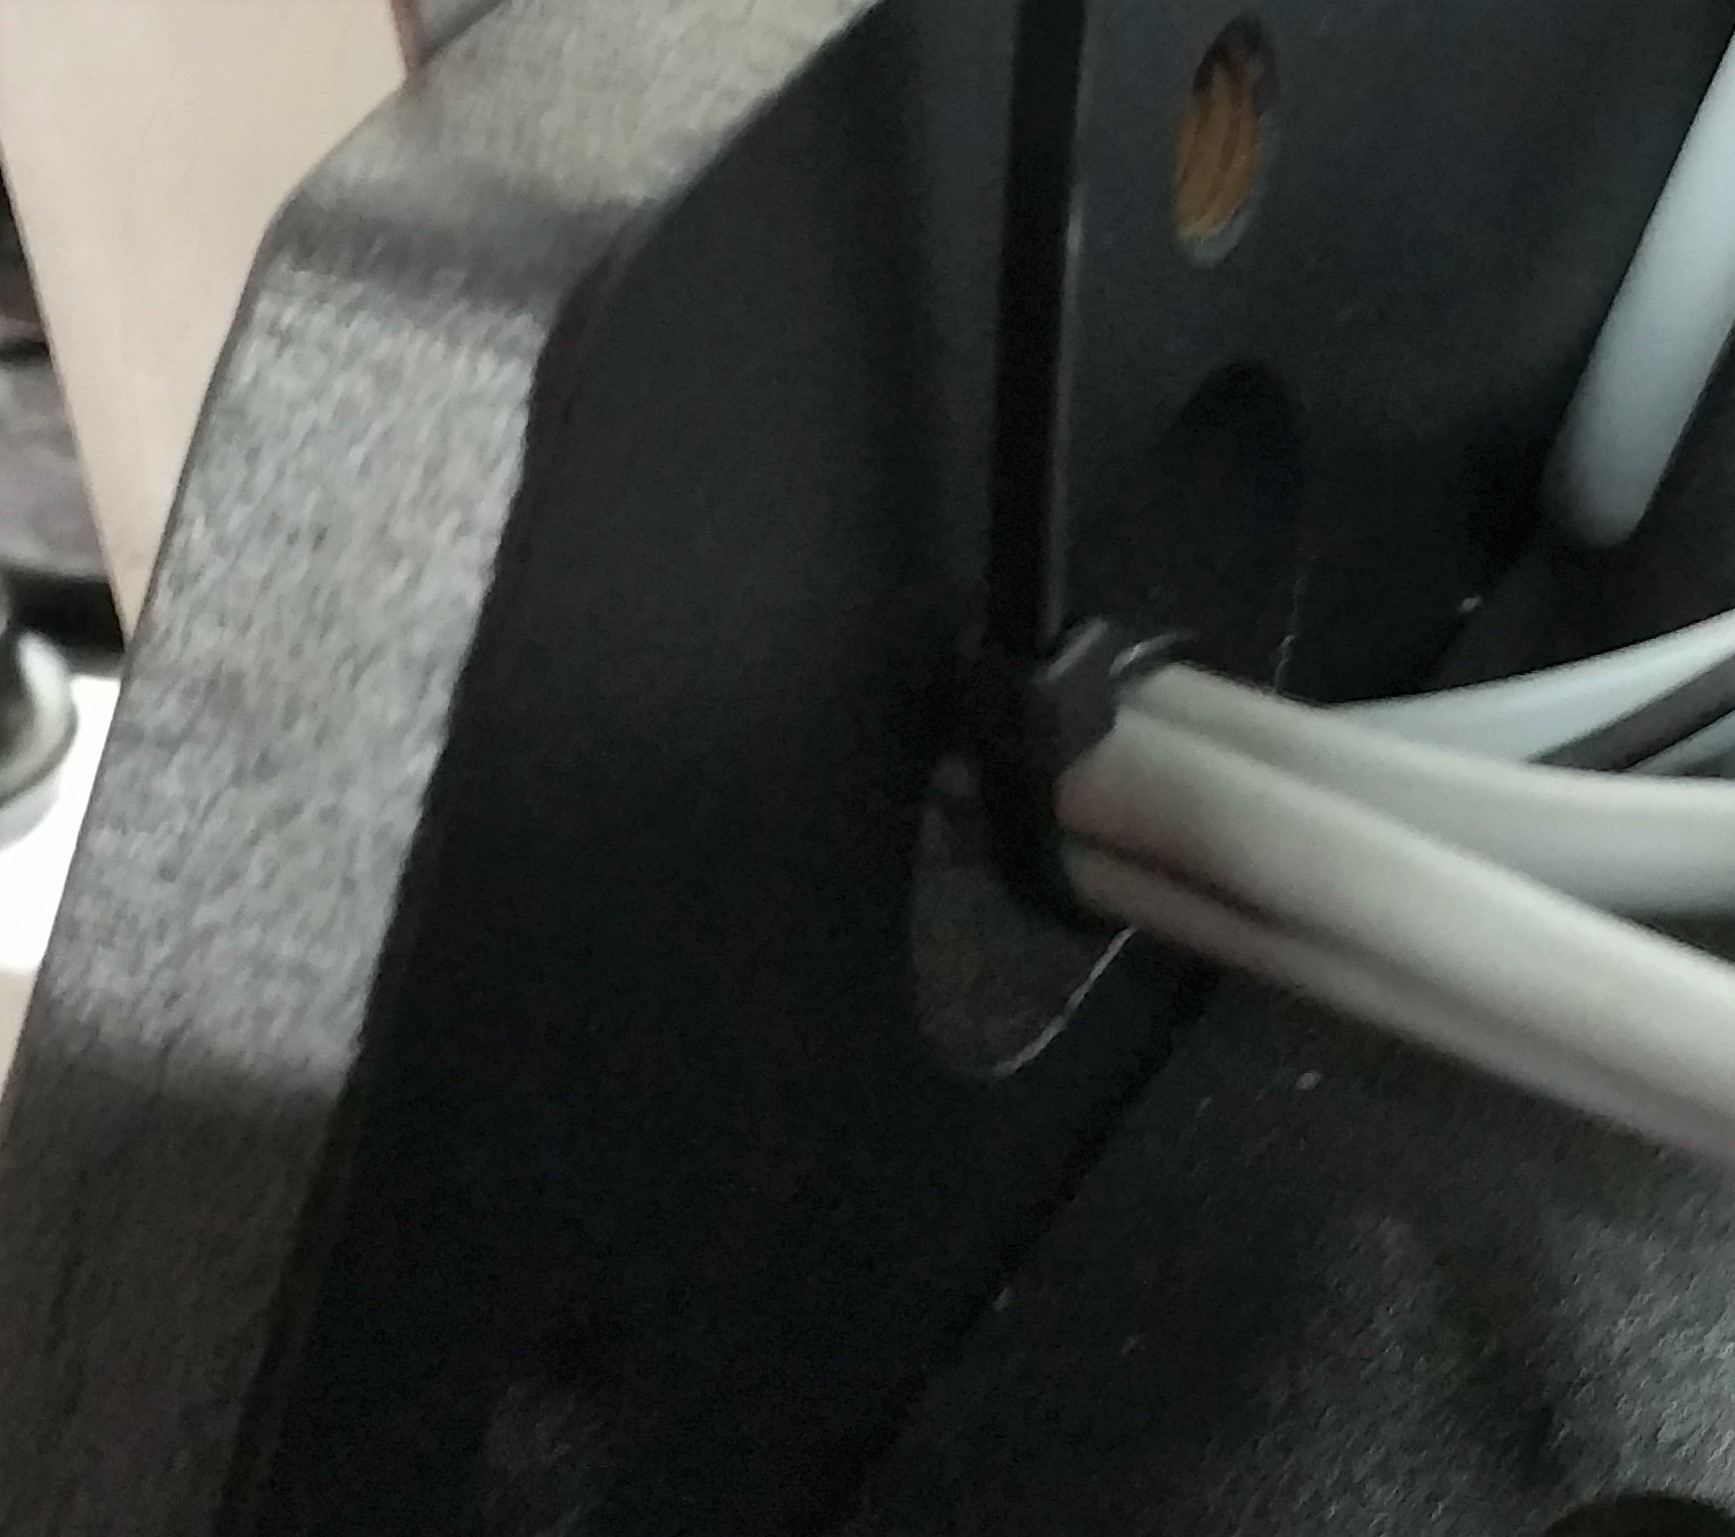
- Use the third zip-tie to anchor the plug to the wire bundle.
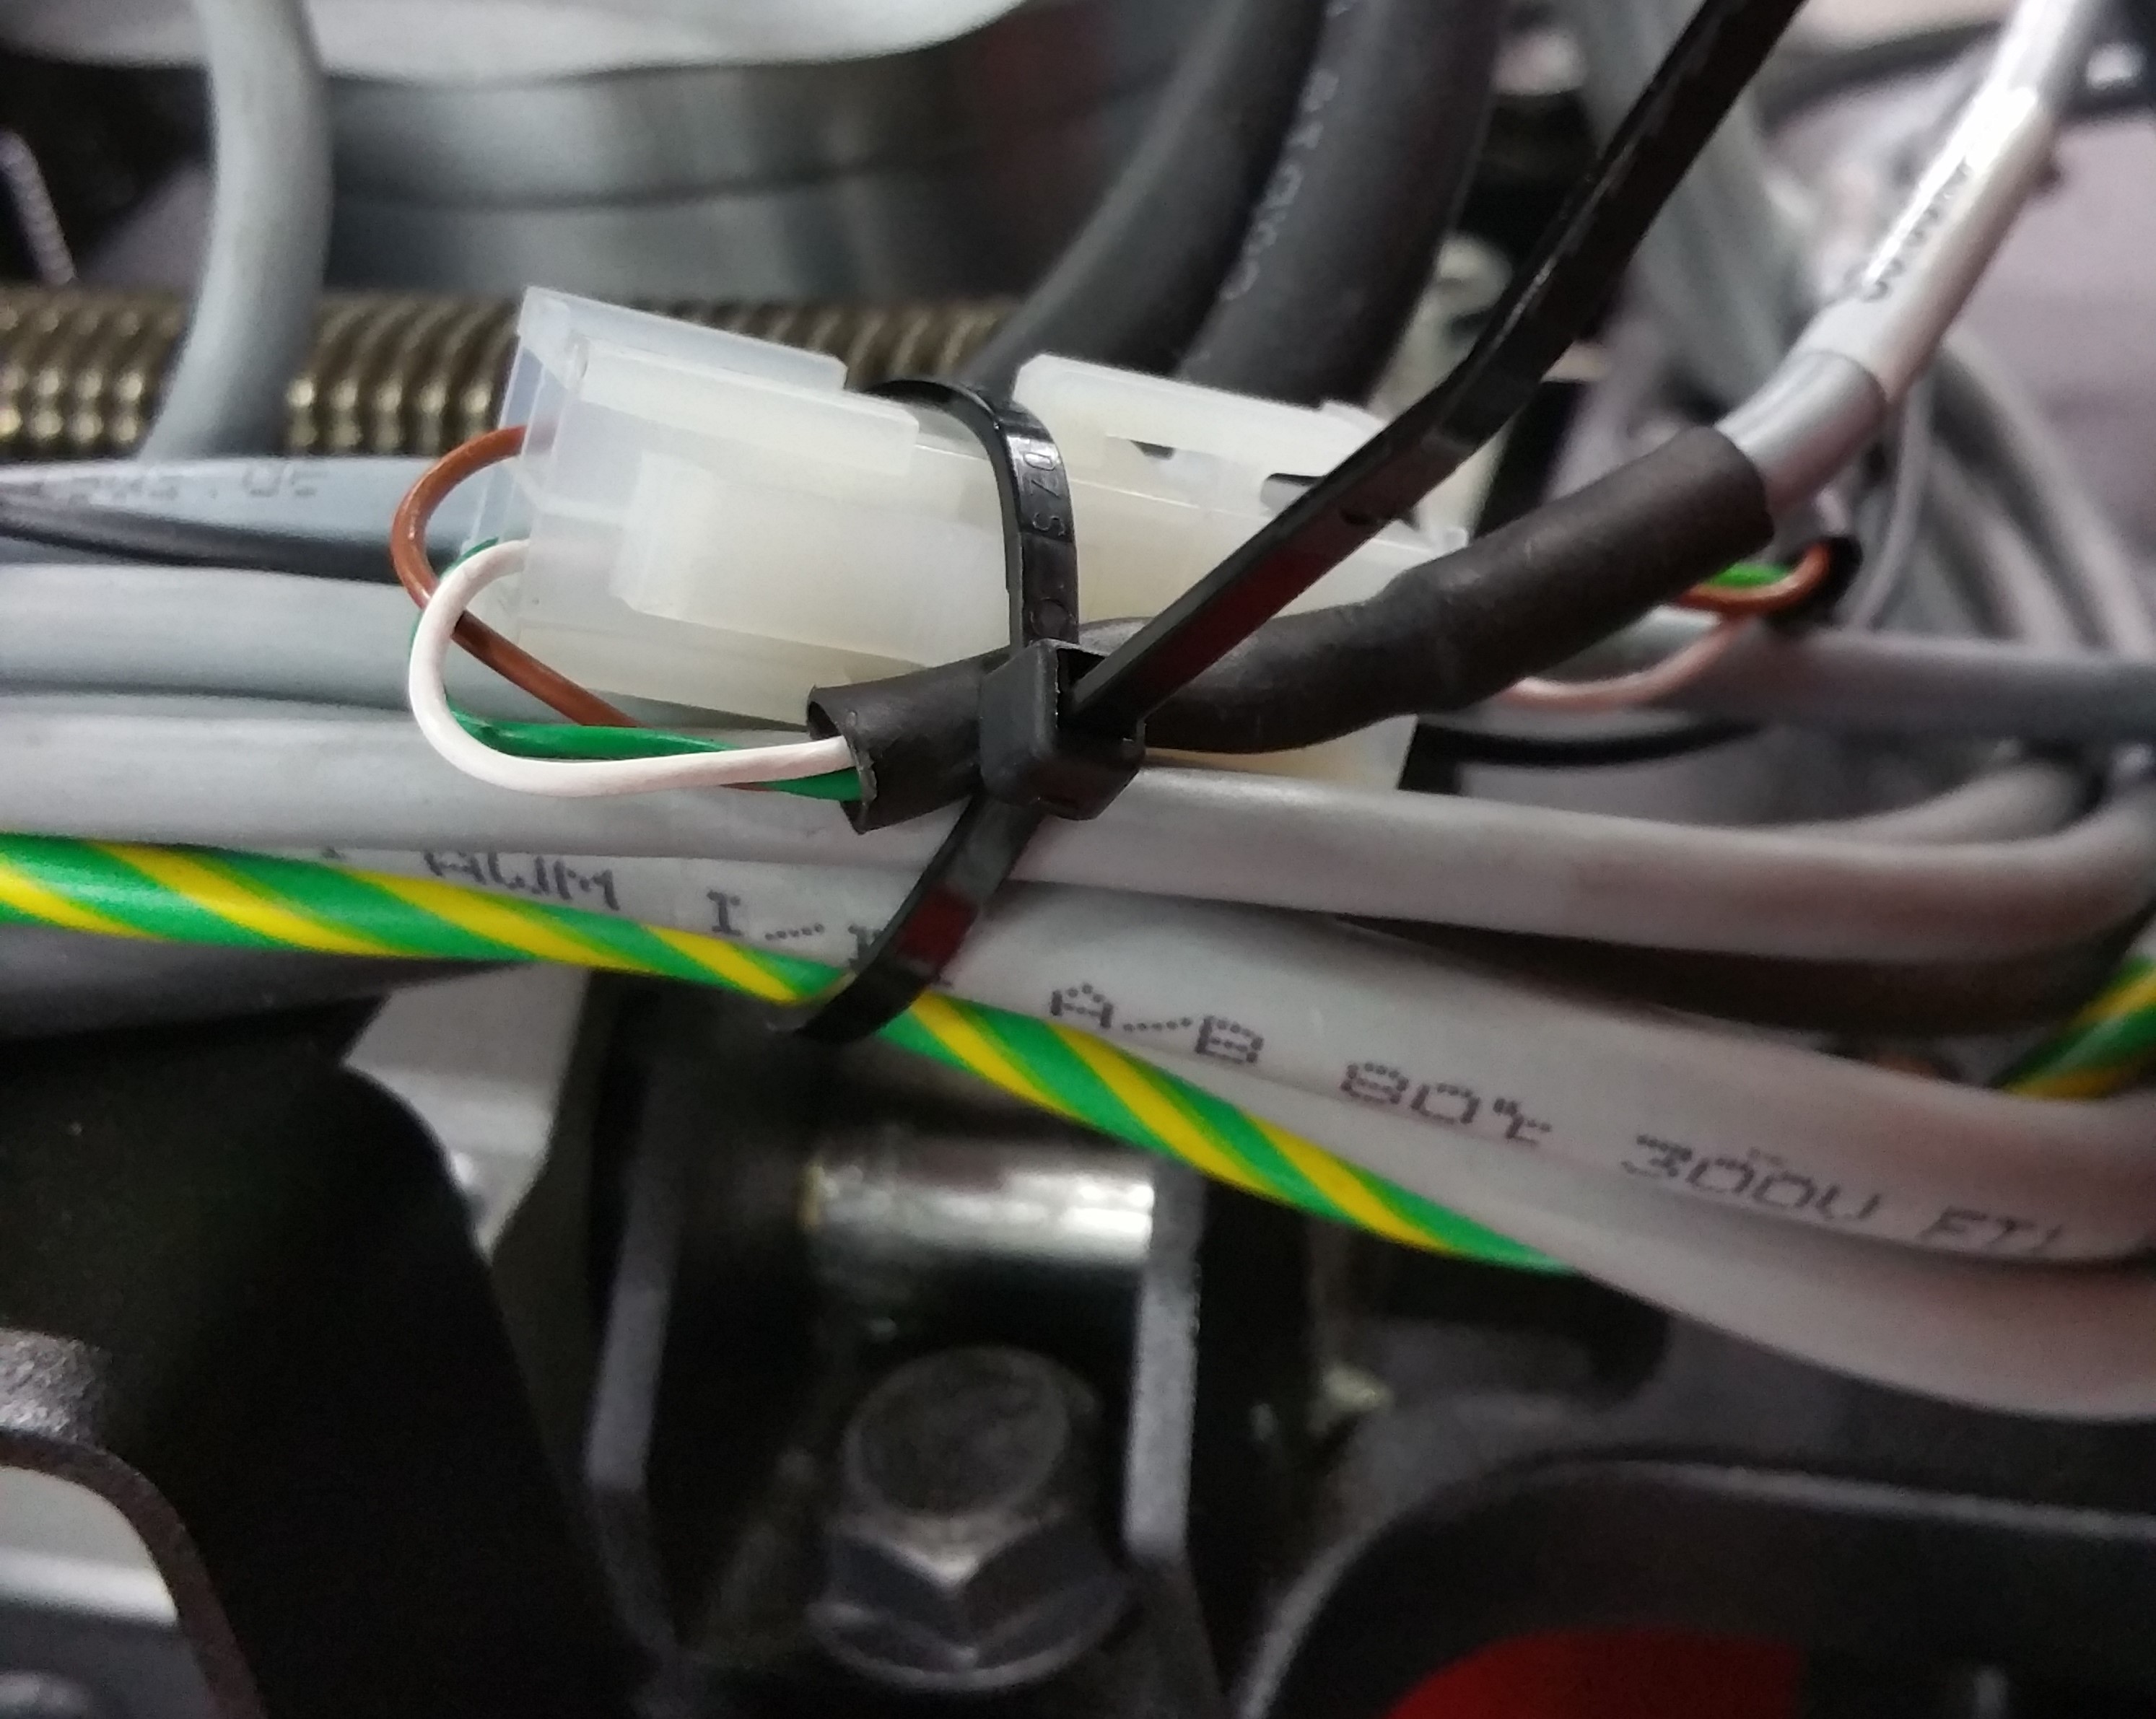
- Trim the ends of the zip-ties. They were left long in the images for location reference.
- Reinstall the removed covers being careful not to pinch any cables.
- Reconnect the two cables to the Z-Axis motor.
Finishing Up
Before continuing, complete both tasks, and connect the torch interface wiring to your plasma unit.
- Apply the software updates.
- Recalibrate your probing system using the calibrate_z.ngc program.
Your machine is ready to run.